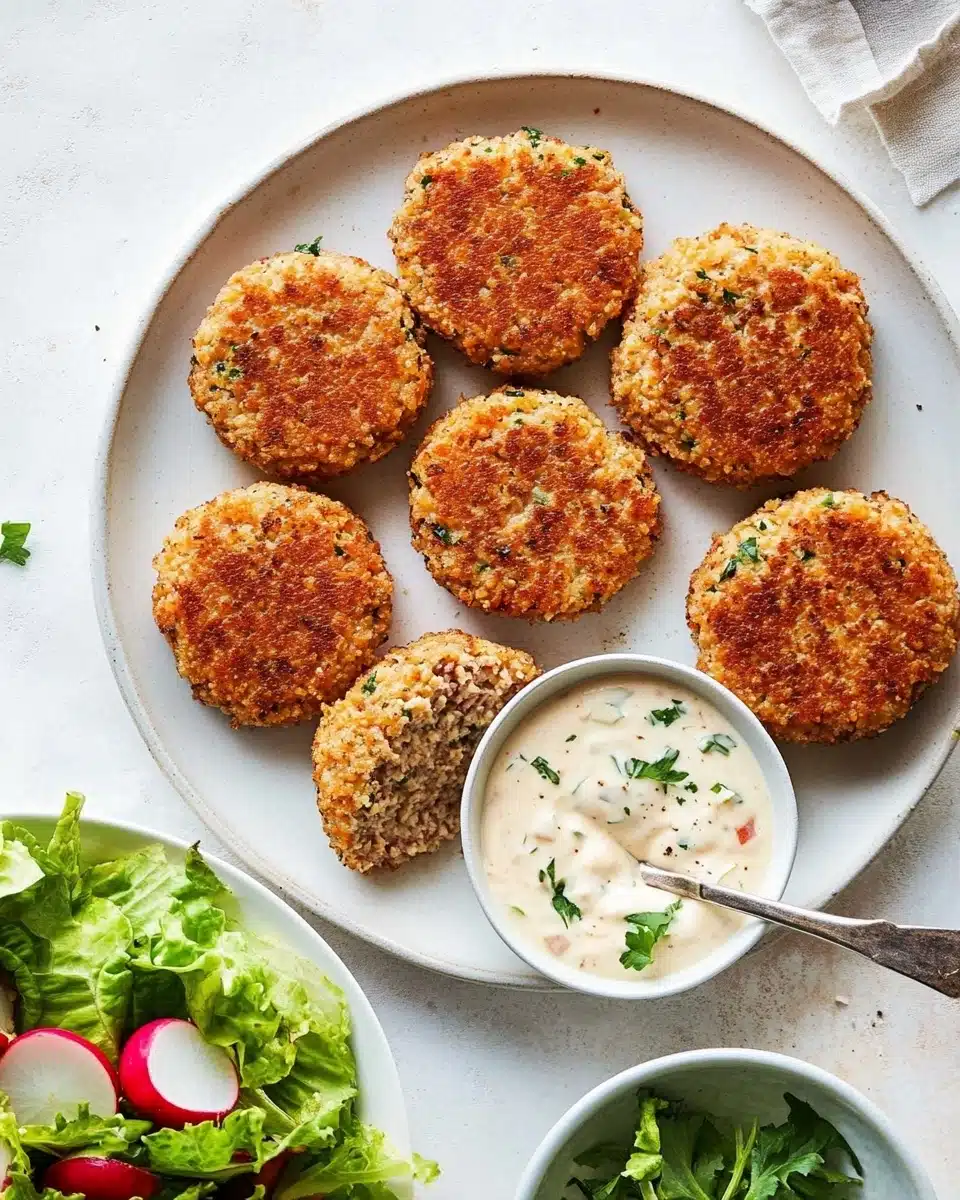
If you’re looking for a dish that’s crisp on the outside, juicy and fresh in the middle, with a zing of herbs and a hint of lemon — these Salmon Cakes are about to become your dinnertime obsession. Bursting with flavor and ready in just about 30 minutes, they’re perfect for weeknights or as a star appetizer when you’ve got friends gathered around your table.
Why You’ll Love This Recipe
- Unbeatable Freshness: These salmon cakes are made with diced fresh salmon—no canned shortcuts—which means every bite is succulent and tender.
- Ultra-Crispy Crust: Thanks to a golden panko coating, each cake has an irresistible crunch outside while staying moist inside.
- Weeknight-Ready: With just 30 minutes from start to finish, you’ll have a restaurant-worthy dinner on your table with almost no stress.
- Customizable for Every Occasion: Serve them as light lunch, appetizer, or main—these salmon cakes truly fit any meal mood.
Ingredients You’ll Need
Every ingredient here plays a special role—balancing creamy richness, bright pops of herb, subtle crunch, and, of course, letting that gorgeous salmon shine through. The magic lies in their simplicity, but the flavors are show-stopping!
- Fresh Salmon Fillet: Skip the canned stuff—fresh, skinless salmon makes these cakes luscious and tender through and through.
- Mayonnaise: Adds creamy binding and just a touch of tang, holding everything together without overshadowing the fish.
- Lemon Juice: Brightens up the cakes with citrusy zing and keeps the flavors feeling light and summery.
- Dijon Mustard: Packs a gentle punch and a little sophistication into each bite.
- Old Bay Seasoning: That classic seafood flavor, with a hint of spice—totally non-negotiable for authentic-tasting salmon cakes!
- Salt & Freshly Ground Black Pepper: Simple, essential, and brings all the savory ingredients into harmony.
- Panko Bread Crumbs: Way crispier than regular breadcrumbs, they add structure and crunch both inside and outside the cakes.
- Scallions: A mild oniony pop that keeps things fresh and beautifully green-flecked.
- Celery: Adds a satisfying, juicy crunch and a hint of earthiness.
- Fresh Dill: Delivers a fragrant, garden-bright finish that elevates every mouthful.
- Vegetable Oil: For pan-frying to golden crispness—it’s neutral, so it won’t compete with the other flavors.
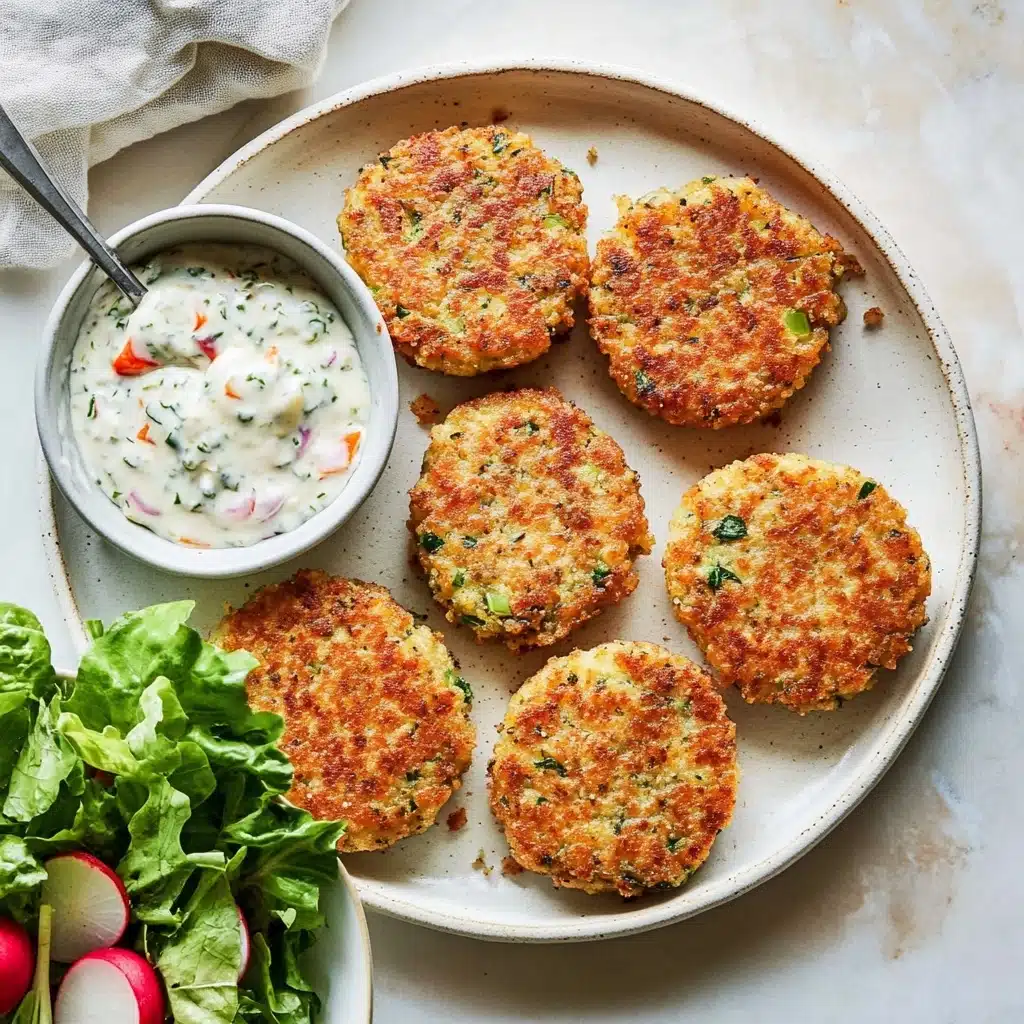
- Salad Greens & Tartar Sauce or Lemon Wedges (for serving): Complete the meal with some freshness or a zippy dip!
Variations
Salmon cakes are endlessly forgiving, so don’t stress if you’re missing something—or want to get creative! Here are a few of my favorite twists if you’d like to tailor them to your taste, pantry, or dietary style.
- Swap the Herbs: Not a dill fan? Try flat-leaf parsley, chives, or even a sprinkle of tarragon to switch up the flavor profile.
- Spicy Kick: Add a diced jalapeño or a pinch of cayenne for those who love a gentle heat.
- Gluten-Free Option: Substitute panko crumbs with gluten-free breadcrumbs—your salmon cakes will still come out crisp!
- Mini Cakes for Appetizers: Make smaller, bite-sized cakes for parties or to serve as finger food at gatherings.
How to Make Salmon Cakes
Step 1: Prep and Mix the Salmon Mixture
Start by whisking together the mayonnaise, lemon juice, Dijon mustard, Old Bay, salt, and pepper in a large mixing bowl. Once your dressing base is smooth, fold in those gorgeous salmon cubes, a portion of the panko for subtle binding, along with fresh scallions, celery, and fragrant dill. Stir everything gently—you want the pieces of salmon intact and not mashed.
Step 2: Shape and Bread the Cakes
Tip the remaining panko onto a plate. Scoop the salmon mixture using a ⅓-cup measure and form it into compact, 1-inch high cakes with your hands. Roll them ever-so-gently in the panko, giving each cake a full, even coating—don’t rush this part, as that panko shell is your ticket to crunch heaven!
Step 3: Chill (Optional, but Recommended)
If you have time, pop the breaded cakes in the fridge for an hour or so. This helps them firm up and makes pan-frying even easier—especially handy if you’re prepping ahead for guests or planning a stress-free dinner.
Step 4: Fry to Golden Perfection
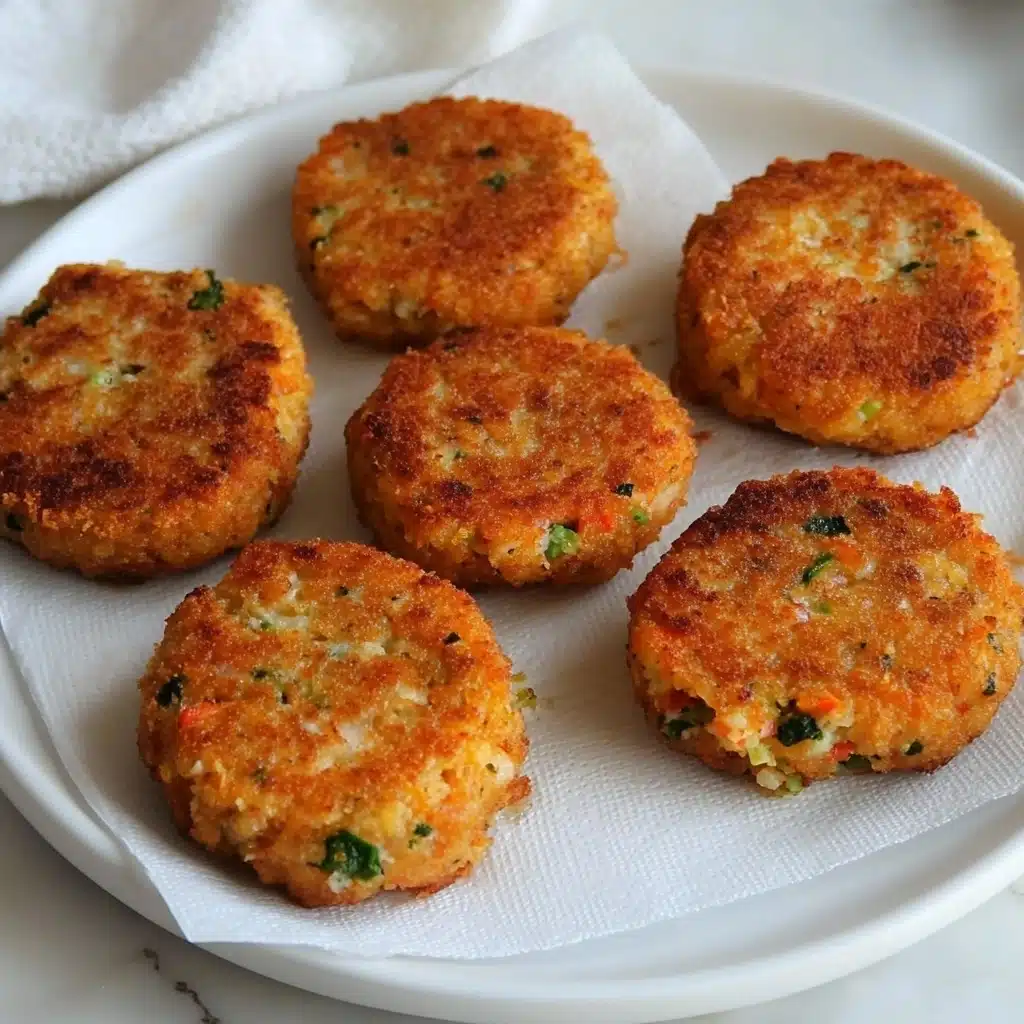
Heat a generous slick of vegetable oil in a skillet over medium-high heat. Working in batches, cook the salmon cakes for about two minutes per side, or until both sides are deeply golden and crisp. Try not to move them too much—you want that gorgeous crust to form. Drain on paper towels and repeat with the rest. That aroma? Utterly mouthwatering.
Pro Tips for Making Salmon Cakes
- Dice, Don’t Mash: Cutting the salmon into ¼-inch cubes gives the cakes their signature tender texture—avoid blending or over-chopping for the best results.
- Chill Before Frying: If time allows, a short chill in the fridge helps the cakes keep their shape and makes frying them a breeze.
- Uniform Heat is Key: Watch your pan! Medium-high heat is just right for getting that deep golden crust without overcooking the interior.
- Don’t Crow the Pan: Cook in batches—giving the salmon cakes space means they’ll crisp up perfectly instead of steaming.
How to Serve Salmon Cakes
Garnishes
The finishing touch can be as simple as a sprinkle of fresh chopped dill and a squeeze of lemon, or get fancy with a dollop of homemade tartar sauce. I also love a dusting of extra Old Bay or a few snipped chives for a touch of color and zip!
Side Dishes
Salmon cakes pair beautifully with a peppery salad, crisp green beans, or even buttery roasted potatoes. For a lighter touch, serve on a bed of vinaigrette-tossed greens—something bright and herby balances the richness perfectly.
Creative Ways to Present
Turn them into sliders with soft rolls and a swipe of aioli, arrange atop a platter with mini pickle skewers for party bites, or layer over a grain bowl with quinoa, arugula, and avocado for a fresh, filling lunch. However you serve them, these cakes love to soak up a good sauce!
Make Ahead and Storage
Storing Leftovers
Any leftover salmon cakes will keep in an airtight container in the fridge for up to two days. Let them cool completely before storing so they maintain that lovely crispy crust (and don’t steam themselves soggy!).
Freezing
To freeze, arrange cooled cakes on a lined baking sheet and freeze until solid, then wrap individually and store in a zip-top bag or airtight container for up to three months. Defrost in the fridge overnight before you plan to reheat and serve.
Reheating
The best way to reheat salmon cakes is in a 350°F oven for 10 to 15 minutes, straight on a baking sheet. This reliably restores that golden, crispy exterior and melts everything inside back to juicy perfection. Avoid microwaving if possible—the crust can get a little sad!
FAQs
-
Can I use canned salmon for these salmon cakes?
While fresh salmon gives these cakes their signature texture and flavor, you can use canned salmon in a pinch—just be sure to drain well and remove any skin or bones. The texture will be softer, but the cakes will still be tasty!
-
What’s the best way to dice the salmon for this recipe?
Use a sharp chef’s knife to cut the salmon into even ¼-inch cubes. Work with cold salmon (it’s firmer and easier to cut), and take your time—consistent size ensures even cooking and a tender bite.
-
Do I have to chill the cakes before frying?
You don’t have to, but chilling makes the cakes easier to handle and helps them hold their shape during frying. If you’re short on time, skip this step—they’ll still be delicious (just handle gently).
-
How should I serve salmon cakes for a party?
Try making them mini-sized! Arrange on a platter with toothpicks and little bowls of tartar sauce or lemon aioli on the side. They’re also fantastic tucked into slider buns for a fun, hand-held appetizer.
Final Thoughts
If you’re craving something irresistibly crisp, wonderfully fresh, and guaranteed to please a crowd, give these salmon cakes a try. I promise—one bite, and you’ll find yourself returning to this recipe again and again, eager to share a platter with your people. Happy cooking and bon appétit!
Print
Salmon Cakes Recipe
- Prep Time: 20 Minutes
- Cook Time: 10 Minutes
- Total Time: 30 Minutes
- Yield: 9 cakes
- Category: Main Dish
- Method: Pan-Frying
- Cuisine: American
- Diet: Gluten Free
Description
Delicious and flavorful salmon cakes made with fresh salmon, herbs, and seasonings, perfect for a quick and satisfying meal.
Ingredients
For the Salmon Cakes
- 1/4 cup mayonnaise
- 1 tablespoon fresh lemon juice, from 1 lemon
- 1 teaspoon Dijon mustard
- 1 teaspoon Old Bay seasoning
- 3/4 teaspoon salt
- 1/4 teaspoon freshly ground black pepper
- 1 1/4 lb skinless salmon fillet, finely diced into 1/4-inch pieces (see note)
- 1 1/4 cups panko bread crumbs, divided
- 1/4 cup thinly sliced scallions, from 3 to 4 scallions, light and dark green parts
- 1/3 cup finely diced celery, from 2 stalks
- 2 tablespoons finely chopped fresh dill
- 1/2 cup vegetable oil
Instructions
- In a large bowl, whisk together the mayonnaise, lemon juice, mustard, Old Bay, salt, and pepper. Add the diced salmon, ¼ cup of the panko, the scallions, the celery, and the dill. Gently mix until uniformly combined.
- Place the remaining 1 cup of panko in a shallow dish or pie plate. Using a ⅓-cup measure, scoop the salmon mixture and form into a compact cake about 1 inch high. Place the salmon cake into the panko and gently coat it all over in crumbs. Repeat with the remaining mixture to form about 9 cakes. (At this point, you can refrigerate the salmon cakes for a few hours until ready to cook, if you’d like.)
- Heat the oil in a medium nonstick skillet over medium-high heat until shimmering. Place half of the salmon cakes in the skillet and cook without moving until golden brown, about 2 minutes. Carefully flip the cakes and cook until the second side is golden brown, about 2 minutes more. Reduce the heat to medium if the cakes are browning too quickly. Transfer cakes to a paper towel–lined plate to drain. Repeat with the remaining cakes (no need to change the oil). Serve warm.
Notes
- If buying a skin-on salmon fillet, purchase 1⅓ pounds of fish to yield 1¼ pounds of fish after skinning.
- The salmon cakes can be fully cooked and refrigerated up to several hours ahead of time. To reheat: preheat the oven to 350°F and line a baking sheet with aluminum foil. Place the salmon cakes in the oven and cook until crisp on the exterior and warm throughout, 10 to 15 minutes. The cakes may also be frozen for up to 3 months; defrost in the refrigerator before reheating.
- The cooked salmon cakes can be frozen for up to 3 months. Once cool, lay them out on one (or more) foil-lined baking sheet(s) and cover them loosely with plastic wrap. Freeze the patties in a single layer for about an hour, then remove them from the freezer. Wrap the cakes individually in plastic wrap and then put them together in a freezer bag or airtight container. Before serving, defrost in the refrigerator before reheating.
Nutrition
- Serving Size: 1 salmon cake
- Calories: 240
- Sugar: 1g
- Sodium: 420mg
- Fat: 14g
- Saturated Fat: 2g
- Unsaturated Fat: 10g
- Trans Fat: 0g
- Carbohydrates: 10g
- Fiber: 1g
- Protein: 20g
- Cholesterol: 45mg

