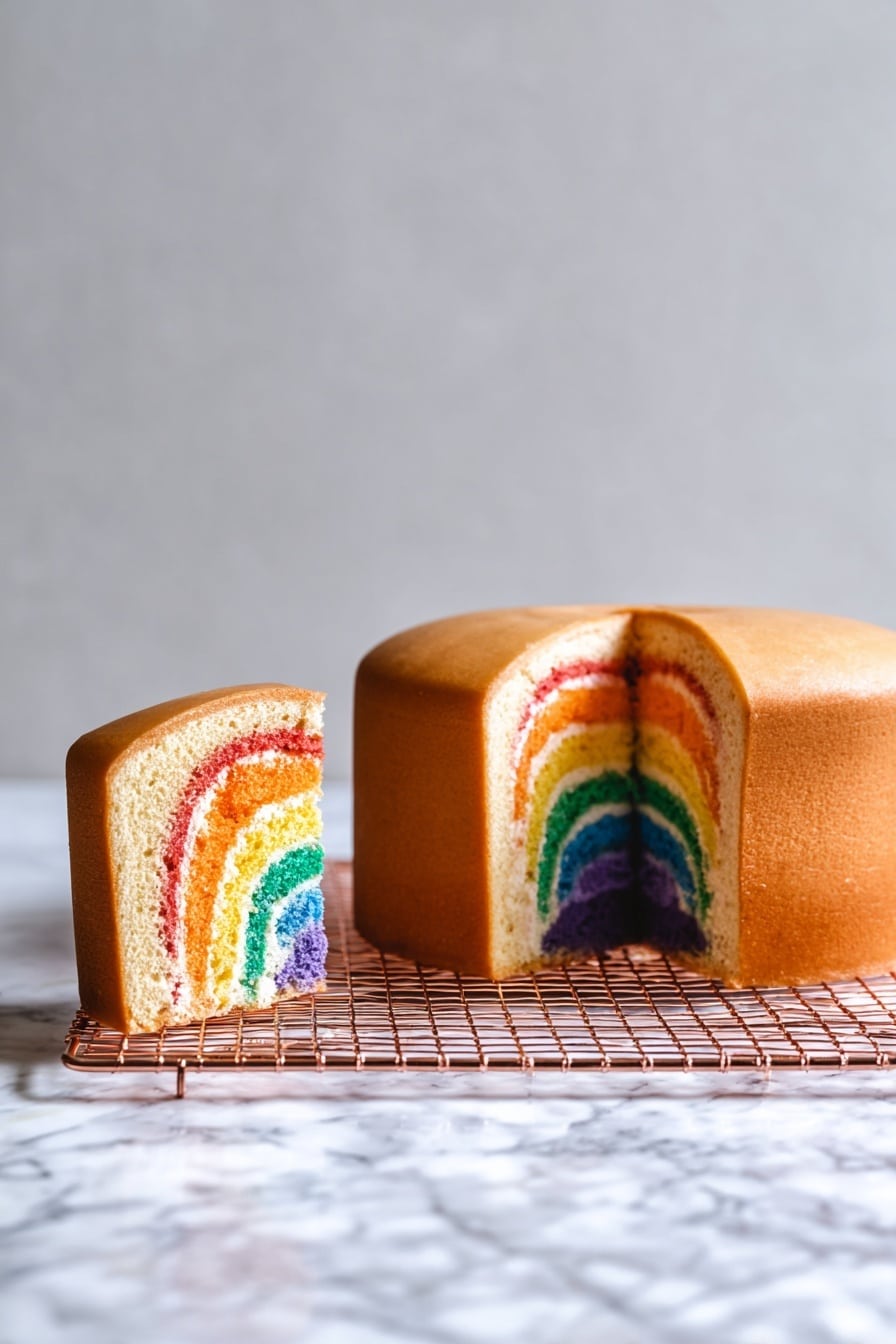
If you’re looking for a cake that’s truly fun and a bit magical, you’ve got to try this Rainbow Surprise Bundt Cake Recipe. I absolutely love how this turns out—a classic white bundt with a hidden burst of rainbow colors inside that will wow your friends and family the moment you slice into it. When I first tried this, I was amazed by how simple it was to layer colors without making a mess, and you’ll find that this recipe’s tricks make the whole process a breeze. Stick around because I’m going to walk you through every step so you can nail this show-stopping dessert yourself!
Why You’ll Love This Recipe
- Hidden Rainbow Magic: The beautiful surprise inside the bundt cake is perfect for birthdays and celebrations.
- Light and Fluffy Texture: Thanks to a mix of cake flour and buttermilk, this cake is tender yet sturdy enough for shaping.
- Easy Step-by-Step Process: I broke down the layering method so you won’t stress over tricky piping or colors mixing.
- Versatile and Fun: It’s a crowd-pleaser whether you’re a beginner or more experienced baker craving something special.

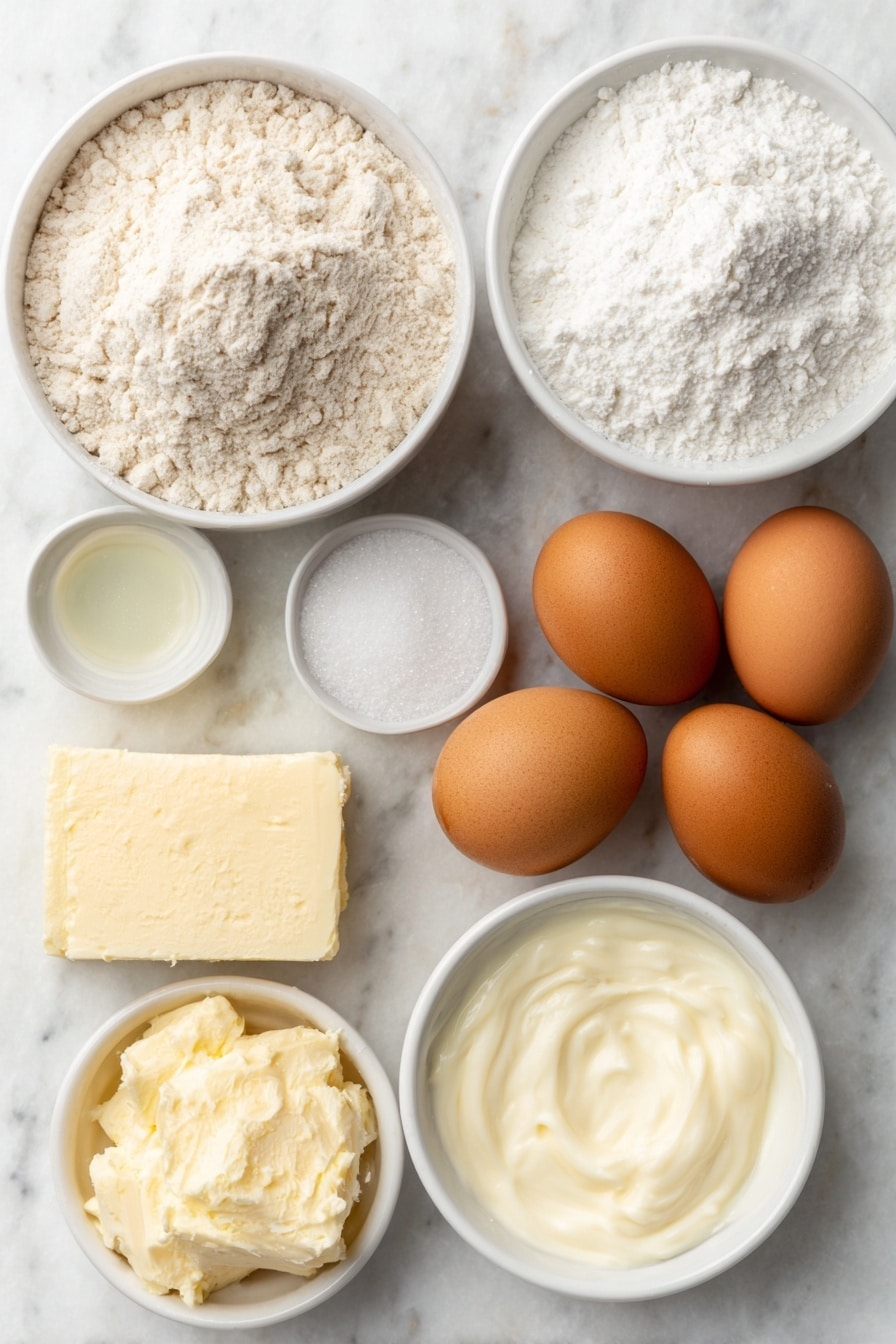
Ingredients You’ll Need
This Rainbow Surprise Bundt Cake Recipe uses a combination of all-purpose and cake flour for the perfect crumb, along with a blend of butter and coconut oil that makes the cake moist and flavorful. You’ll want to grab some gel food coloring for vibrant layers that don’t thin out your batter.
- All Purpose Flour: Gives structure and a classic texture—sifting it helps keep the cake light.
- Cake Flour: Balances the all-purpose flour to ensure tenderness without sacrificing rise.
- Unsalted Butter: Adds richness and creates a creamy base when softened properly.
- Coconut Oil: Keeps the cake moist and adds subtle flavor without overpowering vanilla.
- Granulated Sugar: Use fine sugar for smooth creaming and tender crumb.
- Sea Salt: Just a pinch enhances all flavors and balances sweetness.
- Pure Vanilla Extract & Imitation Vanilla: A combo that layers deep vanilla flavor without bitterness.
- Baking Powder: Essential for the rise and fluffy inside texture.
- Large Egg Whites: Whipped in to add lightness and volume.
- Buttermilk: Keeps the cake tender with a slight tang that pairs beautifully with vanilla.
- Gel Food Coloring: Needed for those brilliant rainbow layers in red, yellow, green, blue, and purple.
Variations
I love how versatile this cake base is, so feel free to tweak it according to your mood or dietary needs. You can get creative with flavors or colors and still end up with a delightful surprise inside. Personalizing this recipe is half the fun!
- Dairy-Free Version: Substitute the butter and buttermilk with plant-based alternatives like vegan butter and coconut yogurt for equally moist texture.
- Flavor Twists: Add citrus zest or almond extract for a unique spin—just a teaspoon can brighten the flavor.
- Color Customization: Swap in different gel colors, like pinks or oranges, to match party themes or holidays.
- Mini Bundt Cakes: Use smaller pans for adorable single-serving cakes—just adjust baking time accordingly.
How to Make Rainbow Surprise Bundt Cake Recipe
Step 1: Prep Your Pan and Preheat
Start by preheating your oven to 350°F (175°C). Then, butter and flour your large bundt pan thoroughly—this cake’s delicate design means you want a perfect release. I like to use a pastry brush for the butter and a little extra flour to dust around corners so nothing sticks.
Step 2: Sift the Flours
Sift the all-purpose flour and cake flour together in a bowl. This step lightens the flour and prevents lumps, which keeps the texture of your cake tender—something I always learned the hard way before I got into the habit of sifting!
Step 3: Cream the Fats and Sugar
In your mixer, beat the softened butter, coconut oil, granulated sugar, sea salt, pure and imitation vanilla extracts, and baking powder together on medium-high for a full five minutes. You’ll see the mixture turn pale and fluffy. This part is critical—don’t rush it or you’ll miss out on that gorgeous texture.
Step 4: Add Egg Whites One by One
With the mixer still running on medium speed, add your egg whites one at a time, making sure the previous one is fully incorporated before adding the next. This slow addition helps trap air, which gives the cake extra lift and lightness. Trust me, you’ll notice it makes a big difference in crumb!
Step 5: Combine Flour Mixture and Buttermilk
Switch your mixer to low speed and gradually add the sifted flour mixture. Then slowly drizzle in the buttermilk while mixing continues on low. This step ensures everything mixes evenly without overworking the batter, so your cake stays tender and doesn’t get tough.
Step 6: Divide and Color the Batter
Divide the batter evenly into five separate small bowls—about 1/3 cup each. Add different gel food coloring to each bowl (red, yellow, green, blue, and purple) and mix gently until you get vivid, even colors. This part is so fun! Using gel coloring is key because it won’t thin out the batter like liquid colorings might.
Step 7: Layer the Batter in the Bundt Pan
Pour most of the remaining white batter (more than two-thirds) into the bottom of your prepared bundt pan—this will be the cake’s base and top layer. Now, fit each colored batter into separate piping bags and snip just the tip off.
Using the back of a teaspoon, gently create a circular moat in the white batter as your rainbow “channel.” Pipe a red circle inside this moat, then smooth it out with the spoon, keeping a white border on both the inner and outer edges. Continue layering each color ring inside the previous one, making each ring slightly narrower as you go (yellow, green, blue, purple). This layered technique keeps the rainbow neat and separate inside the cake.
Once all the colors are in, carefully spoon the last bit of white batter on top to cover the rainbow without disturbing the layers below—an offset spatula works perfectly here.
Step 8: Bake and Cool
Bake your cake for 45 minutes but start checking around 40 minutes. The cake is done when it springs back to the touch and a tester comes out clean. I’ve learned that ovens vary, so keep an eye on it starting early—avoid over-baking to retain moisture.