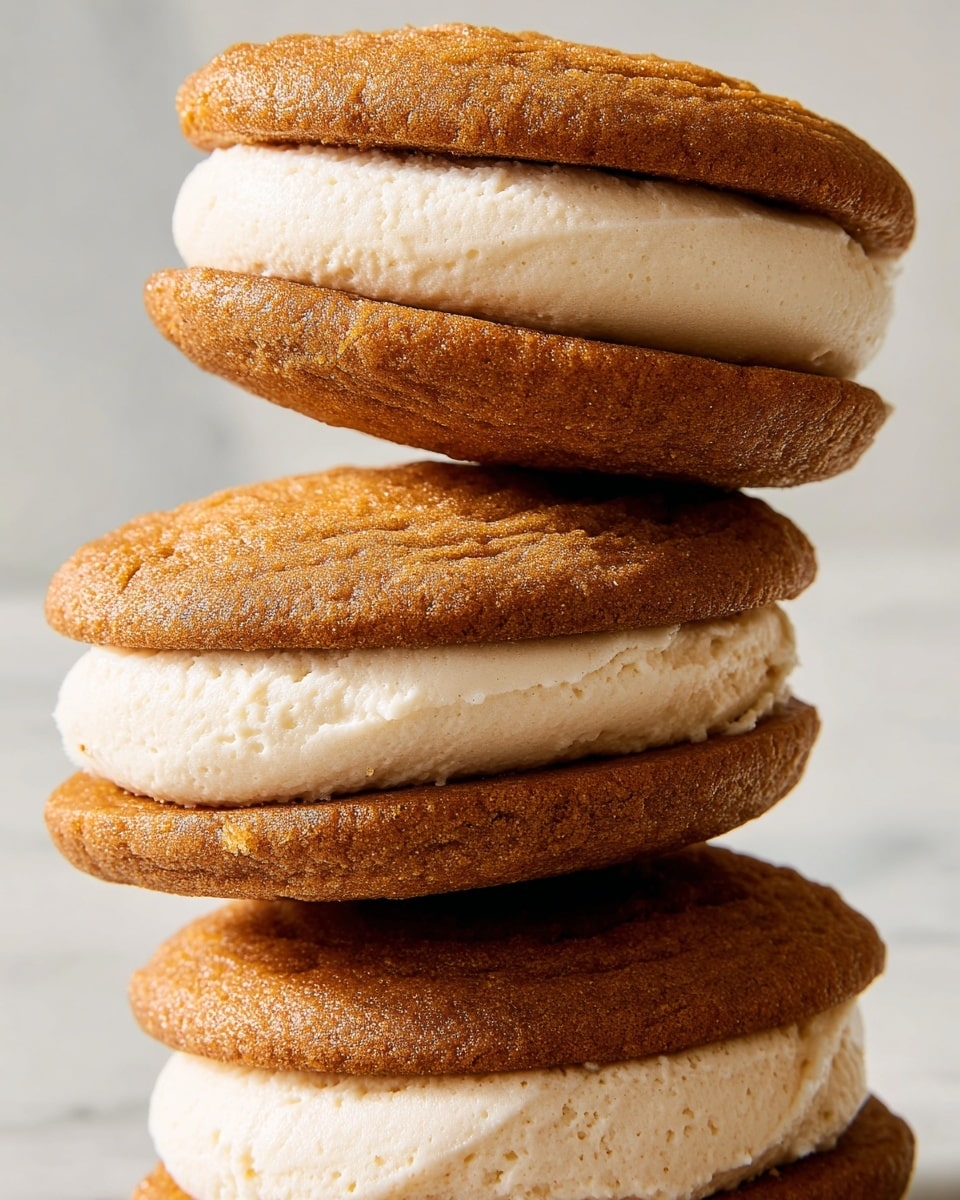
If you’ve ever wanted to bake something that’s equal parts fun, festive, and downright delicious, this Pumpkin Whoopie Pies Recipe is your new best friend. I absolutely love how these soft, cake-like pumpkin rounds sandwich a creamy cinnamon-spiked filling—it’s like the perfect autumn hug in dessert form. Whether you’re baking for Halloween, Thanksgiving, or simply craving that cozy fall vibe, these whoopie pies bring that unmistakable warmth to your kitchen.
When I first tried this Pumpkin Whoopie Pies Recipe, I was amazed at how easy it was to whip up bakery-quality treats right at home. You’ll find that the blend of spices—cinnamon, ginger, nutmeg, and cloves—works beautifully with real pumpkin puree, creating an irresistible flavor combo that isn’t too sweet but hits just right. Plus, assembling these little delights becomes a fun, hands-on activity that’s great for baking with kids or hosting a casual gathering.
Why You’ll Love This Recipe
- Soft, Moist Texture: These whoopie pies are tender and cakey, not dry, thanks to the pumpkin puree and oil combo.
- Balanced Spice Flavor: You get cozy fall spices without that overpowering clove or ginger punch—it’s just right.
- Simple Assembly: With a piping bag or zip-top bag, forming the pies is quick and neat, even if you’re new to baking.
- Versatile for Any Occasion: Whether it’s a casual family dessert or a festive party treat, these pies fit every vibe beautifully.
Ingredients You’ll Need
It might seem like a handful at first, but every ingredient plays a crucial role in nailing that perfect pumpkin whoopie pie. Fresh pumpkin puree provides moisture and flavor, while the blend of spices lifts every bite beautifully. I recommend using good-quality spices and fresh pumpkin puree — it really makes a difference!
- All-purpose flour: The foundation for soft, tender whoopie pies that hold together well.
- Ground cinnamon: The star spice that pairs so well with pumpkin’s natural sweetness.
- Baking powder: Helps give the pies a nice rise and fluffiness.
- Baking soda: Works with the brown sugar and pumpkin to gently leaven the batter.
- Ground ginger: Adds a gentle, warm zing that rounds out the spice mix.
- Kosher salt: Balances the sweetness and brings out the other flavors.
- Ground allspice: A subtle addition that deepens the fall flavor profile.
- Ground cloves: Used sparingly for a hint of aromatic warmth.
- Ground nutmeg: Enhances the sweetness with a cozy note.
- Dark brown sugar: Adds moisture and a rich molasses undertone.
- Unsalted butter (softened): For creaminess and tenderness in both the pies and filling.
- Large eggs: Bind everything together and lend structure.
- Pumpkin puree: The heart of this recipe—use canned or homemade for the best flavor.
- Vegetable or neutral oil: Keeps the pies moist without overpowering the pumpkin’s flavor.
- Pure vanilla extract: Lifts all the warm spices with its sweet, fragrant notes.
- Cream cheese (softened): Gives the filling its rich, tangy creaminess we all love.
- Confectioners’ sugar: Sweetens the filling to just the right degree.
- Honey: Adds a subtle floral sweetness and helps stabilize the filling.
Variations
I love experimenting with this Pumpkin Whoopie Pies Recipe because it’s so versatile. Sometimes I swap the traditional filling for a maple-flavored cream cheese or even a spiced whipped cream. You can definitely tweak the spices or use gluten-free flour if that fits your lifestyle better—just keep an eye on the texture since pumpkin adds moisture.
- Maple Cream Cheese Filling: I tried replacing honey with pure maple syrup—it added a lovely, deeper sweetness that my family went crazy for.
- Gluten-Free Version: Using a cup-for-cup gluten-free flour works well; just be sure to gently mix so you don’t overwork the batter.
- Spicy Kick: If you like heat, add a pinch of cayenne or black pepper to the batter—it really wakes up the spices especially for grown-up taste buds.
- Seasonal Twist: Swap pumpkin puree with sweet potato puree for a different yet equally delicious take on the whoopie pies.
How to Make Pumpkin Whoopie Pies Recipe
Step 1: Whisk Your Dry Ingredients
Start by preheating your oven to 350°F (175°C). In a medium bowl, whisk together the flour, cinnamon, baking powder, baking soda, ginger, salt, allspice, cloves, and nutmeg. This blends all your warm spices evenly into the flour and makes sure you don’t end up with any lumps of baking soda or powder in the final mix. I like to sift them lightly together for an ultra-smooth batter.
Step 2: Cream Butter and Brown Sugar, Then Add Wet Ingredients
Use a stand mixer fitted with a whisk attachment and beat your softened butter and brown sugar on medium-high speed until it’s light and fluffy—this usually takes a good 3 to 4 minutes. Next, add in your eggs, pumpkin puree, oil, and vanilla, mixing until smooth. The batter will turn glossy and luscious here. I’ve learned that the key is not to rush—fully incorporate each ingredient for the best texture.
Step 3: Combine Wet and Dry Ingredients Gently
Reduce your mixer speed to medium-low and gradually add the dry ingredients to the wet mixture. Mix only until just combined—the dough should be smooth and sticky, not overworked. Overmixing will make your pies dense, so this is the moment where gentle hands pay off. The dough will be thick and easy to pipe or scoop.
Step 4: Pipe and Shape Whoopie Pies
Transfer the batter into a gallon-sized freezer or piping bag, snipping about 1-inch off the corner. Pipe rounds about 2 inches wide onto two large parchment-lined baking sheets. Don’t crowd them; leave 2 inches between each for room to spread. If you want, smooth the tops gently with the back of a wet spoon or your finger for an even finish. This little trick helps your pies bake up flat and uniform.
Step 5: Bake and Cool
Bake for 15 to 20 minutes until the top springs back when you lightly touch it. The smell at this point is already intoxicating! Let them cool slightly on the pans, then transfer to a wire rack to cool completely. You want to be patient here to avoid melting your filling later.
Step 6: Make the Cream Cheese Filling
In your stand mixer bowl fitted with a whisk, beat the softened cream cheese and butter until smooth and creamy—this usually takes about 2 minutes. Add confectioners’ sugar, cinnamon, vanilla, and honey, then continue beating until light and fluffy. This filling will hold up perfectly between the whoopie pies and have just the right touch of sweetness. Chill it in the fridge until you’re ready to assemble.
Step 7: Assemble Your Pumpkin Whoopie Pies
Turn half of your cooled whoopie pies domed side down. Spread a generous dollop of filling on the flat sides, then sandwich with the remaining pies domed side up. Press gently so they stick without squeezing out the filling. Voilà! Your Pumpkin Whoopie Pies are ready to enjoy or impress your guests.
Pro Tips for Making Pumpkin Whoopie Pies Recipe
- Room Temperature Ingredients: Using softened butter and cream cheese helps create a smooth batter and creamy filling without lumps.
- Don’t Overmix the Batter: I learned the hard way that overmixing makes whoopie pies tough instead of soft and cakey.
- Use Parchment Paper or Silicone Mats: Prevents sticking and makes cleanup a breeze.
- Chill the Filling: Refrigerating the filling before assembling helps it hold shape and prevent it from oozing out too much.
How to Serve Pumpkin Whoopie Pies Recipe

Garnishes
I like to keep things simple with these whoopie pies—just a dusting of cinnamon or powdered sugar on top really makes them look festive without adding fuss. Sometimes for a party, I’ll sprinkle chopped toasted pecans around the serving plate, adding a bit of crunch and nutty contrast that complements the pumpkin spices beautifully.
Side Dishes
Pair these pumpkin whoopie pies with a warm chai latte or a rich cup of hot chocolate for the ultimate fall treat. I’ve also served them alongside spiced cider at family gatherings, which always feels cozy and inviting. If you want a lighter side, a simple fruit salad with apples and cranberries adds a fresh twist on the plate.
Creative Ways to Present
For holiday parties, I’ve arranged these Pumpkin Whoopie Pies on cake stands decorated with autumn leaves and mini pumpkins—they instantly become a centerpiece. Another fun idea I tried was wrapping individual pies in parchment paper tied with twine as cute take-home gifts. They’re perfect for sharing the cozy vibes with friends and neighbors!
Make Ahead and Storage
Storing Leftovers
Once assembled, I store leftover whoopie pies in an airtight container in the fridge for up to 3 days. They actually taste better after a day because the filling and flavors marry perfectly. Just remember to bring them back to room temperature before serving so the filling softens again.
Freezing
I’ve successfully frozen individual whoopie pies before assembly by wrapping the cooled rounds tightly in plastic wrap and stashing them in a freezer bag. When you’re ready, thaw at room temperature, then add the filling fresh. Freezing after assembly can work, but the filling might get a bit watery once thawed.
Reheating
To reheat, I recommend warming the whoopie pies gently in a microwave for about 10 seconds or placing them in a warm oven for a few minutes—just enough to take the chill off without melting the filling. This brings back their soft, cakey texture beautifully.
FAQs
-
Can I use canned pumpkin puree for this Pumpkin Whoopie Pies Recipe?
Absolutely! Canned pumpkin puree works perfectly and is the most convenient option year-round. Just make sure you’re using pure pumpkin, not pumpkin pie filling, which has added sugars and spices.
-
How do I know when whoopie pies are done baking?
The tops should spring back lightly when you touch them, and a toothpick inserted should come out mostly clean with a few moist crumbs. Avoid overbaking to keep them soft and tender.
-
Can I make the filling ahead of time?
Yes! The cream cheese filling can be made a day or two in advance and kept refrigerated. Just give it a quick stir before assembling to restore its fluffiness.
-
Are Pumpkin Whoopie Pies suitable for freezing?
They freeze well if you freeze the cake rounds before assembling. The filled whoopie pies don’t freeze as well because the cream cheese filling can become watery upon thawing.
-
Can I substitute spices or adjust the spice levels?
Definitely! Feel free to adjust cinnamon, ginger, cloves, and other spices to suit your taste. I sometimes dial back cloves if I’m baking for kids because it’s a stronger spice.
Final Thoughts
I truly believe this Pumpkin Whoopie Pies Recipe is one of those cozy classics that never fails to bring smiles. I still remember the first time I brought a tray to a fall potluck—and how everyone eagerly asked for seconds. If you’re looking for a treat that’s approachable, delicious, and full of seasonal charm, this recipe will quickly become a favorite in your kitchen too. So grab your mixing bowl, pull out the pumpkin, and let’s bake some magic together!
Print
Pumpkin Whoopie Pies Recipe
- Prep Time: 15 minutes
- Cook Time: 20 minutes
- Total Time: 45 minutes
- Yield: 12 servings
- Category: Dessert
- Method: Baking
- Cuisine: American
Description
Delight in these soft and spiced Pumpkin Whoopie Pies, perfect for fall gatherings or a cozy treat. Flavored with warm spices and filled with a creamy cinnamon-vanilla cream cheese frosting, these pies are moist, tender, and irresistibly delicious.
Ingredients
Pies
- 3 cups (360 g) all-purpose flour
- 1 Tbsp. ground cinnamon
- 1 tsp. baking powder
- 1 tsp. baking soda
- 1 tsp. ground ginger
- 1 tsp. kosher salt
- 1/2 tsp. ground allspice
- 1/2 tsp. ground cloves
- 1/4 tsp. ground nutmeg
- 2 cups (430 g) packed dark brown sugar
- 1/2 cup (1 stick) unsalted butter, softened
- 2 large eggs
- 1 cup pumpkin puree
- 1/4 cup vegetable or neutral oil
- 1 1/2 tsp. pure vanilla extract
Filling & Assembly
- 1 (8-oz.) block cream cheese, softened
- 1/2 cup (1 stick) unsalted butter, softened
- 2 cups (230 g) confectioners’ sugar
- 2 tsp. ground cinnamon
- 2 tsp. pure vanilla extract
- 1 tsp. honey
Instructions
- Preheat and Prepare Dry Ingredients: Preheat your oven to 350°F (175°C). In a medium bowl, whisk together the flour, cinnamon, baking powder, baking soda, ginger, kosher salt, allspice, cloves, and nutmeg until well combined.
- Create the Batter: In the large bowl of a stand mixer fitted with the whisk attachment, beat the dark brown sugar and softened butter on medium-high speed until fully combined and fluffy. Add in the eggs, pumpkin puree, vegetable oil, and vanilla extract, mixing until smooth. Lower the mixer speed to medium-low, then gradually incorporate the dry ingredients just until you have a smooth and sticky batter.
- Pipe the Whoopie Pies: Transfer the batter into a gallon-sized freezer or piping bag. Cut about a 1-inch opening at the tip and pipe rounds approximately 2 inches wide onto two large baking sheets lined with parchment paper. Leave around 2 inches between each. Use the back of a spoon or a wet finger to smooth the tops gently.
- Bake: Place the baking sheets in the oven and bake the whoopie pies for 15 to 20 minutes, or until they spring back lightly when touched.
- Cool: Allow the pies to cool slightly on the baking sheets before transferring them to wire racks to cool completely.
- Prepare the Filling: In a clean large bowl, beat softened cream cheese and butter on medium-high speed using the whisk attachment until the mixture is smooth and creamy.
- Add Flavor to Filling: Gradually add the confectioners’ sugar, ground cinnamon, vanilla extract, and honey, continuing to beat until the filling is light and fluffy. Refrigerate until assembly.
- Assemble the Whoopie Pies: Turn half of the whoopie pies so the domed sides face down. Spread a generous amount of filling onto the flat sides, then sandwich with the remaining pies.
Notes
- Ensure the cream cheese and butter for the filling are softened to room temperature for a smooth and creamy texture.
- Use parchment paper to prevent sticking and facilitate easy cleanup.
- The batter is sticky; piping allows for uniform-sized whoopie pies.
- Whoopie pies can be stored in an airtight container in the refrigerator for up to 3 days.
- For a dairy-free option, substitute vegan cream cheese and butter.
Nutrition
- Serving Size: 1 whoopie pie
- Calories: 320
- Sugar: 26g
- Sodium: 280mg
- Fat: 14g
- Saturated Fat: 7g
- Unsaturated Fat: 5g
- Trans Fat: 0g
- Carbohydrates: 44g
- Fiber: 2g
- Protein: 4g
- Cholesterol: 45mg

