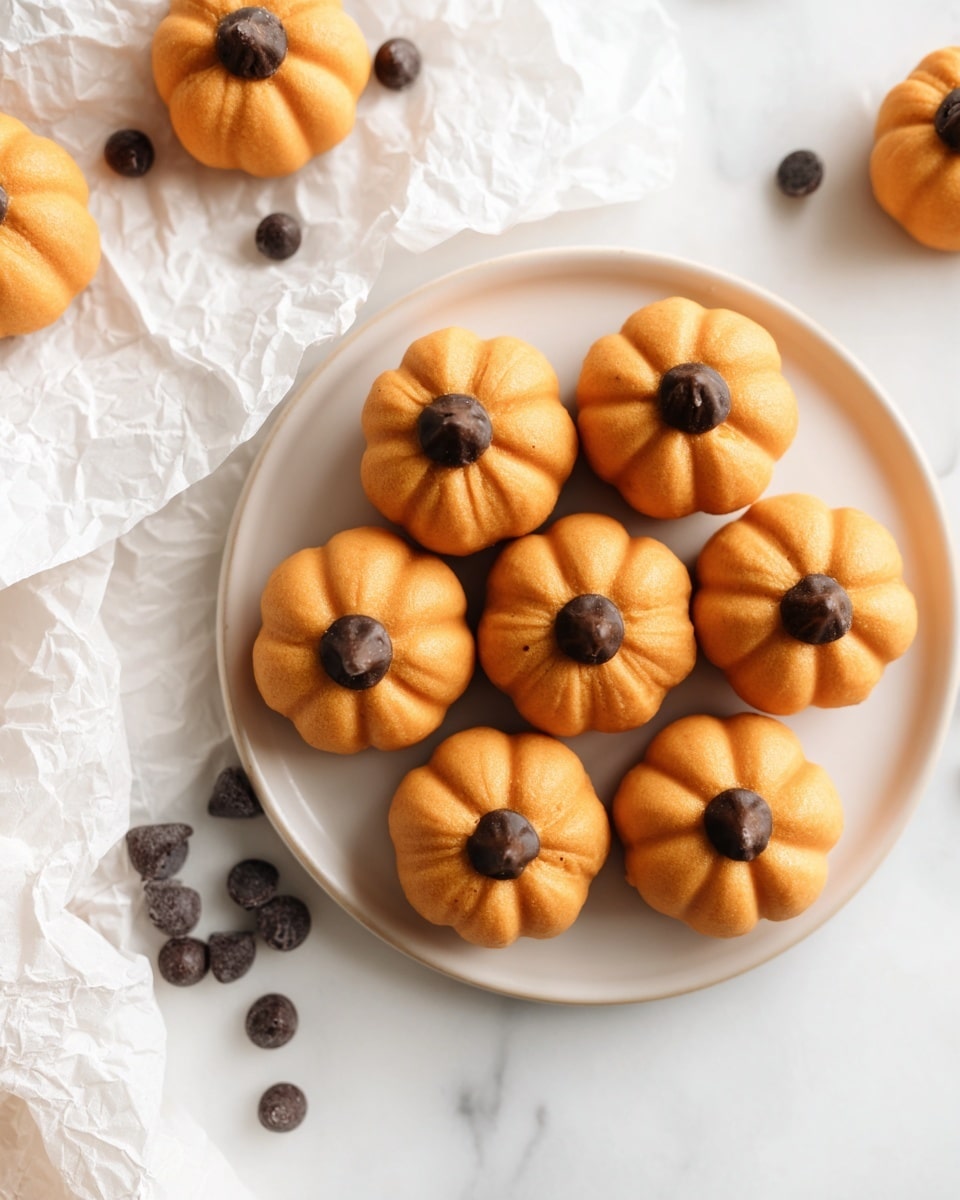
If you’re looking for an adorable, no-bake treat that’s perfect for fall gatherings or just a fun snack, I have to share my Peanut Butter Ball Pumpkins Recipe with you. These little pumpkins are not only cute as all get-out but also super simple to make and absolutely delicious. You’ll find that they’re perfectly sweet, peanut buttery, and with just a hint of vanilla—plus that pop of chocolate on top makes them irresistible. Trust me, once you try making these peanut butter ball pumpkins, they’ll become a seasonal favorite in your kitchen too!
Why You’ll Love This Recipe
- Simple & Quick: It takes just about 30 minutes and requires no baking, making it perfect for busy days.
- Kid-Friendly Fun: Rolling and decorating these pumpkins is a delightful activity for kids (and adults!) alike.
- Delicious Flavor Combo: The creamy peanut butter and sweet powdered sugar hit all the right notes in every bite.
- Festive & Cute: These peanut butter balls decorated as pumpkins add an instant seasonal vibe to any dessert table.

Ingredients You’ll Need
These ingredients are simple pantry staples that come together beautifully to create a creamy, sweet, and slightly salty pumpkin-shaped delight. The orange gel food coloring makes all the difference in giving these balls that perfect pumpkin hue without watering down the texture.
- Butter: Use softened unsalted butter to keep the sweetness balanced and help the dough bind smoothly.
- Creamy Peanut Butter: I always go for creamy over chunky here to get that perfect smooth texture.
- Powdered Sugar: This sweetens the dough without making it gritty. Make sure it’s fresh for the best texture.
- Vanilla Extract: Just a splash adds warmth and depth to the peanut butter mixture.
- Salt: A pinch helps balance the flavors—don’t skip it!
- Orange Gel Food Coloring: This gives vibrant color without thinning your dough like liquid colorings might.
- Chocolate Chips: These make perfect “stems” on top of your peanut butter pumpkins.
Variations
I love how versatile this Peanut Butter Ball Pumpkins Recipe is—feel free to make it your own depending on your tastes or what you have on hand. Whether you want to add a little crunch or swap ingredients out for dietary needs, there are so many fun options.
- Crunchy Twist: Stir in a handful of crushed pretzels or nuts to your dough for a satisfying crunch. My family loved that extra texture contrast!
- Chocolate Lovers: Mix mini chocolate chips right into the dough or dip the finished pumpkin balls halfway into melted chocolate for an extra decadent touch.
- Allergy-Friendly: Use sunflower seed butter instead of peanut butter if you need a nut-free option; it works surprisingly well.
- Color Fun: Experiment with different gel colors to make “painted” pumpkins or other fun shapes for holidays or parties.
How to Make Peanut Butter Ball Pumpkins Recipe
Step 1: Mix the Base Ingredients Until Smooth
Start by combining your softened butter and creamy peanut butter in the bowl of a stand mixer (or with a hand mixer). I always make sure the butter is super soft—it helps with a smooth, even blend. Beat these together until the mixture is silky and completely combined, about 2-3 minutes on medium speed. This is crucial for that creamy base texture.
Step 2: Add Powdered Sugar, Vanilla, and Salt
Once your peanut butter and butter are nicely mixed, it’s time to add the powdered sugar, vanilla extract, and just a pinch of salt. Add these slowly, mixing on low to avoid a sugar cloud in your kitchen! The dough will start to thicken up—don’t worry if it feels stiff, that’s exactly right.
Step 3: Color Your Dough
Here’s where the fun really begins – add in your orange gel food coloring a little at a time. I discovered this trick when I first tried liquid food coloring and ended up with very soft, less vibrant dough. Gel color won’t change the consistency. Mix well until you get that bright, perfect pumpkin orange you want.
Step 4: Shape and Decorate Your Pumpkins
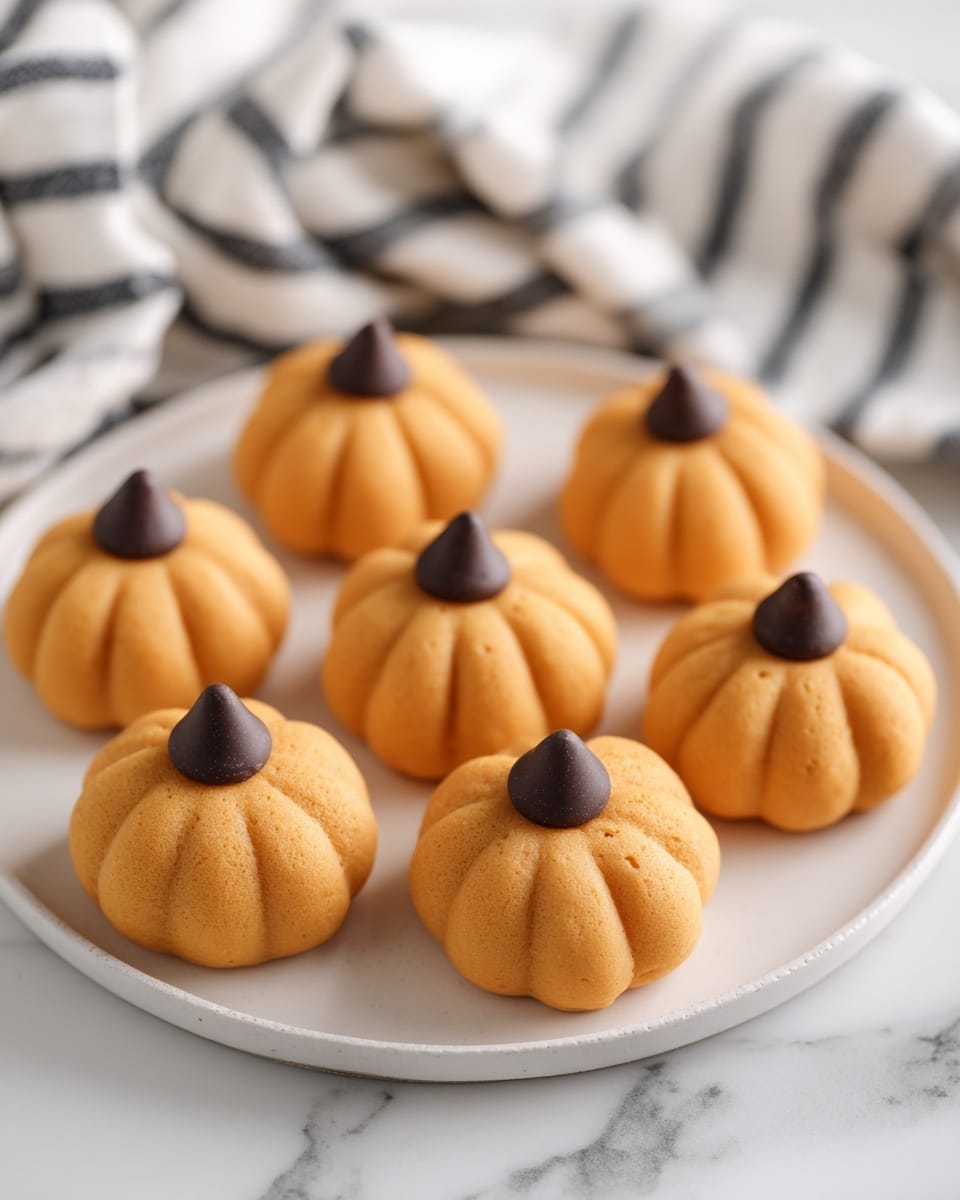
Scoop out about 2 teaspoons of dough at a time and roll it into balls with your hands. To get the pumpkin shape, I use a toothpick to gently press a few vertical lines around each ball, making it look like the ridges on a real pumpkin. Then, place one chocolate chip on top of each ball as the stem. This part is so satisfying and kids usually want to help here!
Step 5: Chill and Enjoy
Pop these peanut butter ball pumpkins into the fridge for about 20-30 minutes. This firms them up perfectly, making them easier to handle and giving them that melt-in-your-mouth feel when you bite in. Then, dig in and enjoy your handiwork!
Pro Tips for Making Peanut Butter Ball Pumpkins Recipe
- Butter Temperature Matters: Make sure your butter’s softened but not melted, or the dough won’t come together properly.
- Use Gel Food Coloring: I learned gel coloring is best here since it won’t alter the consistency like liquid coloring can.
- Don’t Skip the Chill: Refrigerating helps the balls set so they keep their shape and don’t get too soft when handled.
- Perfect Portion Size: Using a teaspoon scoop or measuring spoons keeps your pumpkins uniform and makes decoration easier.
How to Serve Peanut Butter Ball Pumpkins Recipe
Garnishes
I actually love serving these peanut butter ball pumpkins with extra chocolate chips or mini pretzel sticks nearby so people can customize their pumpkin stems or even add little “leaves.” Sprinkling a little extra colored sugar or edible glitter on top brings a festive sparkle that kids adore.
Side Dishes
Since these are a sweet treat, I like to serve them alongside simple, fresh items like apple slices or carrot sticks for contrast. They also pair great with a glass of cold milk or warm, spiced tea for a cozy fall snack.
Creative Ways to Present
For parties, I’ve arranged these peanut butter ball pumpkins in a decorative pumpkin patch setting—think little candy corn “leaves” scattered around with green sprigs of fresh mint or edible herbs for that “garden” look. Another cute idea is to place them on a rustic wooden tray lined with autumn leaves for an instant harvest vibe.
Make Ahead and Storage
Storing Leftovers
I store any leftover peanut butter ball pumpkins in an airtight container in the fridge. They keep perfectly for up to a week, which is great because they make such a tasty snack any time I’m craving something sweet and nutty.
Freezing
Freezing these puppies works well too—I pop them on a parchment-lined tray until frozen solid, then transfer to a freezer-safe bag. They stay good for up to 2 months and thaw quickly at room temperature when you want a quick treat.
Reheating
No need to heat these up! They’re best enjoyed chilled or at room temperature. But if they get too firm from the fridge, just let them sit out for 10 minutes to soften before eating.
FAQs
-
Can I use crunchy peanut butter instead of creamy for the Peanut Butter Ball Pumpkins Recipe?
You absolutely can! Using crunchy peanut butter will add a little extra texture with peanut bits, which some folks really enjoy. Just keep in mind it might be a bit harder to roll the dough smoothly, but the flavor is fantastic either way.
-
What if I don’t have orange gel food coloring?
If you don’t have orange gel, you can mix yellow and red gel food coloring to achieve the shade you want. Avoid liquid food coloring as it can make the dough too soft. Alternatively, leave the dough its natural color for tasty peanut butter balls, just skip the pumpkin look.
-
How long will these peanut butter ball pumpkins last?
Stored in an airtight container in the fridge, they’ll last up to a week. If frozen, they keep well for about 2 months. Just thaw before serving for the best texture and flavor.
-
Can I make these vegan or dairy-free?
Yes! Swap the butter for a vegan butter alternative and ensure your peanut butter and powdered sugar are vegan-friendly. The recipe works just as well and tastes just as amazing.
-
What’s the best way to store leftover peanut butter ball pumpkins?
Store them in an airtight container in the fridge to keep them firm and fresh. This method helps maintain their shape and prevents drying out.
Final Thoughts
I absolutely love how this Peanut Butter Ball Pumpkins Recipe brings a little joy and nostalgia to snack time. Making them reminds me of cozy afternoons in the kitchen with my family, laughing and sneaking tastes. They’re quick to whip up but feel like a special treat—perfect for sharing or just keeping all to yourself. I can’t wait for you to try making these charming little pumpkins; I bet you’ll find yourself coming back to this recipe every fall (or whenever you need a peanut buttery pick-me-up!). Enjoy!
Print
Peanut Butter Ball Pumpkins Recipe
- Prep Time: 30 minutes
- Cook Time: 0 minutes
- Total Time: 30 minutes
- Yield: 50 pumpkins
- Category: Dessert
- Method: No-Cook
- Cuisine: American
Description
Delightfully festive and easy to make, these Peanut Butter Ball Pumpkins are a perfect no-bake treat for Halloween or fall gatherings. Creamy peanut butter is combined with butter, powdered sugar, and vanilla to create a sweet dough that’s colored with orange gel food coloring, shaped into pumpkin-like balls, and finished with chocolate chip ‘stems’ for a charming seasonal look.
Ingredients
Ingredients
- 1/4 cup butter, softened
- 1 cup creamy peanut butter
- 2 cups powdered sugar
- 1 tsp vanilla extract
- 1 pinch salt
- orange gel food coloring (as needed to achieve desired pumpkin orange color)
- 50 chocolate chips (for pumpkin stems)
Instructions
- Combine Butter and Peanut Butter: In the bowl of a stand mixer, blend the softened butter and creamy peanut butter until the mixture is smooth and creamy.
- Add Remaining Ingredients: Add powdered sugar, vanilla extract, and a pinch of salt to the mixture. Continue mixing until a thick, dough-like consistency forms.
- Color the Dough: Add orange gel food coloring gradually into the mixer and blend until the dough achieves a bright, pumpkin-like orange color.
- Shape the Dough: Portion the dough into small balls, about 2 teaspoons each, and roll between your palms to form smooth spheres.
- Create Pumpkin Details: Use a toothpick to gently press vertical lines into each ball to mimic the ridges of a pumpkin.
- Add Chocolate Chip Stems: Place one chocolate chip on top of each peanut butter ball to resemble a pumpkin stem.
- Serve and Enjoy: Repeat with remaining dough until all pumpkins are formed, then serve immediately or refrigerate until ready to enjoy.
Notes
- For best results, ensure the butter is softened to room temperature before mixing.
- If dough is too sticky, refrigerate for 15-20 minutes to firm up for easier shaping.
- Orange gel food coloring is preferred over liquid to maintain dough consistency and achieve vibrant color.
- Store finished peanut butter pumpkins in an airtight container in the refrigerator for up to one week.
- These treats are no-bake and require no cooking or heating beyond mixing ingredients.
Nutrition
- Serving Size: 1 pumpkin ball (approx. 15g)
- Calories: 80
- Sugar: 7g
- Sodium: 50mg
- Fat: 5g
- Saturated Fat: 2g
- Unsaturated Fat: 3g
- Trans Fat: 0g
- Carbohydrates: 8g
- Fiber: 1g
- Protein: 2g
- Cholesterol: 10mg

