If you’re looking for a dessert that’s irresistibly creamy, effortlessly simple, and perfect for any occasion, you’re going to fall head over heels for this No-Bake Cheesecake Cups Recipe. I absolutely love this recipe because it delivers that classic cheesecake flavor without turning on your oven. Plus, it’s super customizable and perfect for whipping up last minute when guests drop by. Keep reading, and I’ll walk you through every step to make sure your cheesecake cups come out perfectly every single time!
Why You’ll Love This Recipe
- No Oven Needed: You can enjoy rich and creamy cheesecake without heating up your kitchen.
- Quick and Easy: From start to finish in about an hour, including chilling time.
- Customizable Toppings: Use your favorite fruit fillings, chocolate, or even crushed candies for a fun twist.
- Perfect for Entertaining: These cups are just the right size for guests and look adorable on any dessert table.

Ingredients You’ll Need
These ingredients come together beautifully to give you a creamy, luscious cheesecake filling with a classic graham cracker crust. I recommend using full-fat cream cheese and heavy whipping cream for that rich texture you love. Also, fresh lemon juice adds a subtle brightness that really makes the flavors pop.
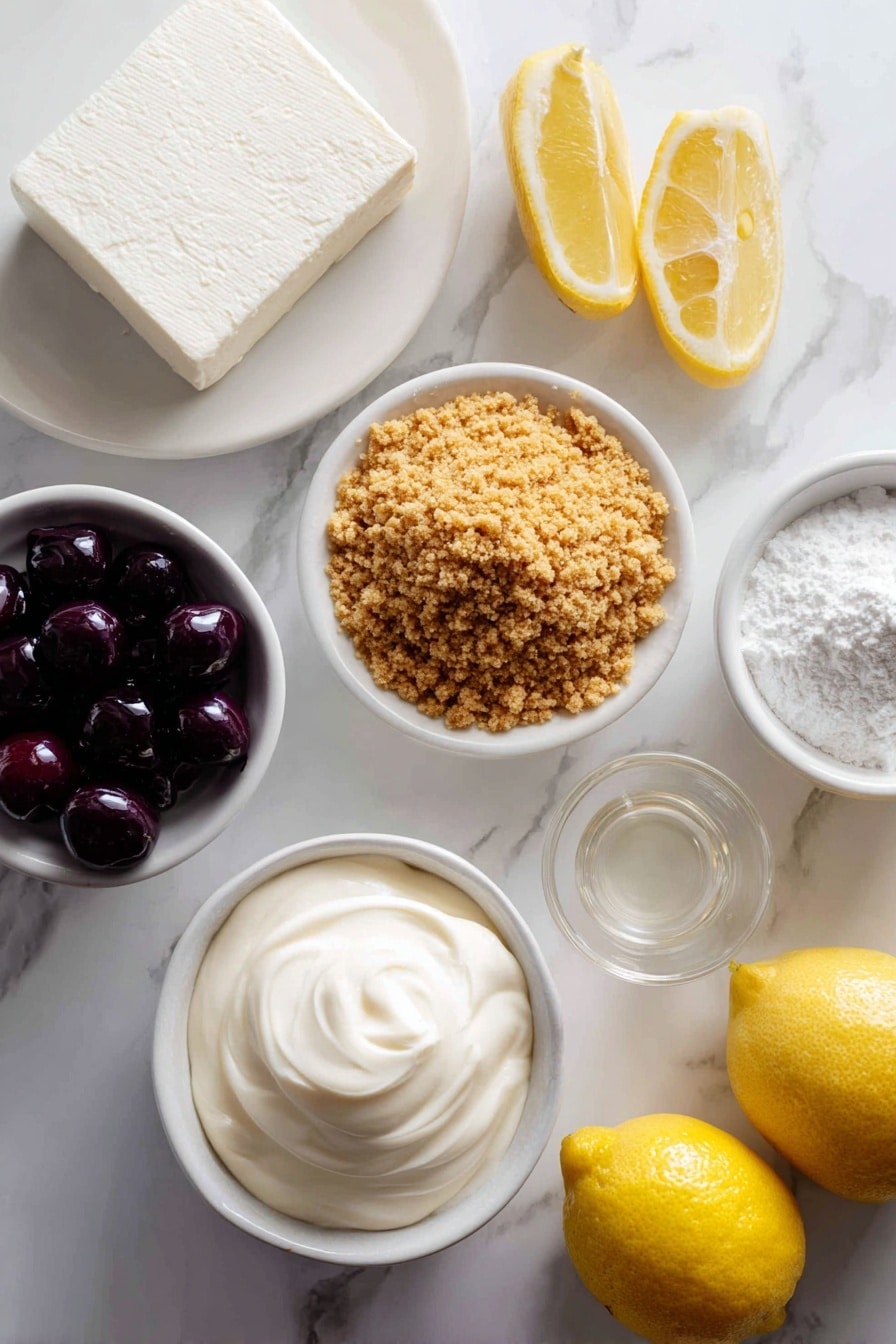
- Graham cracker crumbs: Acts as the crunchy base—store-bought or homemade both work great.
- Full fat cream cheese: Make sure it’s softened to room temperature to avoid lumps.
- Heavy whipping cream: The secret to that fluffy, dreamy texture in the cheesecake filling.
- Powdered sugar: Split between the cream cheese and whipping cream to give just the right sweetness and smoothness.
- Fresh lemon juice: Adds a fresh, subtle tang that brightens the whole dessert.
- Vanilla extract: For that warm, comforting undertone that makes it taste like a classic cheesecake.
Variations
I love how versatile this No-Bake Cheesecake Cups Recipe is—you can easily swap out toppings or crust ideas to suit your taste or dietary needs. Feel free to get creative! When I first tried this, I stuck with the classic graham cracker base, but since then, I’ve experimented with all kinds of flavors.
- Gluten-Free Variation: Use gluten-free graham crackers or crushed almonds for the crust—my friend who’s gluten-sensitive loves this alternate crust!
- Fruit Flavors: Swapping out the toppings with fresh berries, mango salsa, or a homemade raspberry sauce adds a delicious seasonal twist.
- Chocolate Lover’s Edition: Add a sprinkle of cocoa powder in the filling or top with mini chocolate chips and chocolate ganache—my family goes crazy for this one.
- Lower Sugar Option: Use powdered erythritol or your favorite sugar substitute to reduce the sweetness while keeping the creamy texture.
How to Make No-Bake Cheesecake Cups Recipe
Step 1: Prep your workspace and cups
Start by choosing the cups you want to use—whether small 4-6 oz or larger 9 oz cups, the size affects the amount of graham cracker crumbs and servings. For big 9 oz cups, I use about 2 tablespoons of crumbs; for smaller ones, go with 1 tablespoon. Lining up your cups now makes assembling a breeze later. This little bit of prep saves you from scrambling once the filling is ready.
Step 2: Chill your mixing bowl for the whipped cream
Pop a metal or glass mixing bowl into the freezer for 15 minutes. I discovered this trick because I struggled getting stiff peaks when whipping cream in a warm bowl. Chilled bowls keep the cream cold, making it whip up fluffy and fast—trust me, it’s a game changer.
Step 3: Beat cream cheese and powdered sugar
Using an electric mixer, whip the softened cream cheese with 1 cup of powdered sugar until smooth and creamy, about 1-2 minutes. Make sure there aren’t any lumps—this step ensures your cheesecake filling will have that luscious, silky mouthfeel.
Step 4: Whip the cream, sugar, and flavorings
Remove your chilled bowl from the freezer and add heavy whipping cream, remaining ½ cup powdered sugar, fresh lemon juice, and vanilla extract. Beat it on medium-high speed until stiff peaks form, roughly 4-5 minutes. Watch closely here—stop once you can hold the bowl upside down without the cream falling. That’s your perfect consistency.
Step 5: Fold cream cheese into whipped cream
On low speed, gently mix the cream cheese mixture into the whipped cream for 1-2 minutes, just until fully combined. You want to maintain as much air as possible, so don’t overmix. When you can’t distinguish which is cream cheese and which is whipped cream, you’re good to go.
Step 6: Assemble your cheesecake cups
Transfer the cheesecake filling to a piping bag or a simple zip-top bag with a corner snipped off. Pipe or spoon the filling into the cups over the graham cracker base, filling each about three-quarters full. Using a piping bag not only looks pretty but makes the process cleaner and faster in my experience.
Step 7: Chill and top
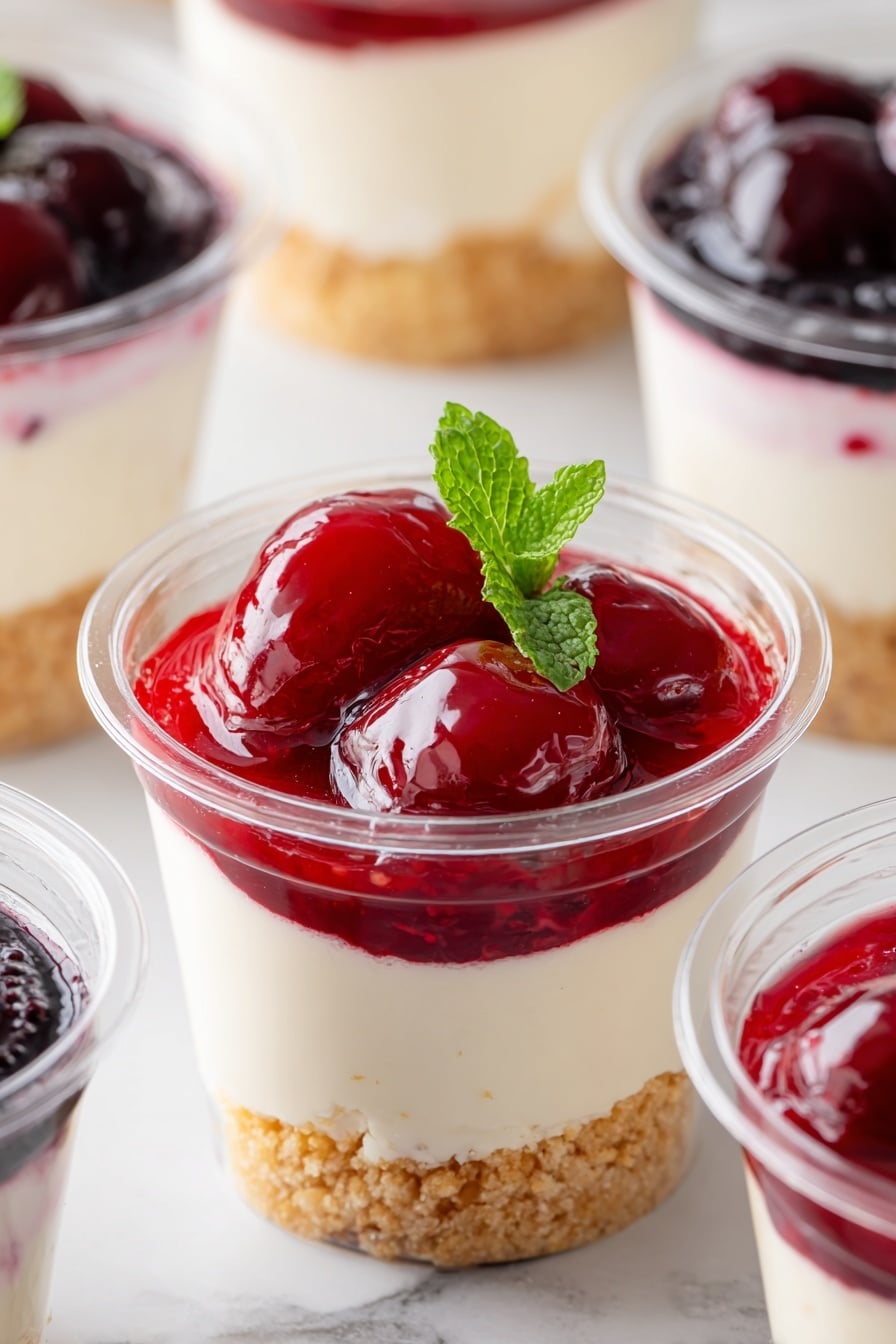
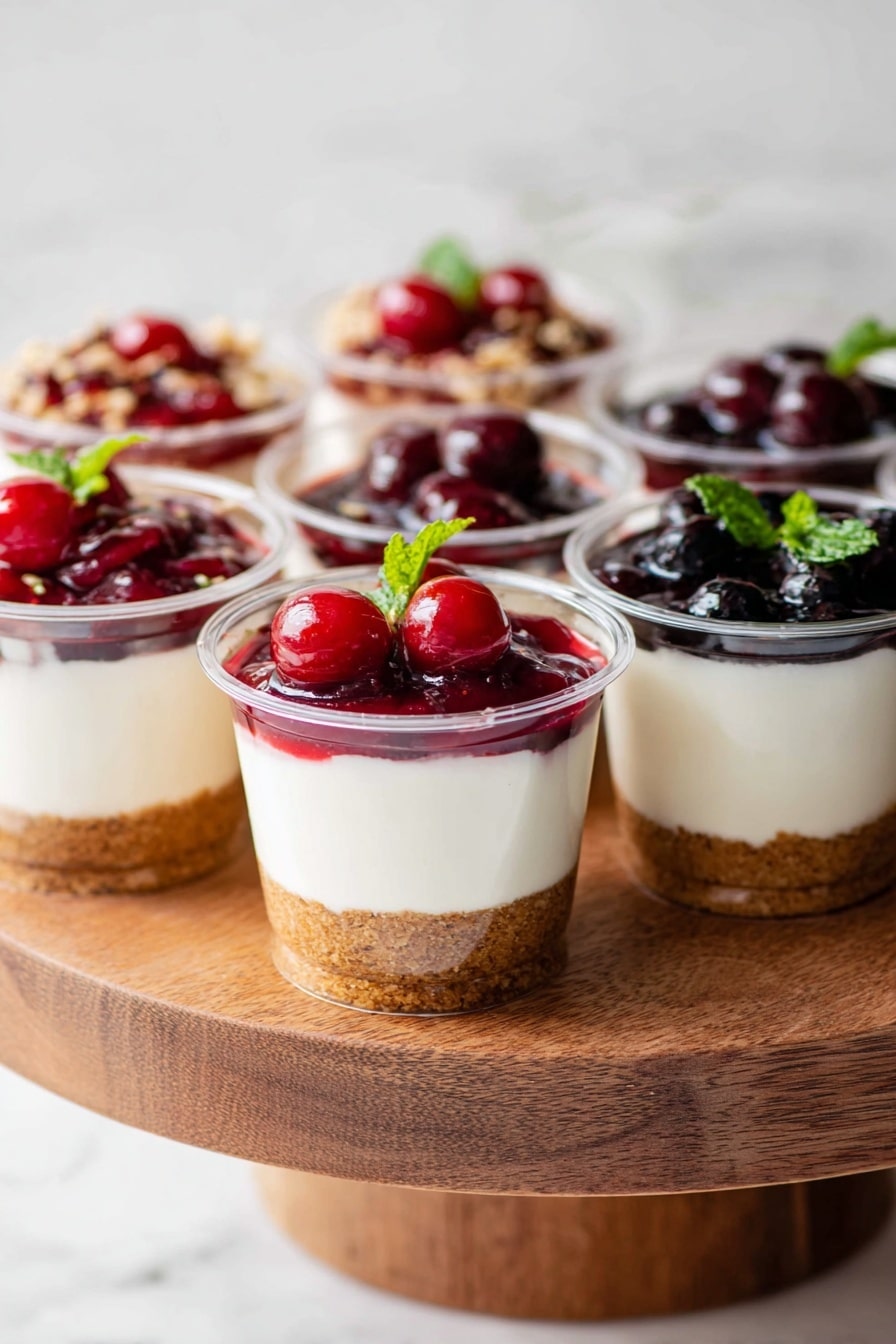
Refrigerate the cups for at least 1-2 hours so they set up nicely. If you want to prep ahead, you can cover them with plastic wrap and chill overnight. Before serving, add your favorite topping like cherry pie filling, blueberry jam, homemade strawberry sauce, or even crushed Oreos—whatever makes your heart happy!
Pro Tips for Making No-Bake Cheesecake Cups Recipe
- Chill the Bowl: I learned the hard way—cold bowls make whipping cream much easier and fluffier.
- Room Temperature Cream Cheese: Soft cream cheese blends smoother, so don’t skip letting it sit out before mixing.
- Don’t Overmix Filling: Folding gently preserves airiness, giving your cheesecake cups that light and creamy texture.
- Customize Carefully: When adding toppings, be mindful of moisture to keep the crust from getting soggy.
How to Serve No-Bake Cheesecake Cups Recipe
Garnishes
I often top my cheesecake cups with a simple spoonful of cherry pie filling or fresh blueberries for that perfect balance of sweetness and tartness. If I’m feeling decadent, I drizzle a little chocolate ganache or sprinkle crushed Oreos on top. These garnishes not only taste amazing but add beautiful pops of color that make these cups extra special when serving friends.
Side Dishes
Since these are already rich and creamy, I like to keep sides light and fresh. A crisp fruit salad or a refreshing mint tea pairs beautifully without overpowering the dessert. Sometimes, I serve it alongside a sparkling beverage or coffee—perfect for a casual get-together or brunch.
Creative Ways to Present
I’ve had great success layering these cheesecake cups in clear mini mason jars for picnics or party favors—that way guests can grab and go. You can also add an edible flower or a sprig of fresh mint on top to dress them up for special occasions like birthdays or dinner parties. Presentation really does make a difference in how your guests enjoy this treat.
Make Ahead and Storage
Storing Leftovers
I store leftover cheesecake cups tightly covered in the fridge, and they keep well for up to 3 days. The flavors actually deepen when chilled overnight. Just be sure to cover them so they don’t absorb fridge odors or dry out.
Freezing
I’ve frozen these cheesecake cups a few times by wrapping each cup individually in plastic wrap and placing them in an airtight container. Thaw them in the fridge overnight before serving; the texture stays almost as good as fresh, which is a lifesaver when prepping in advance.
Reheating
Since these are best served chilled, I don’t recommend reheating. Instead, just let frozen or refrigerated cups come to room temperature for about 15 minutes before enjoying—that way the flavors open up without losing any creaminess.
FAQs
-
Can I use low-fat cream cheese or milk instead of full fat?
You could, but the texture and flavor won’t be quite as creamy or rich. Full fat cream cheese and heavy cream work best to give that classic cheesecake mouthfeel you’re after.
-
How long do these cheesecake cups keep in the fridge?
When stored covered, they stay fresh for up to 3 days. It’s best to enjoy them sooner so you get the full creamy texture and fresh flavor.
-
Can I make these gluten free?
Absolutely! Just swap out the graham cracker crumbs for gluten-free alternatives or crunchy nut crusts like almond meal.
-
What’s the best way to get stiff peaks when whipping cream?
Chilling your mixing bowl and beaters beforehand helps, as does using cold heavy cream. Whip on medium-high speed and watch closely to avoid overwhipping.
-
Can I prepare these a day ahead?
Yes! In fact, chilling them overnight allows the flavors to meld beautifully. Just cover tightly with plastic wrap or lid to avoid drying out.
Final Thoughts
This No-Bake Cheesecake Cups Recipe quickly became a favorite in my kitchen because it’s reliable, delicious, and downright charming. Whether you’re a seasoned baker or just starting out, you’ll enjoy making these because they come together with minimal fuss and max flavor. Trust me, your friends and family will be asking for the recipe once they taste how creamy and decadent these little cups are. So go ahead—give this recipe a try and treat yourself to a no-fail dessert you can whip up anytime!
Print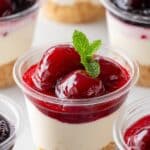
No-Bake Cheesecake Cups Recipe
- Prep Time: 15 minutes
- Cook Time: 0 minutes
- Total Time: 1 hour 15 minutes
- Yield: 8 servings
- Category: Dessert
- Method: No-Cook
- Cuisine: American
Description
Delicious and easy no-bake cheesecake cups made with a simple graham cracker crust and a creamy cream cheese filling, topped with your favorite fruits or candies. Perfect for quick entertaining or a sweet treat any time.
Ingredients
Crust
- Graham cracker crumbs (quantity depends on cup size)
Cheesecake Filling
- 16 oz full fat cream cheese (2 8 oz packages, room temperature)
- 2 cups (473ml) heavy whipping cream (1 pint)
- 1 ½ cups (169g) powdered sugar (divided into 1 cup and 1/2 cup)
- 1 Tbsp fresh lemon juice
- 2 tsp vanilla extract
Instructions
- Prepare Cups and Crust: Choose your cup size; for 9 oz cups, place 2 tablespoons of graham cracker crumbs at the bottom of each of 8 cups. For smaller 4-6 oz cups, use 1 tablespoon crumbs in 12-16 cups.
- Chill Mixing Bowl: Place a metal or glass mixing bowl in the freezer for 15 minutes to chill; this will help when whipping the cream.
- Mix Cream Cheese and Sugar: In a separate bowl, beat cream cheese with 1 cup of powdered sugar using an electric mixer until smooth and creamy, about 1-2 minutes. Set aside.
- Whip Cream and Flavorings: Remove chilled bowl from freezer. Add heavy whipping cream, remaining 1/2 cup powdered sugar, lemon juice, and vanilla extract. Beat on medium-high until stiff peaks form, about 4-5 minutes.
- Combine Mixtures: Gently fold the cream cheese mixture into the whipped cream on low speed for 1-2 minutes, just until fully combined with no visible streaks.
- Fill Cups: Transfer the cheesecake filling into a piping bag or a ziplock bag with a corner cut off. Pipe the filling into the crusted cups, filling about three-quarters full.
- Chill: Refrigerate the cups for 1-2 hours. For longer chilling, cover each cup with plastic wrap. You can refrigerate overnight for best results.
- Add Toppings and Serve: Before serving, add your choice of toppings such as cherry or blueberry pie filling, homemade strawberry sauce, chocolate ganache, crushed Oreos, or chopped candies.
Notes
- These cheesecake cups are an easy, no-bake dessert perfect for entertaining or casual gatherings.
- Adjust the amount of graham cracker crumbs to match your cup size to ensure balanced crust.
- Chilling the mixing bowl helps achieve perfectly whipped cream with stiff peaks.
- You can prepare these cups a day ahead and refrigerate overnight—they taste even better the next day.
- Customize with a variety of toppings to suit different tastes and occasions.
Nutrition
- Serving Size: 1 serving
- Calories: 491 kcal
- Sugar: 26 g
- Sodium: 194 mg
- Fat: 41 g
- Saturated Fat: 25 g
- Unsaturated Fat: 12 g
- Trans Fat: 0 g
- Carbohydrates: 28 g
- Fiber: 0.01 g
- Protein: 5 g
- Cholesterol: 124 mg


