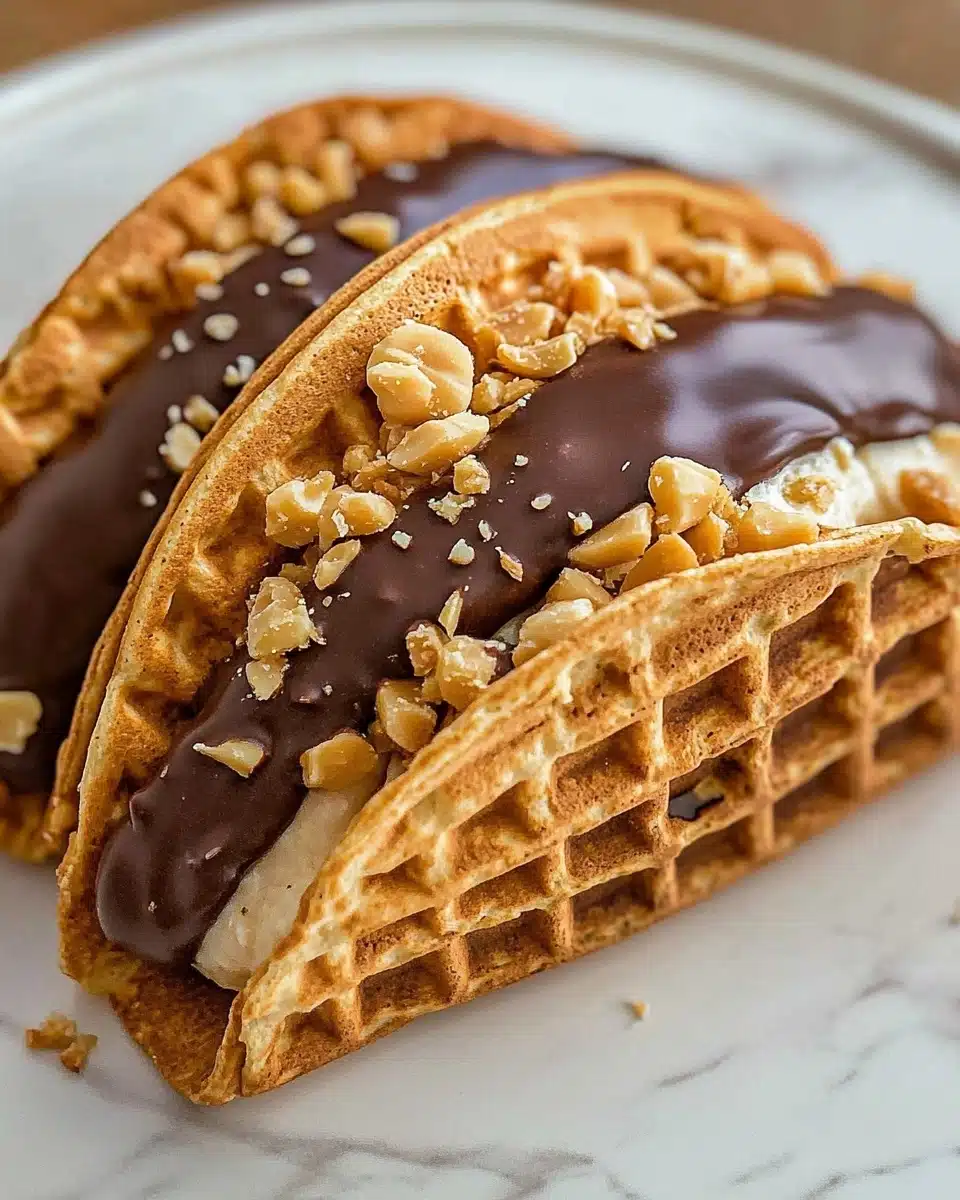
If you only ever enjoyed Choco Tacos from an ice cream truck, get ready to be delighted: these Homemade Choco Tacos taste like pure nostalgia with a delicious, gourmet twist. Each bite brings a crackly chocolate shell, creamy vanilla ice cream, and crunchy roasted peanuts all snuggled into a crispy waffle taco shell—what’s not to love?
Why You’ll Love This Recipe
- Pure Fun: Homemade Choco Tacos are as much fun to assemble as they are to devour, making them perfect for family nights or parties.
- Customizable Everything: You get to choose your favorite ice cream, chocolate, and toppings for a totally personalized treat every time.
- Nostalgic Flavors with a Homemade Upgrade: All the magic of the original, but with fresh, quality ingredients and that unbeatable homemade touch.
- Simple & Impressive: Minimal ingredients, easy steps, and such a wow-worthy dessert—everyone will think you’re an ice cream genius!
Ingredients You’ll Need
Homemade Choco Tacos come together with just a handful of pantry staples, but each ingredient plays a deliciously important role. Every component adds a different texture, color, and layer of flavor, building a dessert that’s both crisp and creamy, crunchy and melty—all in one heavenly bite!
- Waffle Cones (12): The foundation of your “taco”—they become irresistibly crunchy shells once reshaped and filled.
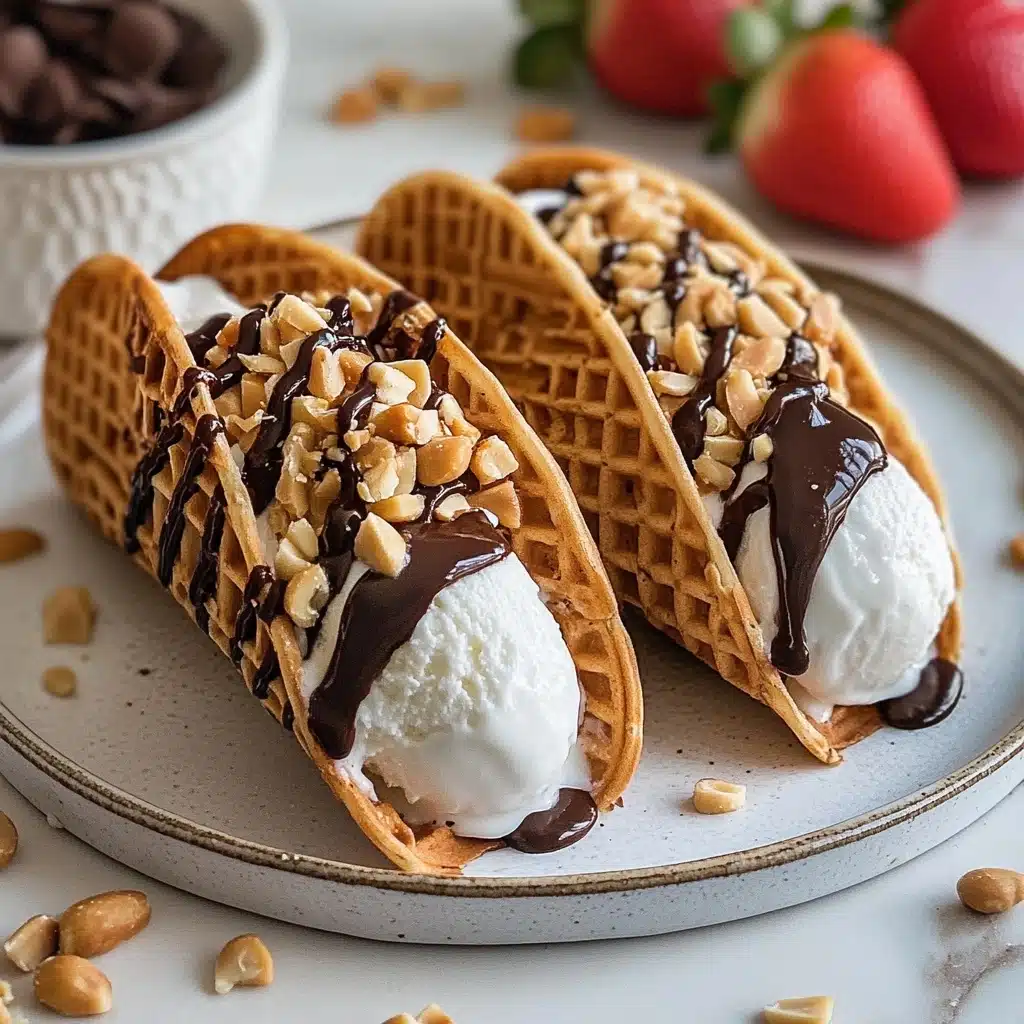
- Vanilla Ice Cream: Go with a creamy, high-quality ice cream for the dreamiest center; don’t be afraid to sub in your favorite flavor.
- Dark Chocolate Chips: Melting chocolate chips creates that snappy, classic Choco Taco shell—dark chocolate brings depth but semi-sweet or milk chocolate work too!
- Roasted Peanuts, Crushed: A quick sprinkle adds salty crunch and perfectly balances the sweet flavors.
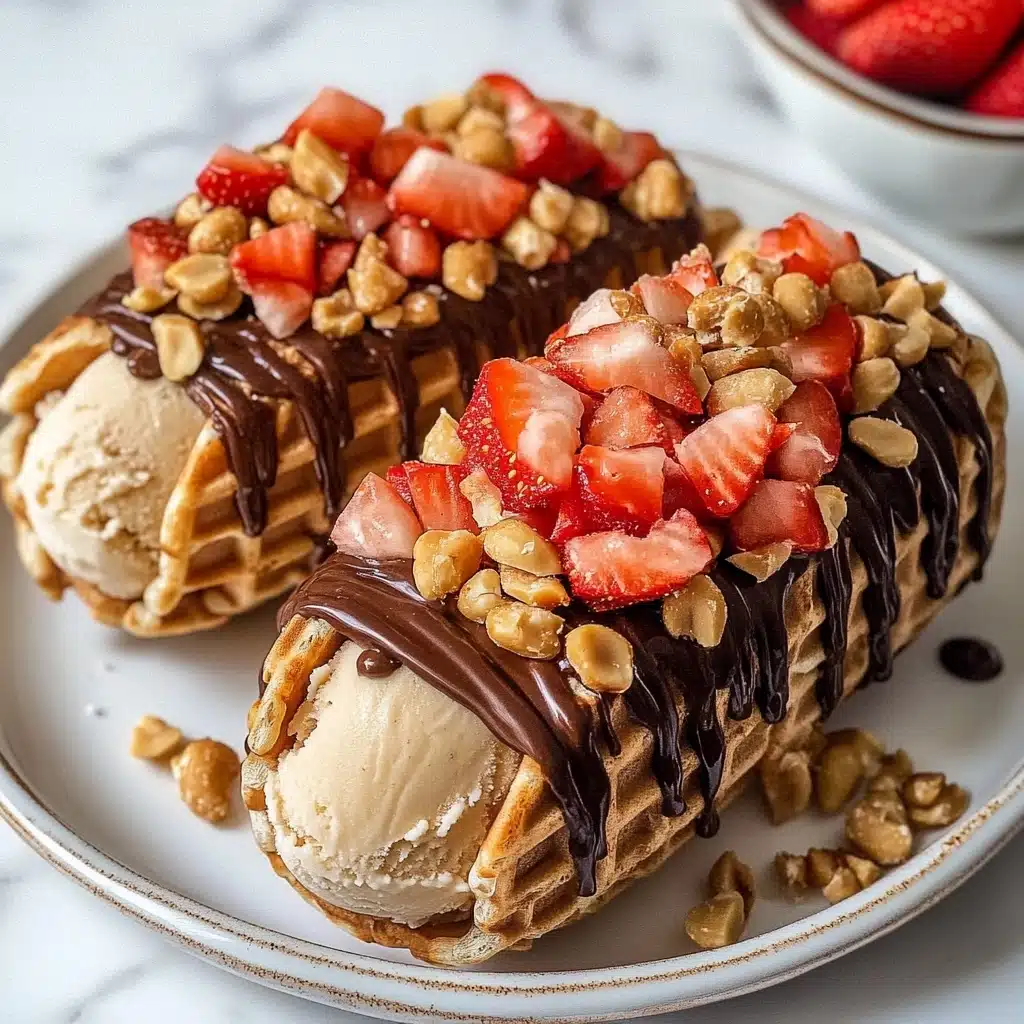
- Chopped Fruit (Optional): Fresh berries or chopped bananas make a gorgeous and juicy garnish if you’re feeling fancy.
Variations
Choco Tacos invite you to let your sweet tooth run wild—there are so many ways to personalize this playful dessert! Don’t hesitate to swap out flavors, adjust for dietary needs, or play with creative toppings to make them completely your own.
- Flavorful Ice Cream Swaps: Not a vanilla fan? Try chocolate, salted caramel, mint chocolate chip, or dairy-free coconut ice cream for a new spin.
- Different Shells: If you can’t find waffle cones, use homemade pizzelle cookies, stroopwafels, or any thin, crisp wafer that can be shaped.
- Nut-Free Treats: Allergic to peanuts? Top with toasted coconut, sprinkles, or crushed pretzels instead.
- Dipped & Drizzled: Use white chocolate, butterscotch chips, or a swirl of Nutella to coat your tacos for an extra decadent finish.
How to Make Homemade Choco Tacos
Step 1: Shape the Waffle Cone Shells
This is where the magic happens! Humidify a few paper towels, wrap them around each waffle cone, and microwave them until the cones are just soft enough to bend. Quickly mold each one using the edge of a cutting board or a sturdy handle—you’ll be amazed at how easily they turn into perfect taco shells! Work one at a time so each shell holds its signature crunch.
Step 2: Fill with Ice Cream
Spoon a generous amount of vanilla ice cream into each taco shell, filling almost to the top. If your ice cream starts to soften (let’s be honest, it will!), place your filled tacos in the freezer so they hold their shape and don’t melt during the next step.
Step 3: Coat in Chocolate and Add Peanuts
Melt your chocolate chips using a classic double boiler (a bowl over a pot of simmering water), stirring until glossy and smooth. Dip or drizzle the chocolate over each filled taco, then immediately shower with crushed roasted peanuts while the chocolate is still wet for ultimate stick power.
Step 4: Freeze and Garnish
Place your Homemade Choco Tacos in the freezer for a final chill—about 10 minutes is all it takes for the chocolate to set and the shells to hold their snap. Add fresh chopped fruit for a pop of color and a refreshing finish right before serving, if desired.
Pro Tips for Making Homemade Choco Tacos
- Shell Shaping Secret: Work quickly after microwaving the cones! Warm cones are pliable for just a minute or two, so shape while they’re soft and handle gently for a taco that stays crisp.
- Ultra-Smooth Chocolate: If your chocolate is too thick, add a teaspoon of coconut oil when melting—it creates a perfectly snappy shell that won’t seize up or flake.
- No-Mess Filling: Scoop your ice cream ahead and freeze it in taco shapes (using plastic wrap and an empty taco shell as a mold!) to make quick assembly—and less melting mess—a breeze.
- Peanut Crunch Perfection: Chop your peanuts on the smaller side so every bite gets a salty burst, and sprinkle them while the chocolate is freshly melted for maximum stick.
How to Serve Homemade Choco Tacos
Garnishes
For that classic Choco Taco look (and even more festive fun), go wild with toppings! A sprinkle of extra crushed peanuts, a handful of colored sprinkles, or a drizzle of caramel or extra melted chocolate takes these over the top. A scattering of bright fruit like berries or kiwi adds freshness and color—perfect for parties or to delight every kid (or kid at heart) at your table.
Side Dishes
Serve these Homemade Choco Tacos alongside a summery fruit salad, a bowl of maraschino cherries, or an assortment of simple cookies for a playful dessert spread. If you’re celebrating, pair with milkshakes or sparkling lemonade for the ultimate throwback ice cream social vibe!
Creative Ways to Present
Let your imagination run wild: arrange Homemade Choco Tacos upright in a muffin tin or taco holder for a taco “bar,” or wrap each taco in parchment for easy grab-and-go at parties. For an impressive effect, line them up on a platter with different flavors and dips, or set up a DIY toppings station for guests to finish their own tacos.
Make Ahead and Storage
Storing Leftovers
Choco Tacos hold up beautifully in the freezer—just place any extras in an airtight container or carefully wrap them in foil or plastic wrap. They’ll keep their crave-worthy crunch for up to a week, so you can always have something sweet on standby!
Freezing
If you plan on stocking up your dessert stash, freeze Homemade Choco Tacos for up to one month. Separate layers with parchment paper so they don’t stick, and be sure to keep them at the back of your freezer for optimal freshness and texture.
Reheating
No reheating needed—these beauties are meant to be enjoyed straight from the freezer! If the chocolate feels too hard, let your Choco Taco sit out for a minute or two for the perfect combination of creamy center and crisp shell.
FAQs
-
Can I use gluten-free cones for Homemade Choco Tacos?
Absolutely! As long as your gluten-free cones are thin and crisp, you can reshape and use them just like traditional waffle cones. Always microwave and shape gently, as gluten-free shells can be a tad more delicate.
-
What’s the best way to keep the taco shells crispy?
Work quickly during shaping and ice cream-filling—chilling your taco shells before and after filling helps maintain their satisfying crunch. Also, avoid overfilling so the shell doesn’t get soggy before you enjoy it!
-
Can I make Choco Tacos ahead of time for a party?
Yes! Simply follow all the steps, freeze your finished Homemade Choco Tacos, and keep them in an airtight container until serving time. They’re actually even better once they’ve had a little time to firm up in the freezer.
-
Do I have to use peanuts? What else can I use for toppings?
No peanuts? No problem. Try toasted almonds, pistachios, coconut flakes, rainbow sprinkles, or chocolate shavings—the sky’s the limit for customizing your Homemade Choco Tacos!
Final Thoughts
Once you taste the creamy, chocolatey, crunchy joy of Homemade Choco Tacos, you’ll know why I can never resist sharing them. They’re pure happiness in hand-held form—nostalgic, crowd-pleasing, and completely customizable. Gather your favorite people and make a batch; I promise, smiles are guaranteed!
Print
Homemade Choco Tacos Recipe
- Prep Time: 20min
- Total Time: 20min
- Yield: Up to 12 Tacos
- Category: Dessert
- Method: Microwaving, Boiling, Freezing
- Cuisine: American
- Diet: Vegetarian
Description
Indulge in the nostalgic delight of Homemade Choco Tacos, a fun and easy dessert that combines crunchy waffle cone shells, creamy vanilla ice cream, rich dark chocolate, and crunchy peanuts.
Ingredients
Waffle Cone Taco Shells:
- 12 waffle cones
Fillings and Toppings:
- Heinen’s vanilla ice cream
- Heinen’s dark chocolate chips
- Heinen’s roasted peanuts, crushed
- Chopped fruit, for garnish (optional)
Instructions
- Prepare Waffle Cone Taco Shells: Dampen 2-3 paper towels with warm water. Carefully wrap a waffle cone and microwave for 30 seconds. Shape into a taco shell while warm. Repeat with remaining cones.
- Melt Chocolate: Melt dark chocolate chips in a bowl over boiling water. Set aside once melted.
- Fill Taco Shells: Fill taco shells with vanilla ice cream. Dip in melted chocolate or drizzle over top.
- Add Toppings: Sprinkle with crushed peanuts. Freeze for 10 minutes.
- Serve: Enjoy immediately with chopped fruit if desired.
Notes
- Be creative with toppings like sprinkles, caramel sauce, or chopped nuts.
- Experiment with different ice cream flavors for a unique twist.
Nutrition
- Serving Size: 1 Choco Taco
- Calories: Approx. 250
- Sugar: Approx. 20g
- Sodium: Approx. 100mg
- Fat: Approx. 12g
- Saturated Fat: Approx. 6g
- Unsaturated Fat: Approx. 5g
- Trans Fat: 0g
- Carbohydrates: Approx. 30g
- Fiber: Approx. 2g
- Protein: Approx. 3g
- Cholesterol: Approx. 10mg


