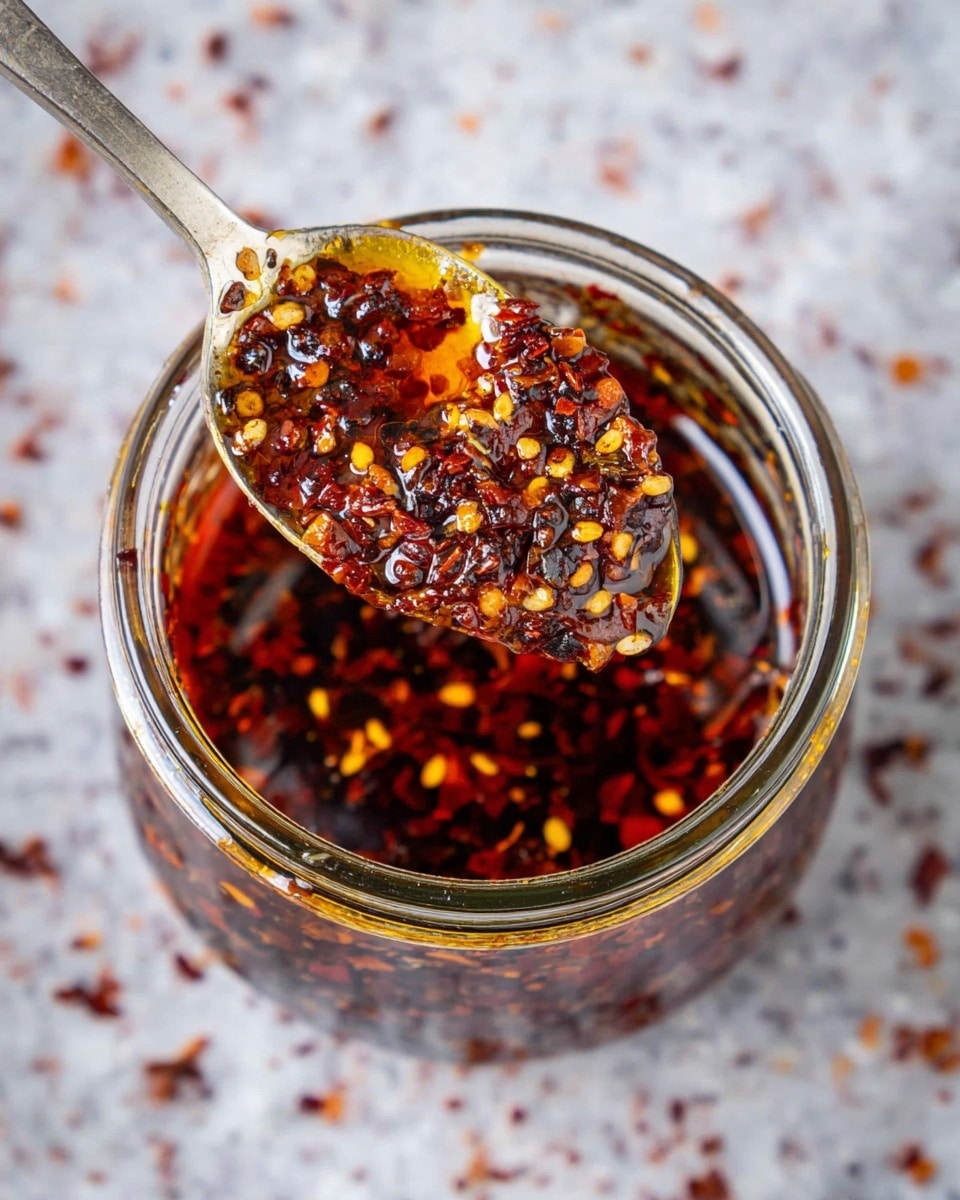
I absolutely love sharing this Homemade Chili Crisp Recipe with friends because it’s one of those magical condiments that instantly amps up any dish. Whether you’re drizzling it over rice, tossing it with noodles, or adding a spicy kick to your eggs, this chili crisp is bursting with flavor and texture that keeps you coming back for more. When I first tried making chili crisp at home, I was amazed at how customizable and fresh it tasted compared to store-bought versions.
You’ll find that making your own chili crisp is not only satisfying, but it also lets you control the heat and ingredients—no mystery preservatives here. Plus, it’s a fantastic way to preserve those chili peppers and aromatic spices you love, turning them into a versatile kitchen staple that enhances everything from stir-fries to salads. Trust me, once you’ve made this Homemade Chili Crisp Recipe, you’ll want to keep a jar in your fridge at all times!
Why You’ll Love This Recipe
- Authentic Flavor: Made from simple, fresh ingredients that come together with intense, layered flavors.
- Versatile Use: Perfect for spicing up everything from dumplings to scrambled eggs, and even salads.
- Customizable Heat: You can easily adjust the spice level to your taste by using different chili flakes or peppers.
- Made Ahead Convenience: Refrigerates beautifully and actually tastes even better the next day, so you can prep in advance.

Ingredients You’ll Need
The ingredients for this Homemade Chili Crisp Recipe are simple but thoughtfully chosen so they harmonize beautifully. A good quality oil and fresh aromatics like garlic and shallots are essential, and the touch of soy sauce lends a lovely umami kick you don’t want to skip.
- Vegetable or Peanut Oil: Use a neutral oil with a high smoke point to avoid bitterness and allow the flavors to shine.
- Serrano Peppers: They add fresh heat and depth; you can swap for another chili if you prefer it milder or hotter.
- Shallot: Adds a subtle sweetness and complexity that deepens the flavor.
- Garlic: Essential for that punchy, savory background note.
- Black or Sichuan Peppercorns: I love using Sichuan peppercorns for their floral, numbing heat, but black pepper works well too.
- Red Chili Flakes: The backbone of the fiery crispy texture loved in chili crisp.
- Smoked Paprika or Gochugaru: I like smoked paprika for a smoky depth, but Gochugaru adds authentic Korean chili flavor.
- Soy Sauce: Brings richness and umami to the mix—don’t skip it!
- Sugar: Balances the heat and acidity for a well-rounded flavor.
- MSG (Optional): Intensifies the savory notes; you can replace with a pinch of sea salt if preferred.
- Cinnamon Stick and Star Anise (Optional): Add these for a warm, aromatic twist that’s incredible if you want a more complex flavor profile.
Variations
I love experimenting with this recipe — it’s great because you can tweak the spices and heat level to suit your mood or what’s in your pantry. Don’t be afraid to make it your own!
- Milder Version: I’ve made it with fewer serrano peppers and milder chili flakes when cooking for friends who don’t love intense heat.
- Extra Crispy: Adding a bit more oil and cooking the garlic bits a little longer gets those crunchy morsels just how my family adores them.
- Aromatic Boost: The optional cinnamon stick and star anise add a lovely depth that transformed this chili crisp into something really special for holiday meals.
- Gluten-Free: Just be sure to use gluten-free soy sauce if that matters to you.
How to Make Homemade Chili Crisp Recipe
Step 1: Infuse Your Oil
Start by placing your oil in a small pot along with the chopped serrano peppers, shallot, garlic, and peppercorns. If you’re using cinnamon and star anise, toss those in here too. Heat over medium-low and let this gently simmer for 20-30 minutes—you want the aromatics to brown slowly without burning. This slow cooking brings out a beautiful toasted flavor in the oil that’s key to a perfect chili crisp.
Step 2: Mix Your Dry Seasonings
While your oil is warming, combine the chili flakes, smoked paprika (or Gochugaru), soy sauce, sugar, and optional MSG in a heat-proof bowl. This mix will be the spicy, savory base that your infused oil will marry with.
Step 3: Strain and Combine
Once your oil and aromatics have browned nicely, remove the pot from heat and let it cool for a few minutes. Then carefully strain the oil into your chili flake mixture. The crispy bits will catch in the strainer—set those aside to cool and crisp up fully before adding back. Don’t forget to fish out the cinnamon stick and star anise pods!
Step 4: Bring it All Together
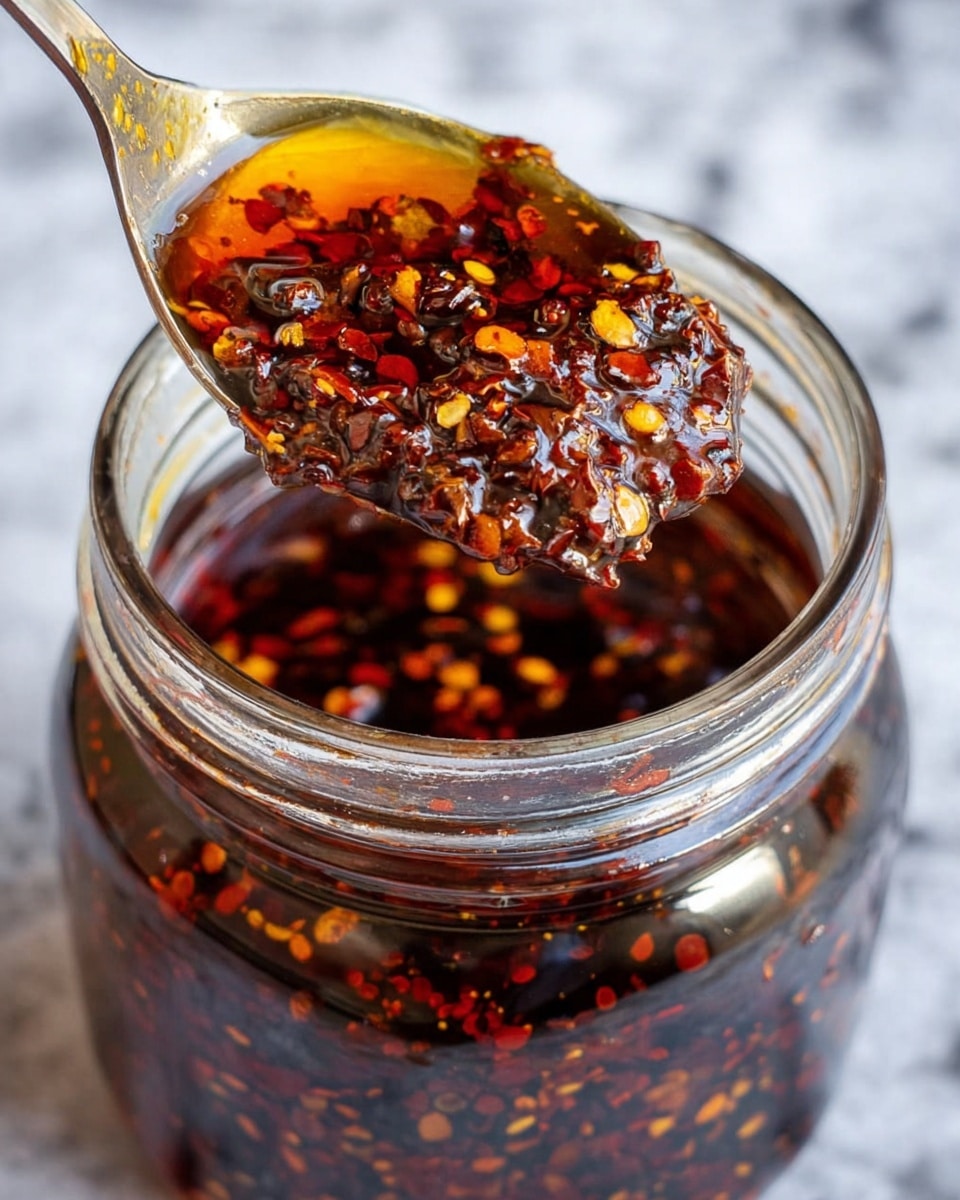
After the crispy bits have cooled, stir them gently back into the oil mixture. Cover your bowl and refrigerate overnight at least; this resting time really lets all the flavors develop and intensify. When you’re ready to serve, give it a good stir and enjoy the layers of crunch and spice!
Pro Tips for Making Homemade Chili Crisp Recipe
- Low and Slow Cooking: I learned this trick the hard way—cooking the aromatics on too high heat can make your oil taste burnt. Keep it gentle for the best flavor.
- Crispy Bits Magic: If your crispy bits don’t get crunchy enough, just return them to the pot with a splash of the chili oil and gently heat until crispy again.
- Oil Choice Matters: Using peanut oil adds a subtle nuttiness, but vegetable oil is perfect if you want a cleaner flavor that lets the spices shine.
- Flavor Development: Refrigerating your chili crisp overnight makes such a difference I always plan ahead!
How to Serve Homemade Chili Crisp Recipe
Garnishes
When serving, I like to sprinkle some extra crispy fried garlic on top and sometimes a few toasted sesame seeds for a nutty finish. A drizzle over freshly steamed broccoli or even avocado toast instantly makes it restaurant-worthy.
Side Dishes
My family goes crazy for chili crisp when served with simple white rice or cold noodles. It also elevates dumplings, grilled meats, and even pizza! Honestly, anything that benefits from some heat and crunch pairs wonderfully.
Creative Ways to Present
For special gatherings, I like serving chili crisp in a tiny dipping bowl surrounded by an array of finger foods like spring rolls or bao buns. Another fun idea is adding a spoonful into deviled eggs or drizzling over homemade popcorn for an unexpected spicy snack.
Make Ahead and Storage
Storing Leftovers
I keep my chili crisp in a clean, airtight jar in the fridge. It lasts up to a month, and the flavor actually intensifies over time. Just make sure to use a clean spoon every time to avoid contamination—that’s key for freshness.
Freezing
Although I rarely freeze chili crisp because we use it fast, it can be frozen in small containers if you want to store it longer. Just thaw overnight in the fridge and gently stir before use to bring back the texture.
Reheating
If the oil solidifies in the fridge, I gently warm the chili crisp in a bowl over hot water or microwave for a few seconds, stirring until smooth to restore that perfect pourable texture.
FAQs
-
Is Homemade Chili Crisp Recipe very spicy?
The heat level can be adjusted easily by choosing milder or hotter peppers and chili flakes. If you prefer less spice, reduce the serrano peppers and chili flakes, or use milder chili varieties. This recipe is very flexible to suit your taste.
-
Can I use other oils besides vegetable or peanut oil?
Yes! Just make sure the oil has a high smoke point and a neutral or pleasant flavor so it doesn’t overpower the spices. Sunflower or grapeseed oil can work well. Avoid extra virgin olive oil as it can have a strong flavor and lower smoke point.
-
How do I keep the crispy bits crispy?
After straining, let the bits cool completely so they crisp up. If they’re not crunchy enough, simply return them to the pot with some oil and gently heat until crispy before mixing back in. This step is crucial for texture.
-
How long can I store Homemade Chili Crisp Recipe?
The chili crisp keeps well for up to one month in the refrigerator when stored in a clean airtight jar. Always use a clean spoon to prevent contamination, and the flavors often improve the longer it sits.
Final Thoughts
This Homemade Chili Crisp Recipe is something I genuinely consider a kitchen game-changer. I love having a jar ready to add instant flavor, heat, and crunch to just about any meal. It’s deceptively simple to make yet adds so much character, and honestly, I can’t imagine cooking without it now. Give it a try—once you taste the freshness and depth, you’ll wonder how you ever lived without this fiery, crispy goodness in your fridge!
Print
Homemade Chili Crisp Recipe
- Prep Time: 15 minutes
- Cook Time: 25 minutes
- Total Time: 40 minutes
- Yield: About 32 tablespoons (2 cups)
- Category: Condiment
- Method: Stovetop
- Cuisine: Asian Fusion
Description
This homemade Chili Crisp recipe delivers a flavorful and versatile spicy condiment featuring crunchy, aromatic bits of serrano peppers, shallots, and garlic infused in fragrant, chili-infused oil. Perfect for adding heat and umami to noodles, rice, dumplings, and more, this easy-to-make chili oil gets better with time as the flavors meld.
Ingredients
Main Ingredients
- 1.5 cups vegetable oil or peanut oil
- 2 serrano peppers, rough chopped
- 1 shallot, rough chopped
- 10 cloves garlic, rough chopped
- 1 teaspoon black peppercorns or Sichuan peppercorns
- 1/4 cup red chili flakes
- 1 tablespoon smoked paprika or Gochugaru seasoning blend or cayenne for more heat
- 1 tablespoon soy sauce
- 1 teaspoon sugar
- 1/2 teaspoon MSG (optional) or sea salt as an alternative
Optional Additions for Extra Flavor
- 1 3-inch cinnamon stick
- 4 star anise pods
Instructions
- Prepare the Infused Oil: Add the vegetable or peanut oil to a small pot along with the rough chopped serrano peppers, shallot, garlic, black or Sichuan peppercorns, and the optional cinnamon stick and star anise pods. Heat the oil over medium-low heat and allow it to simmer gently for 20-30 minutes. Cook until the ingredients brown and crisp in the oil, adjusting time as needed depending on the size of the chopped peppers and temperature. This process infuses the oil with deep aromatic flavors.
- Cool the Oil: Remove the pot from heat and let it cool for 2-3 minutes. This resting period lets the flavors continue to infuse the oil even further as it cools slightly.
- Mix the Dry Ingredients: In a separate heatproof bowl, combine the red chili flakes, smoked paprika or chosen heat powder (Gochugaru or cayenne), soy sauce, sugar, and MSG (or sea salt). This spicy mixture will become the base for your chili crisp.
- Strain and Combine: Carefully strain the warm infused oil into the bowl with the chili flake mixture, separating out the browned crispy bits of serrano, shallot, and garlic in the strainer. Set aside these crispy bits to cool so they can fully crisp up as the oil cools.
- Remove Whole Spices: Take out the cinnamon stick and star anise pods from the strained oil. Then, fold the reserved crispy browned bits back into the chili-infused oil and spice mixture, incorporating all the textural elements.
- Let the Flavors Develop: Cover the bowl and refrigerate the chili crisp overnight. This resting time allows the flavors to develop and deepen, delivering a richer and more balanced condiment. Stir well before serving to evenly distribute the crispy pieces and oil.
Notes
- Makes about 2 cups of chili crisp. Store in an airtight container in the refrigerator for up to 1 month.
- The chili crisp can be used immediately but tastes better after sitting overnight or a day for the flavors to mature.
- If the crispy bits are not crisp enough after cooling, gently reheat them in a small amount of the chili oil over low heat until they crisp up fully, then mix them back in.
Nutrition
- Serving Size: 1 tablespoon
- Calories: 120
- Sugar: 0.3g
- Sodium: 150mg
- Fat: 14g
- Saturated Fat: 2g
- Unsaturated Fat: 12g
- Trans Fat: 0g
- Carbohydrates: 1g
- Fiber: 0.3g
- Protein: 0.3g
- Cholesterol: 0mg


