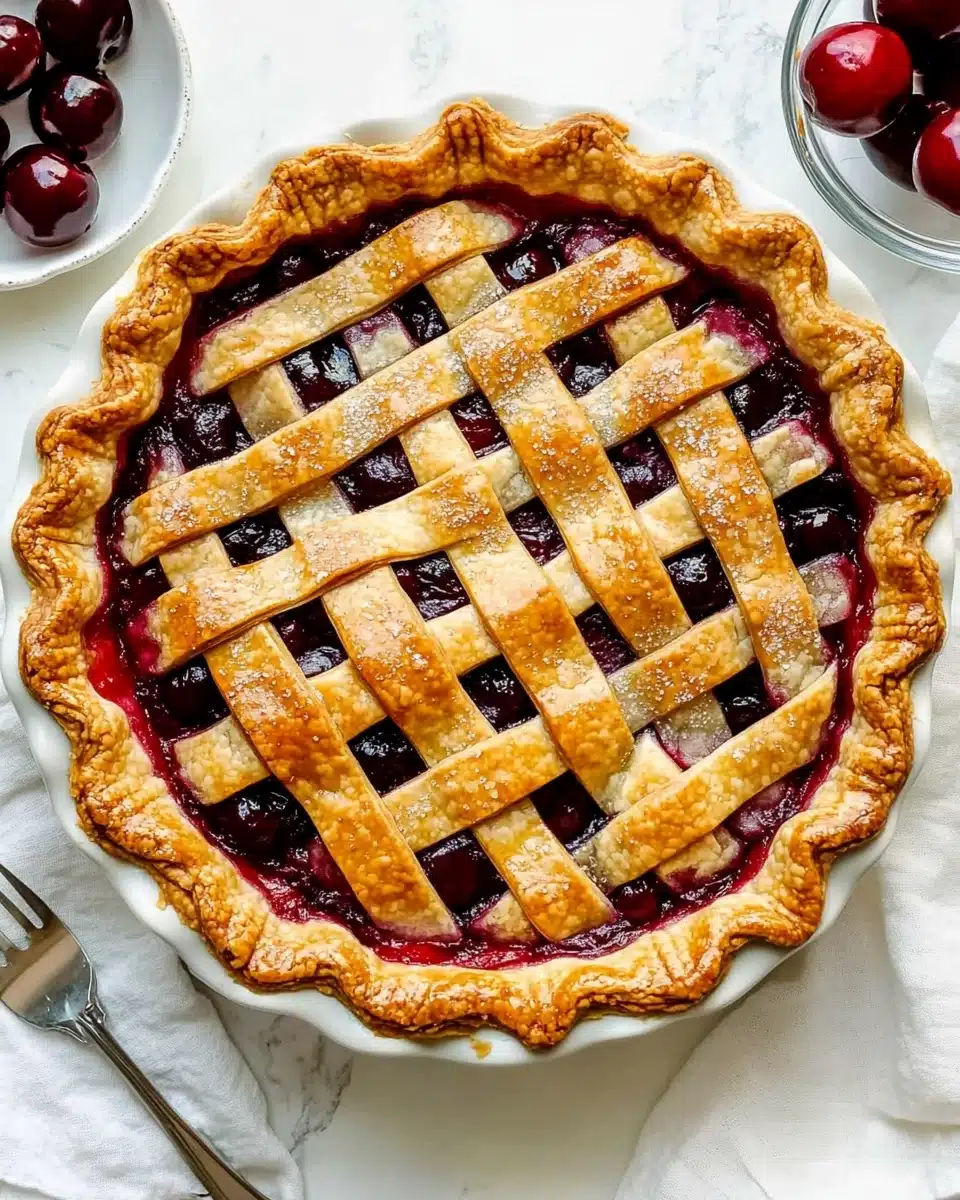
If there’s one classic dessert I crave as soon as cherries hit the farmer’s market, it’s Homemade Cherry Pie Recipe. This glorious pie is the real deal: a flaky, golden crust, juicy sweet-tart cherry filling, and that perfect sliceable texture. Whether you’re baking for a picnic or just want a taste of pure summer, this recipe is a labor of love that everyone will adore.
Why You’ll Love This Recipe
- All-Natural Real Fruit Flavor: Each bite bursts with sweet-tart cherries, letting the fruit shine—no canned filling here!
- Buttery, Flaky Crust: Nothing compares to a homemade double crust that’s crisp, tender, and beautifully golden.
- Easier Than You Think: With step-by-step guidance, even lattice crusts and pie newbies can master this stunning dessert.
- Perfect for Celebrations: The Homemade Cherry Pie Recipe steals the show at cookouts, birthdays, and every summer gathering (plus leftovers, if you’re lucky!).

Ingredients You’ll Need
Every superstar pie begins with simple, honest ingredients. Here’s the cast that brings our Homemade Cherry Pie Recipe to life, each one adding its own special magic to the flavor, texture, or that deep ruby color everyone swoons over.
- Homemade Pie Crust or All Butter Pie Crust: The foundation of any stellar pie—a double crust means both top and bottom are extra flaky and rich. Homemade is truly worth it here!
- Fresh Cherries (4 1/2 cups, pitted and chopped): The star! Using a mix of halved and quartered cherries gives you the best texture and juiciness.
- Granulated Sugar (2/3 cup): Sweetens the tart cherries just right, but still keeps their bright flavor front and center.
- Cornstarch (1/4 cup): Thickens the filling as it cooks so you get perfect slices (no runny messes here!).
- Lemon Juice (1 tablespoon): Brightens the filling and balances out the sweetness.
- Pure Vanilla Extract (1 teaspoon): An essential cozy background note that brings depth.
- Almond Extract (1/4 teaspoon): Just a whisper adds aromatic magic and makes cherries taste even more cherry-like.
- Cold Unsalted Butter (1 tablespoon, cubed): Melts into the filling for extra silkiness and flavor.
- Egg Wash (1 egg + 1 tablespoon milk): Helps your crust bake up shiny and beautifully golden brown.
- Coarse Sugar (optional): A sprinkle on top gives it an irresistible crunch and sparkle.
Variations
The beauty of the Homemade Cherry Pie Recipe is how flexible it can be. You can personalize your pie to suit different cherries, flavor notes, or dietary preferences—here are some of my favorite little switches.
- Sour Cherry Swap: Use tart sour cherries for a classic, tangy pie. Just remember to increase the sugar slightly to balance the sourness.
- Frozen Cherries: No fresh cherries? Frozen cherries work perfectly. Just don’t thaw them—toss them straight into the filling and follow the same steps.
- Almond Crunch Crust: Add a tablespoon of finely ground almonds to your crust dough for subtle nuttiness that pairs delightfully with cherries.
- Gluten-Free Version: Substitute your favorite gluten-free pie crust and thicken with a gluten-free alternative like arrowroot or tapioca starch.
How to Make Homemade Cherry Pie Recipe
Step 1: Prepare and Chill Your Pie Crust
Start this journey by making your favorite double pie crust, whether it’s Homemade or All Butter. After mixing and forming into two discs, wrap tightly in plastic and chill for at least two hours. This step is the not-so-secret secret to those beautifully flaky layers!
Step 2: Mix the Cherry Filling
In a big mixing bowl, combine your pitted, chopped cherries with sugar, cornstarch, lemon juice, vanilla, and almond extract. Stir everything together gently until the cherries are evenly coated and glossy. Cover and chill while you roll out the dough, letting the flavors mingle and the juices start to release.
Step 3: Roll Out and Fill the Bottom Crust
On a floured surface, roll out one pastry disc until it’s about 12 inches across. Carefully ease the dough into your 9-inch pie dish, making sure it’s smooth and tucked into every nook. Now, using a slotted spoon, heap that cherry filling into the crust—leave the excess juices in the bowl for later!
Step 4: Reduce the Juices
Poor the reserved cherry juices into a small saucepan and cook on low, stirring, until slightly thickened (about 3–4 minutes). Let it cool for 5 minutes—they’ll be syrupy and extra flavorful! Pour this magic reduction gently over the cherries in your pie shell, and dot with cold butter cubes.
Step 5: Roll Out Top Crust and Create Your Lattice
Roll out the remaining dough into a big circle, then slice into wide and narrow strips. Weave them into a lattice over the pie, alternating under and over. When you finish, press edges to seal, trim any excess, and crimp or flute for those beautiful bakery-style edges.
Step 6: Add Finishing Touches
Brush your lattice and edges with the egg wash, and if you’re feeling fancy, sprinkle with coarse sugar for extra crunch. Chill the pie one last time for 20–30 minutes—this ensures it bakes up as picture-perfect as it tastes.
Step 7: Bake to Golden Perfection
Bake at 400°F for 20 minutes, then lower to 375°F and continue for 30–40 minutes until the crust glows golden brown and you see juices happily bubbling up. If your crust edges brown too fast, cover them with a pie shield for the last stretch of baking.
Step 8: Cool Before Slicing
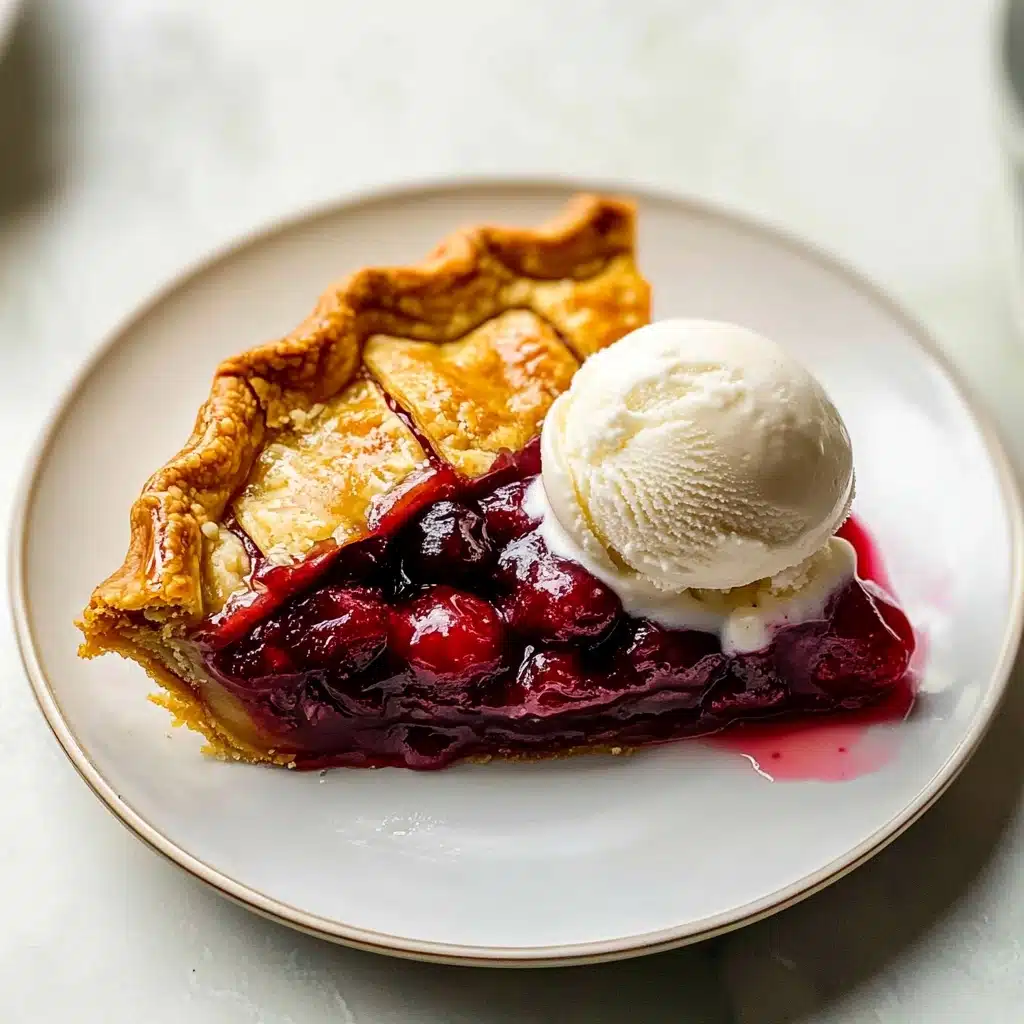
Remove pie from the oven and let it cool on a rack for at least 3–4 hours. As tempting as it is to dive in, waiting helps the filling set, so your slices hold beautifully.
Pro Tips for Making Homemade Cherry Pie Recipe
- Ultimate Cherry Prep: For best texture, combine halved and quartered cherries. It creates pockets of juiciness and prevents the filling from collapsing after baking.
- Juice Reduction Magic: Don’t skip reducing the cherry juices! This step ensures your filling is luscious and sliceable, not soggy or runny.
- Chill, Chill, Chill: Chill your assembled pie before baking for a crisper, flakier crust—especially on warm days or if your kitchen runs hot.
- Edge Protection Plan: Use a pie crust shield or foil strips during the final bake to keep your edges perfectly golden instead of overly brown.
How to Serve Homemade Cherry Pie Recipe
Garnishes
Serve slices with a cloud of barely sweetened whipped cream, a scoop of classic vanilla ice cream, or a scatter of toasted almond slices to echo that gorgeous almond extract aroma. A dusting of powdered sugar gives a pretty finish when you’re feeling fancy!
Side Dishes
Homemade Cherry Pie Recipe shines as the grand finale, but it also plays well with a savory barbecue spread, fresh summer salads, or alongside coffee as a midday treat. It’s so beloved, you might even find yourself sneaking slices for breakfast (been there, loved that!).
Creative Ways to Present
Show off your beautiful lattice! Try individual mini pies for picnics, top with sugared cherries or fresh mint leaves, or cut the pie into fun shapes with a cookie cutter for party finger food. A mini pitcher of warm cherry sauce drizzled over each slice is next-level decadence.
Make Ahead and Storage
Storing Leftovers
Cover any leftover cherry pie tightly and refrigerate. It’ll stay fresh, juicy, and irresistible for up to 5 days (though, honestly, leftovers rarely last that long in my house!). The crust keeps its texture and the filling only gets better by the slice.
Freezing
Baked Homemade Cherry Pie Recipe freezes like a dream—wrap the cooled pie snugly in plastic plus foil, and freeze for up to 3 months. Thaw overnight in the fridge, then let sit at room temperature before serving for best texture.
Reheating
Reheat slices in the oven at 300°F (about 10–15 minutes) for as-good-as-fresh flavor and a revived, flaky crust. If you’re in a hurry, a quick zap in the microwave works, but the oven keeps every bite just right.
FAQs
-
Can I use canned cherry pie filling instead of fresh cherries?
While you certainly can, the magic of the Homemade Cherry Pie Recipe comes from fresh or frozen cherries. Canned fillings tend to be sweeter and more gelatinous, so you’ll miss out on the vibrant, natural fruit flavor that makes this pie so special.
-
Why does my cherry pie filling come out runny?
This usually means the filling wasn’t thickened enough or the pie was sliced while still warm. Be sure to reduce the cherry juices (as described above) and let your pie cool completely before cutting for the cleanest slices.
-
What’s the best way to pit cherries for the pie?
A cherry pitter makes the job delightfully quick and easy, but if you don’t have one, a sturdy paperclip or chopstick will do in a pinch. Just push through the center and pop that pit right out!
-
Can I make the Homemade Cherry Pie Recipe in advance?
Absolutely! You can assemble the whole pie a day ahead and store at room temperature after cooling, or prep the crust and filling separately for a head start. The baked and cooled pie also freezes beautifully for future cravings.
Final Thoughts
This Homemade Cherry Pie Recipe turns even the simplest gathering into something unforgettable. Give it a try and share those gorgeous, jewel-toned slices with your favorite people—you’ll be the baker everyone talks about long after the last crumb is gone. Happy baking, friends!
Print
Homemade Cherry Pie Recipe
- Prep Time: 3 hours
- Cook Time: 55 minutes
- Total Time: 7 hours (includes cooling)
- Yield: 8-10 servings
- Category: Dessert
- Method: Baking
- Cuisine: American
- Diet: Vegetarian
Description
Indulge in the sweet and tangy flavors of this Homemade Cherry Pie Recipe with a buttery crust and juicy cherry filling. Perfect for any occasion!
Ingredients
For the Pie Crust:
- Homemade Pie Crust or All Butter Pie Crust (both recipes make 2 crusts, 1 for bottom and 1 for top)
For the Filling:
- 4 and 1/2 cups halved & quartered pitted fresh cherries
- 2/3 cup (135g) granulated sugar
- 1/4 cup (28g) cornstarch
- 1 Tablespoon (15ml) lemon juice
- 1 teaspoon pure vanilla extract
- 1/4 teaspoon almond extract
- 1 Tablespoon (14g) cold unsalted butter, cut into small cubes
- egg wash: 1 large egg beaten with 1 Tablespoon (15ml) milk
- optional: coarse sugar for sprinkling on crust
Instructions
- The crust: Prepare either pie crust recipe through step 5. The pie dough needs to chill in the refrigerator for at least 2 hours before using.
- Make the filling: In a large bowl, stir the cherries, sugar, cornstarch, lemon juice, vanilla, and almond extract together until thoroughly combined…
- Roll out the chilled pie dough: On a floured work surface, roll out one of the discs of chilled dough (keep the other one in the refrigerator)…
- Pour the leftover juice into a small saucepan. Cook over low heat, stirring, until juice has slightly reduced and thickened, about 3–4 minutes…
- Arrange the lattice: Remove the other disc of pie dough from the refrigerator…
- Using a pastry brush, lightly brush the top and edges of the pie crust with egg wash…
- Preheat oven to 400°F (204°C). Place the pie onto a large baking sheet and bake for 20 minutes…
- Remove pie from the oven, place on a cooling rack, and cool for at least 3–4 hours before slicing and serving…
Notes
- Make Ahead / Freezing Instructions: There are a couple ways to make this pie ahead of time…
- Special Tools (affiliate links): Cherry Pitter, Glass Mixing Bowl, Rolling Pin, Pie Dish, Pastry Wheel or Pizza Cutter, Pastry Brush, Pie Crust Shield, Cooling Rack
- Cherries: You need about 1.5 lbs of cherries for this recipe…
Nutrition
- Serving Size: 1 slice
- Calories: Approximately 320
- Sugar: 22g
- Sodium: 120mg
- Fat: 12g
- Saturated Fat: 6g
- Unsaturated Fat: 4g
- Trans Fat: 0g
- Carbohydrates: 50g
- Fiber: 3g
- Protein: 3g
- Cholesterol: 35mg

