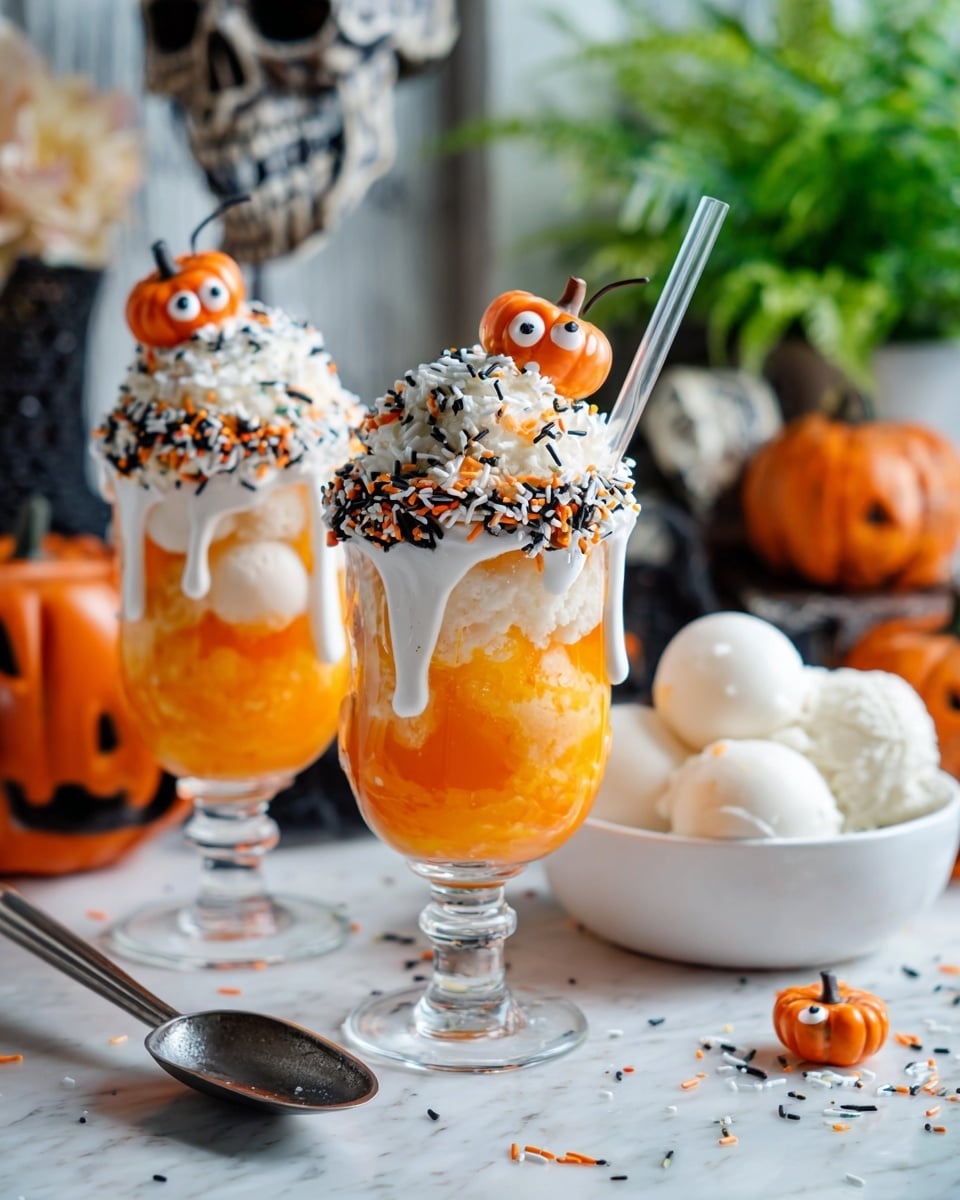
If you’re looking for a spooky and delicious treat that’s quick to make and sure to impress, this Halloween Ice Cream Floats Recipe is just what you need. I absolutely love how festive and fun these floats turn out — they’re super easy to whip up, and trust me, your family and friends will go crazy for them this Halloween!
Why You’ll Love This Recipe
- Super Quick and Easy: You can have these Halloween ice cream floats ready in just minutes—perfect for last-minute party plans.
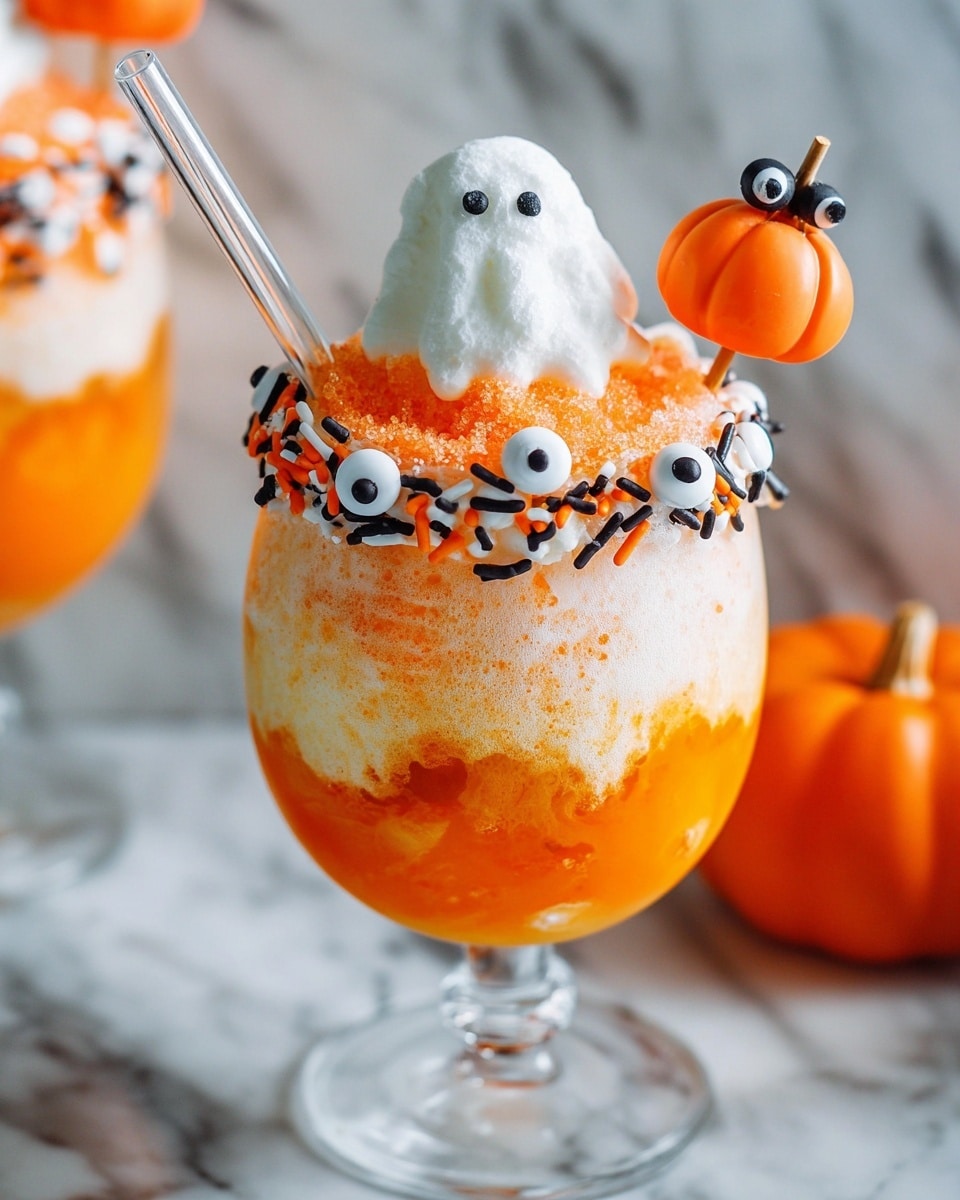
- Festive and Fun Presentation: The icing drips and spooky sprinkles make every float look like it’s straight from a Halloween party.
- Perfect for All Ages: Kids love the colorful sodas and candy eyes, and adults appreciate the nostalgic ice cream float twist.
- Customize to Your Taste: You can experiment with different soda flavors and toppings to make it your own.

Ingredients You’ll Need
The magic here is in the balance of sweet vanilla ice cream and fizzy orange soda, with some fun Halloween accents to give these floats their spooky theme. I like to use chilled soda to keep everything nice and bubbly without melting the ice cream too fast.
- Icing White Writing: This creates those awesome drips around the glass rim—try to get a good consistency so it slowly drips down.
- Halloween-Themed Sprinkles: Candy eyes are a fun choice that add spooky character, but sprinkles can also work if you want more color.
- Orange Soda: Make sure it’s chilled to keep your float fizzy and refreshing.
- Vanilla Ice Cream: The creamy base that pairs perfectly with orange soda—choose a quality brand for the best flavor.
Variations
One of the best things about this Halloween Ice Cream Floats Recipe? You can make it totally your own. I love switching up flavors and decorations based on who I’m serving it to, so feel free to get creative!
- Flavor Swap: My family loves when I use grape soda instead of orange for a darker, slightly eerie twist that pairs beautifully with vanilla ice cream.
- Dairy-Free: I once made these with coconut milk ice cream—just as creamy and totally Halloween-approved.
- Extra Spooky: Adding gummy worms or edible googly eyes on top amps the fun factor, especially for kids.
- Non-Alcoholic Adult Version: Try ginger beer in place of soda for a more complex flavor that adults appreciate.
How to Make Halloween Ice Cream Floats Recipe
Step 1: Prep Your Glasses for Maximum Spookiness
This is where the magic of the Halloween Ice Cream Floats Recipe really starts. You want a clean, totally dry glass to get that icing to stick nicely. I like to take my time piping the white icing slowly along the rim, letting it drip down naturally. Moving slower in some spots lets you build up those fun, bigger drips that look like spooky spider webs or goo. If the icing is too stiff to drip, warming the icing pouch in hot water for about a minute helps loosen it up so it flows just right.
Step 2: Add Your Sprinkles
Right after icing the rim, sprinkle on your Halloween-themed sprinkles while the icing is still wet. Candy eyes work great here—they stick really well and instantly transform your float into a little creepy masterpiece. Just be gentle so you don’t accidentally knock off the icing drip details.
Step 3: Scoop in the Vanilla Ice Cream
Use a small cookie scoop or spoon to fill the glass about three-quarters full with vanilla ice cream. If you try to pack it too tight, the soda won’t fizz up properly, so leave a little wiggle room. This step is fun because as the soda hits the ice cream, it starts that classic fizz that’s the heart of any great float.
Step 4: Pour in the Orange Soda Slowly
Now the fizz! Carefully pour chilled orange soda into your glass. I usually fill just halfway first to let the foam rise and settle, then slowly add more soda until the glass is full. Pouring too fast can make it overflow and get messy, so patience is key here. Plus, slow pouring keeps that fizz perfectly balanced with creamy ice cream.
Step 5: Add Festive Touches
Top off your float with a festive straw and consider adding candy pumpkins or candy corn on the side—they add color and extra sweetness that make these floats Instagram-worthy. Remember, the presentation makes half the fun here!
Pro Tips for Making Halloween Ice Cream Floats Recipe
- Getting the Drips Just Right: I discovered warming the white icing just a little before piping helps it drip slowly instead of running way too fast.
- Chill Your Glasses: Pop your glasses in the fridge before making floats to keep the ice cream from melting too quickly, which gives you more time to enjoy each sip.
- Use Quality Ice Cream: I used to grab whatever was on sale, but switching to a creamier vanilla ice cream made these floats taste way better—trust me on this one!
- Pour Soda Slowly: Pouring slowly helps control the foam—I’ve avoided many sticky spills this way, especially when serving kids.
How to Serve Halloween Ice Cream Floats Recipe
Garnishes
I like to keep garnishes fun and playful. Candy pumpkins, candy corn, and even little plastic spiders (the clean, food-safe kind!) add that perfect Halloween vibe. Plus, a striped or glow-in-the-dark straw immediately amps up excitement for the kids.
Side Dishes
These floats pair beautifully with light snacks like caramel popcorn, ghost-shaped sugar cookies, or even a bowl of spooky mixed nuts. When serving at a party, I love having a big Halloween-themed snack platter on the side for guests to nibble on while sipping their floats.
Creative Ways to Present
For a party, I once lined up the floats on a big tray with dry ice underneath for a smoky, bubbling effect—it was a total hit! Another time, I served the floats in mini mason jars with painted faces for the littlest guests. Presentation really elevates this recipe, so have fun with it!
Make Ahead and Storage
Storing Leftovers
I’ve found that ice cream floats are best enjoyed fresh, but if you do have leftovers, store any unused ice cream in the freezer and leftovers of soda in the fridge. Don’t leave a prepared float out, as the ice cream will melt and the drink will go flat quickly.
Freezing
Since this recipe involves soda and ice cream, freezing a prepared float isn’t really recommended—it’ll lose its fizz and texture. Instead, freeze the ice cream separately and keep soda chilled for the best float every time.
Reheating
There’s no reheating needed here, thankfully! Just make the floats fresh or add the ice cream and soda right before serving to preserve that perfect frothy magic.
FAQs
-
Can I use other sodas besides orange for this Halloween Ice Cream Floats Recipe?
Absolutely! While orange soda creates a vibrant Halloween vibe, you can try grape, root beer, or even cream soda for different flavors and colors. Just make sure it’s chilled for the best fizz!
-
How do I prevent the icing from dripping too much on the glass?
If your icing is too runny, refrigerate the iced glasses briefly to let the drips firm up. Also, warm the icing pouch gently before piping to control the flow better, allowing you to create larger or smaller drips at will.
-
What’s the best size glass to use for these floats?
I recommend a 12-ounce glass; it gives enough room for ice cream and soda without overflowing too quickly. But feel free to adjust if you prefer bigger or smaller servings!
-
Can I prepare the floats ahead of time for a party?
It’s best to assemble the floats soon before serving since the ice cream melts and soda loses fizz quickly. You can prepare the glass rims with icing and sprinkles earlier, but add ice cream and soda just before guests arrive.
-
Are there any allergy-friendly tweaks for this Halloween Ice Cream Floats Recipe?
Definitely. Use dairy-free ice cream alternatives like almond or coconut milk versions, and check soda ingredients for allergens or choose natural sodas without additives. For sprinkles, opt for allergen-free candy decorations.
Final Thoughts
Honestly, this Halloween Ice Cream Floats Recipe has been one of my go-tos every October. It’s simple, gorgeous, and fun to make with the kids or friends. The combination of creamy ice cream and fizzy soda is a classic, but adding that Halloween twist with drippy icing and candy eyes takes it to a whole new level of festive joy. If you want to impress without a lot of fuss, this treat’s definitely your sweet spot. Give it a try—I promise it’ll become a Halloween favorite in your house too!
Print
Halloween Ice Cream Floats Recipe
- Prep Time: 5 minutes
- Cook Time: 0 minutes
- Total Time: 5 minutes
- Yield: 1 serving
- Category: Beverage
- Method: No-Cook
- Cuisine: American
Description
Celebrate Halloween with these festive Halloween Ice Cream Floats, featuring a fun and spooky decoration of white icing drips, Halloween-themed sprinkles, creamy vanilla ice cream, and refreshing orange soda. This quick and easy treat is perfect for parties and delightful for kids and adults alike.
Ingredients
Decoration
- 3 Tablespoons icing white writing
- 1 Teaspoon Halloween-themed sprinkles
- candy eyes (optional for garnish)
Float
- 6 Ounces orange soda, chilled
- ¾ Cup vanilla ice cream
Instructions
- Prepare the glass: Take a clean, completely dry glass and use the white writing icing to slowly pipe along the top edge of the glass, allowing the icing to drip down the sides. Vary your speed to create larger drips in some areas for a spooky effect.
- Add sprinkles: While the icing is still wet, carefully sprinkle the Halloween-themed sprinkles onto the icing so they stick and create a festive decoration.
- Add ice cream: Using a small cookie scoop or spoon, add vanilla ice cream to the glass, filling it about three-quarters full.
- Pour orange soda: Slowly pour chilled orange soda into the glass, filling only halfway at first to control the fizzing and foam. Once the fizz settles, top the float off with more soda until the glass is full.
- Garnish and serve: Add festive straws, candy pumpkins, candy corn, or candy eyes for added Halloween fun and serve immediately before the ice cream melts.
Notes
- To get the right consistency of icing for dripping, warm the icing pouch in hot water for about a minute to make it runnier. If the icing drips too much, chill the glasses in the refrigerator or place them in front of a fan to set faster.
- A 12-ounce glass is ideal for serving. Adjust ingredient quantities if using different sized glasses or making multiple servings.
- You can use clear plastic cups instead of glass for an easy disposable option.
- Serve the ice cream floats immediately after preparation to prevent the ice cream from melting and losing the float’s signature texture and presentation.
Nutrition
- Serving Size: 1 float (approx. 12 oz)
- Calories: 220
- Sugar: 28 g
- Sodium: 45 mg
- Fat: 7 g
- Saturated Fat: 4.5 g
- Unsaturated Fat: 2 g
- Trans Fat: 0 g
- Carbohydrates: 35 g
- Fiber: 0 g
- Protein: 3 g
- Cholesterol: 25 mg


