
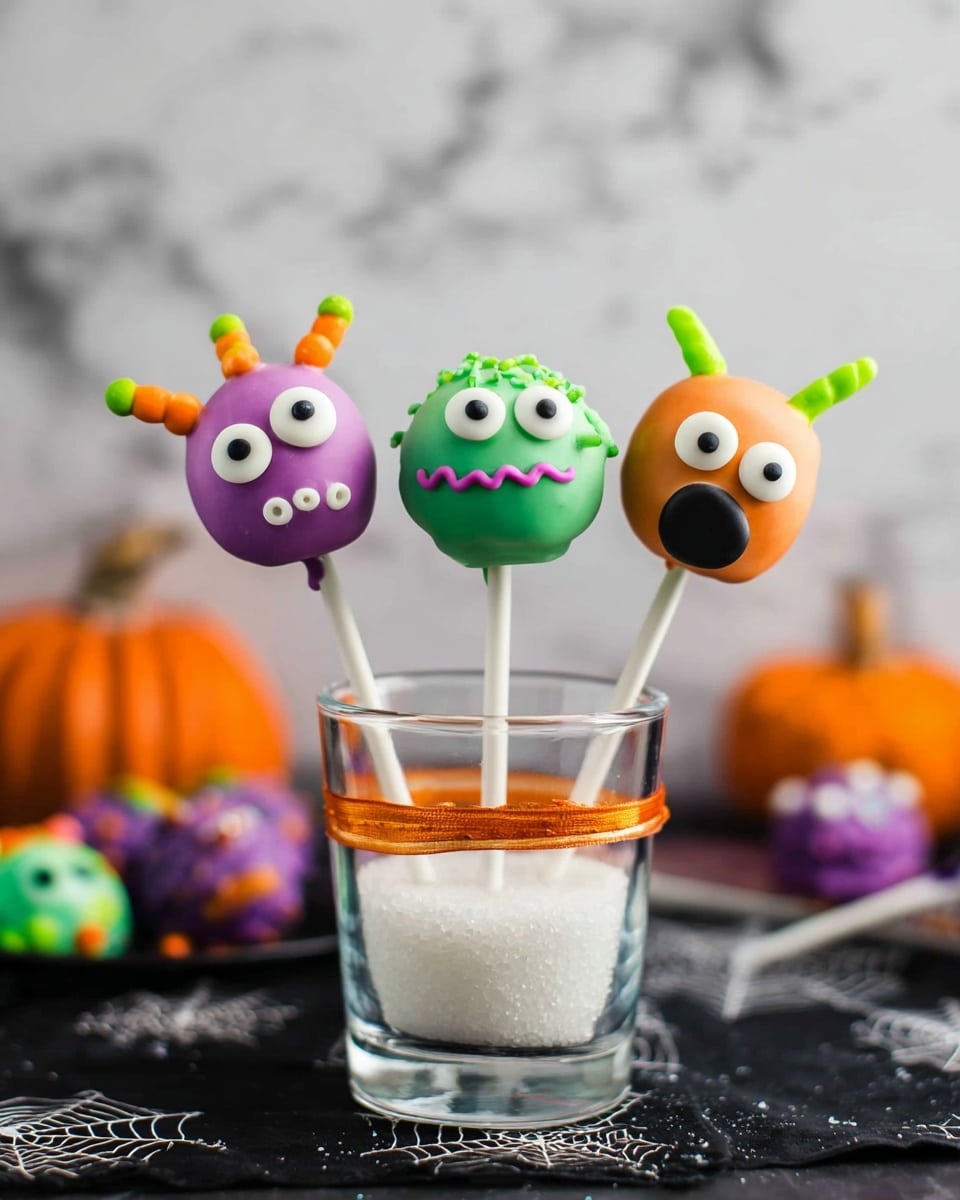
If you’re looking for a fun, festive treat to wow your friends and family this season, you’ve got to try this Halloween Cake Pops Recipe. I absolutely love how these pops combine the ease of mini donuts with the magic of candy melts, letting you create spooky, adorable goodies without fussing over baking. They’re perfect for Halloween parties, classroom treats, or even just a silly snack to make with the kids. Stick with me, and I’ll share everything I’ve learned to help you nail these delightful pops every time.
Why You’ll Love This Recipe
- Simple Setup: No baking required—mini donuts make this an effortless kitchen win.
- Customizable Fun: You can create all kinds of spooky designs with candy melts and decorations.
- Kid-Friendly Activity: My family loves making these together; it’s a blast for little hands and big imaginations.
- Perfect Party Treats: These pops are as festive as they are tasty, sure to impress at any Halloween gathering.

Ingredients You’ll Need
The magic of this Halloween Cake Pops Recipe lies in its simple ingredients that transform easily into a festive masterpiece. Choosing vibrant candy melts gives your pops that bright, eye-catching look, and mini donuts form the perfect chewy base without extra baking stress.
- Candy Melts (green, purple, orange): These colorful melts coat the pops beautifully and harden with a satisfying crunch.
- Lollipop Sticks: Essential for holding your pops and giving them that classic look; be sure they’re the right length for mini donuts.
- Mini Donuts or Donut Holes: These are the “cakes” of your pops — easy, fun, and no baking required.
- Candy Eyeballs: They add personality and a little spooky vibe, making your monsters come alive.
- Assorted Sprinkles: Use these to add texture, sparkle, and Halloween-themed fun like orange and black confetti.
- Black Decorating Gel: Perfect for drawing details like mouths, stitches, or spider webs with precision.
Variations
I love personalizing this Halloween Cake Pops Recipe depending on the mood or who I’m making them for. It’s fun to mix up colors, decorations, and even the base treat to keep things interesting—and you’ll enjoy experimenting with your own twists too.
- Chocolate Lovers: Swap out candy melts for dark or milk chocolate melts for a richer flavor—my kids go nutty for chocolate monster pops!
- Vegan Friendly: Use vegan candy melts and make sure your mini donuts are vegan—this keeps all your guests happy and included.
- Spooky Shapes: Try using donut holes as tiny pumpkins or mini donuts as ghosts by adding white candy melts and clever eyes.
- Extra Texture: Add crushed cookies or edible glitter on top before the candy melts set for a fun crunch or shimmer effect.
How to Make Halloween Cake Pops Recipe
Step 1: Prep and Melt Your Candy
Start by melting your candy melts according to the package instructions. I usually go low and slow with short bursts in the microwave to avoid burning. You want a smooth, dip-able consistency. Once melted, get your lollipop sticks and mini donuts ready on a clean workspace lined with wax paper—trust me, cleanup is so much easier this way!
Step 2: Assemble the Pops
Dip the tip of each lollipop stick about ¼ to ½ inch into the melted candy and immediately insert it into a mini donut, pushing gently so it stays put. Stand the donuts upside down on the wax paper with the stick pointing up, and let the candy harden for a few minutes. This step acts like glue, keeping your pop secure, so don’t skip it.
Step 3: Coat the Donuts
Once the sticks are set, dip each donut into the candy melt, spinning it around for an even coat. If the melt feels thick, give it a quick stir or heat it again briefly to keep it smooth. Place them back on the wax paper, sticks up, and let them harden completely before decorating.
Step 4: Decorate Your Creepy Creations
This is where the fun really begins. Use candy eyeballs, sprinkles, and black decorating gel to craft spooky faces, monster eyes, or whatever Halloween characters your heart desires. For sprinkles, you can dip the tops while the coating is still a bit tacky for better adhesion. For drizzles and eyes, patience pays off—let each candy layer set well before adding the next to prevent smudging.
Pro Tips for Making Halloween Cake Pops Recipe
- Candy Melt Consistency: If your melts get too thick, don’t panic—just add a tiny dab of vegetable oil and stir to smooth it out.
- Stick Stability: Always dip the stick in candy melt first before inserting to create a strong hold that’ll prevent pops from sliding off.
- Decoration Timing: Let each candy layer harden almost fully before adding sprinkles or details to avoid colors bleeding together.
- Storage Caution: Avoid refrigerating these pops—moisture can ruin the candy shell and cause cracking.
How to Serve Halloween Cake Pops Recipe
Garnishes
For garnish, I tend to stick with classic candy eyeballs—they add so much personality with minimal effort. My kids love sprinkles in orange, black, and purple for that festive flair, and I sometimes add edible glitter for a magical shimmer that catches the light just right. The black gel lets me add monster mouths or spider webs to really bring the spooky vibes home.
Side Dishes
These Halloween cake pops pair perfectly with simple sides like a bowl of candy corn or a spooky punch. I’ve also served them alongside pumpkin-shaped sugar cookies or bite-sized brownies for a full Halloween dessert table that’s irresistible to both kids and adults.
Creative Ways to Present
Presenting these pops stuck into a foam block covered with black tissue paper creates a neat “pop garden” effect that guests love. You can also arrange them standing in a Halloween-themed mug or mason jar filled with candy corn. For a party centerpiece, try placing them on skewers alongside mini pumpkins or autumn leaves for an eye-catching seasonal display.
Make Ahead and Storage
Storing Leftovers
If you happen to have leftover pops (lucky you!), store them at room temperature in an airtight container. I learned the hard way that refrigeration causes the candy coating to sweat and crack, which definitely ruins the look and texture. So, keep them cozy on the counter, ideally somewhere cool and dry.
Freezing
Freezing isn’t really recommended for these pops because the candy melts don’t always thaw nicely and can become dull or crackly. But if you must freeze, wrap each pop individually in plastic wrap and place in an airtight container. Thaw at room temperature, but be prepared for some texture change.
Reheating
Thankfully, these cake pops don’t really need reheating. If you want the candy shell a bit softer, a quick 5-second zap in the microwave can do the trick, but be careful—not too long! Otherwise, just enjoy them as-is for that perfect balance of chewy donut and crisp candy shell.
FAQs
-
Can I use regular cake instead of mini donuts for this Halloween Cake Pops Recipe?
Absolutely! You can crumble baked cake and mix it with frosting to shape into balls before dipping. However, using mini donuts saves time and adds a delicious chewiness without the extra steps of baking and shaping.
-
How do I prevent the candy melts from cracking after drying?
Make sure you store the pops at room temperature, avoiding refrigeration or freezing. Also, let each layer dry completely before adding more candy melt or decorations to reduce cracking and color bleeding.
-
What if my candy melts get too thick while working?
If your candy melts thicken as you dip, gently reheat in short bursts and stir. Adding a tiny bit of vegetable oil can also restore the right consistency.
-
Can I prepare these Halloween Cake Pops Recipe ahead of time?
You can make them up to 24 hours ahead. Just keep them in an airtight container at room temperature. Avoid chilling or freezing, as moisture can ruin their texture.
Final Thoughts
This Halloween Cake Pops Recipe is one of those treats that brings a little joy and creativity into the kitchen without requiring a ton of work. Every year, making them with my family turns into a lively tradition full of giggles and sticky fingers. I can’t recommend them enough if you’re after a simple but impressive dessert that’s bound to be a hit. Trust me, once you try these, they’ll become your go-to Halloween treat too—so grab those mini donuts and candy melts, and let the spooky fun begin!
Print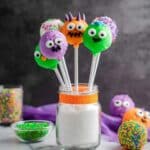
Halloween Cake Pops Recipe
- Prep Time: 30 minutes
- Cook Time: 10 minutes
- Total Time: 40 minutes
- Yield: 24 servings
- Category: Dessert
- Method: Dipping
- Cuisine: American
Description
Celebrate Halloween with these festive Halloween Cake Pops, featuring mini donuts dipped in colorful candy melts and decorated with fun spooky details like candy eyeballs, sprinkles, and black decorating gel. Perfect for parties or a seasonal treat, these easy-to-make cake pops bring seasonal cheer with minimal fuss.
Ingredients
For the Cake Pops
- 1 cup candy melts (green, purple, and/or orange)
- 24 lollipop sticks (6- to 7-inch)
- 24 plain mini donuts and/or donut holes
For Decorating
- Candy eyeballs
- Assorted sprinkles
- Black decorating gel
Instructions
- Melt Candy Melts: Melt the candy melts according to the package directions until smooth and ready for dipping.
- Insert Lollipop Sticks: Dip each lollipop stick about 1/4- to 1/2-inch into the melted candy melts. Then, insert the stick into each mini donut. Place the donuts upside down on wax paper with the sticks pointing upward. Let the candy melt harden for a few minutes to secure the sticks.
- Dip Donuts: Carefully dip each donut into the melted candy melts, rotating to coat it fully and evenly. Set the coated donuts upside down on wax paper again to cool and harden completely.
- Decorate Cake Pops: Once the candy melts have set, decorate each cake pop using candy eyeballs, assorted sprinkles, and black decorating gel as desired. Follow specific decorating tips for sprinkle toppings, drizzles, or monster designs for creative flair.
- Serve or Store: Serve the cake pops immediately for best texture and freshness. If making ahead, store them at room temperature in an airtight container for up to 24 hours. Avoid refrigeration to prevent sweating and cracking of the candy coating.
Notes
- For sprinkle-topped pops, let the first candy melt layer set for about 3 minutes before dipping the tops into sprinkles.
- For drizzled pops, allow the first candy melt layer to almost fully set before adding a second drizzle layer.
- For monster pops, let the first layer of candy melt dry fully before attaching candy eyes and decorating with sprinkles and black gel.
- To create monster horns, pipe candy melts onto wax paper in horn shapes, letting them set. Attach horns to cake pops using more melted candy, reinforcing with sprinkles if needed.
- Do not refrigerate or freeze the cake pops as the candy coating can sweat, crack, or bleed color when brought back to room temperature.
Nutrition
- Serving Size: 1 cake pop
- Calories: 150
- Sugar: 14g
- Sodium: 85mg
- Fat: 8g
- Saturated Fat: 6g
- Unsaturated Fat: 1.5g
- Trans Fat: 0g
- Carbohydrates: 18g
- Fiber: 0.5g
- Protein: 1g
- Cholesterol: 5mg


