
If you’re looking for a show-stopping treat this holiday season that’s as healthy as it is beautiful, you’ve got to try this Festive Fruit Christmas Tree Recipe. I absolutely love how it turns out every time—the colors pop, the fresh fruit tastes amazing, and it’s surprisingly easy to put together. Whether you’re hosting a holiday party or just want a fun snack to get everyone into the Christmas spirit, this fruity tree brings instant joy to the table. Let me walk you through how to make it, and share some tips that’ll help you nail it on the first try!
Why You’ll Love This Recipe
- Vibrant and Inviting: The combination of fresh fruit colors and shapes makes this tree a festive showpiece that everyone notices.
- Easy Assembly: You don’t need fancy skills—just some simple cutting and toothpicks to create something extraordinary.
- Healthy Holiday Treat: It’s packed with vitamins and fiber, perfect for balancing out heavier holiday fare.
- Fun for All Ages: Kids especially love helping to build and then munch on this edible Christmas tree.

Ingredients You’ll Need
These fruits were chosen not just for their flavor but also for how well they complement each other in texture and color—making your festive fruit tree really pop! When picking your fruit, try to get fresh, firm berries and a pineapple that isn’t overripe but smells sweet at the base.
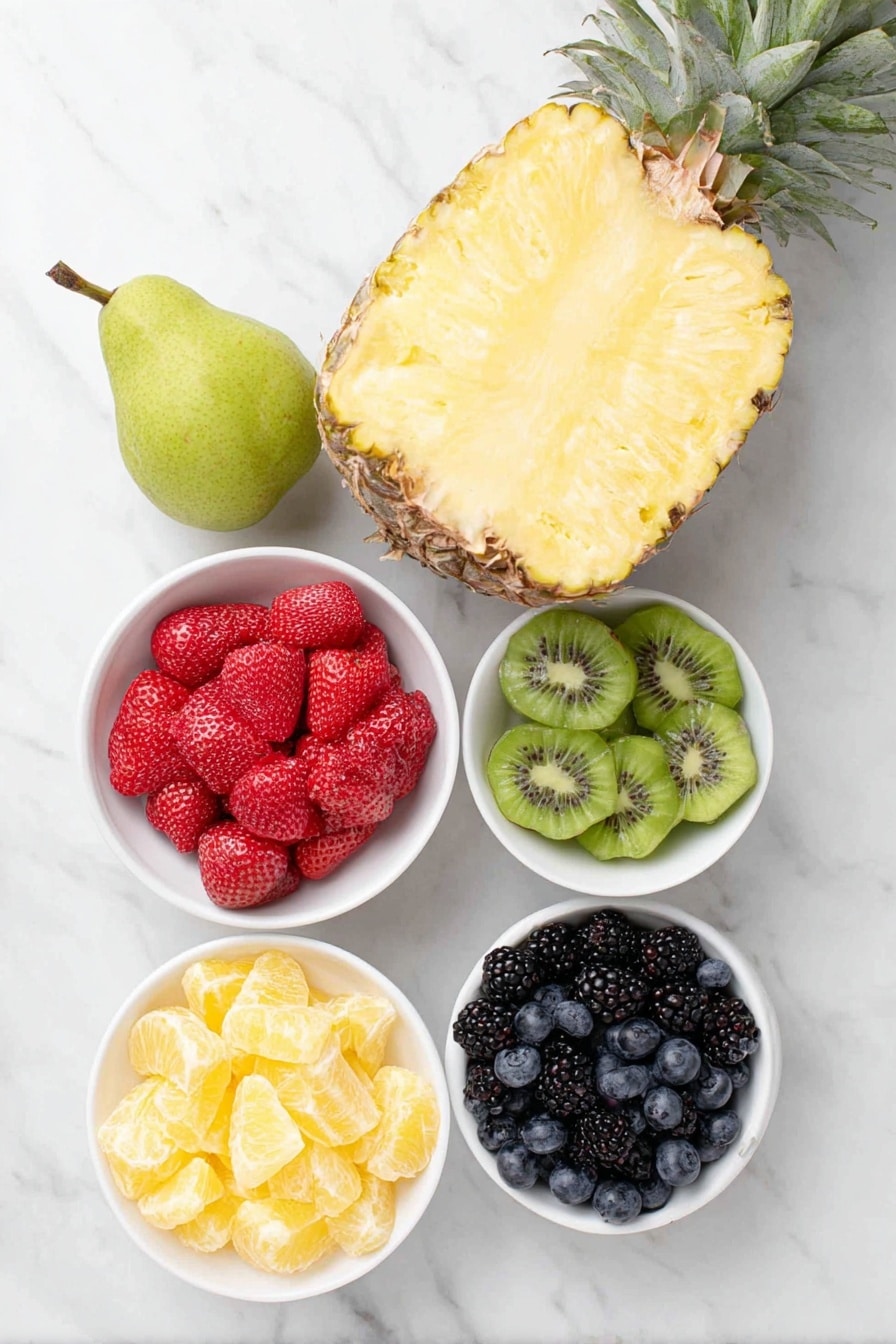
- Pineapple: Acts as the sturdy base; choose a small or medium one for manageable assembly.
- Pear: Used as the tree trunk; pick one that stands upright well.
- Blackberries: Their deep purple adds richness to the color palette.
- Strawberries: Bright red and juicy, perfect as “ornaments.”
- Kiwi: Cut into stars – their green hue and tang make them a festive addition.
- Clementines: Their segments add pops of orange and a juicy sweetness.
- Green Grapes: Round and fresh, they fill in spaces nicely.
- Blueberries: Small and sweet, perfect for gaps and extra color spots.
- Fresh Mint: Adds a pop of green and freshness, and helps hide any gaps.
- Toothpicks & Large Skewer: Crucial for holding the fruit securely in place.
Variations
I love playing around with this Festive Fruit Christmas Tree Recipe depending on what’s in season or what my family prefers. It’s super flexible, so feel free to mix in your favorite fruits or swap out for dietary needs.
- Dairy-Free Dippers: Try serving with a side of coconut yogurt or a honey drizzle for dipping—my kids love it!
- Nutty Add-Ons: Sprinkle chopped pistachios or almonds between the fruit for crunch and festive green touches.
- Berry Substitutes: If blackberries aren’t your thing, raspberries work just as well for bright color and flavor.
- Mini Tree Version: Use a small pineapple or even a melon ball base for a kid-friendly size that’s fun to assemble.
How to Make Festive Fruit Christmas Tree Recipe
Step 1: Prep Your Fruit Smartly
Start by washing and gently drying all your fruit with paper towels—that step makes a big difference for keeping your fruit fresh and easier to handle. Next, lay your pineapple on its side to cut off the very top and bottom, creating a nice flat base and a starting point for your tree shape. I like to cut a slice off the top so I can use a star-shaped cookie cutter to create the perfect star for the tree’s topper. It’s a fun little detail that really elevates the final look.
Step 2: Shape the Pineapple and Add the Pear Base
Once you have your pineapple’s base and star ready, carve the pineapple into a rough cone shape by making angled cuts around the sides. Don’t stress about perfection here—the goal is a nice tree silhouette. Then, trim the bottom of your pear flat enough so it stands upright comfortably. You’ll use a large skewer to attach the pear to the top of the pineapple, making a sturdy “trunk” for your fruit Christmas tree.
Step 3: Start Decorating with the Big Pieces
Grab your toothpicks and begin by securing larger fruit pieces onto the pineapple cone. I usually start with strawberries, clementine segments, and green grapes because their size and color balance really well. Space them evenly around the tree for a full, lush look without overcrowding. It’s okay if it looks a little bare at first—that’s what the next step is for!
Step 4: Fill in the Gaps with Smaller Fruit and Mint
Next, add smaller fruits like blackberries, blueberries, and those cute little pineapple and kiwi stars to fill any spaces. The star shapes add such a festive touch, especially the kiwi ones with their bright green. Finally, tuck in fresh mint leaves here and there—it adds a lovely fragrance and hides any spots where you can see too much of the pineapple base.
Step 5: Top It Off and Serve
Use the toothpick to stick the pineapple star to the top of the pear trunk, finishing off your edible Christmas tree. I always get compliments when I bring this to holiday gatherings—it’s like a centerpiece that everyone wants to nibble on. Serve right away or keep it chilled for up to a couple of hours before guests arrive.
Pro Tips for Making Festive Fruit Christmas Tree Recipe
- Choose Firm Fruit: Selecting fruits that are ripe but firm helps the tree stay intact longer without squishing or leaking juice.
- Secure with Toothpicks Strategically: Push toothpicks deep enough to hold fruit but not so deep that they poke through on the other side.
- Prep Stars Ahead of Time: Use a small star cookie cutter on pineapple and kiwi while you prep all your other fruit to save time during assembly.
- Keep It Cool: Assemble close to serving time or keep it chilled wrapped loosely with plastic wrap to maintain freshness and color.
How to Serve Festive Fruit Christmas Tree Recipe
Garnishes
I love adding a few extra mint sprigs around the base and some powdered sugar dusted lightly over the top for a snowy effect—especially for photos! Sometimes I tuck in tiny edible flowers or sprinkle a handful of pomegranate seeds if I have them on hand for that extra festive pop.
Side Dishes
This fruity tree pairs wonderfully with simple cheese platters or a bowl of whipped cream or yogurt dip for guests who want a little extra indulgence. I also like serving it alongside warm holiday drinks—it makes a fresh contrast to richer flavors.
Creative Ways to Present
For special occasions, I’ve tried placing the fruit tree on a platter surrounded by crushed ice or garnished with rosemary sprigs for a piney aroma. Another fun idea is building mini versions on skewers so each guest can have their own personal fruit tree to enjoy—great for kids’ parties!
Make Ahead and Storage
Storing Leftovers
If you have leftovers, I recommend removing the fruit from the skewers and storing everything in an airtight container in the fridge. The fruit stays fresh for up to 2 days, though the pineapple base will brown a bit. It still tastes great, but for the best look, serve fresh whenever possible.
Freezing
Freezing isn’t the best option here because the fruit texture changes, especially with juicy fruits like strawberries and grapes. I usually skip freezing this recipe and instead plan to make it fresh for each holiday event.
Reheating
Since this is served fresh and cold, reheating isn’t necessary. Just be sure to keep it refrigerated to maintain freshness, and remove any fruit that looks too soft before serving leftover pieces.
FAQs
-
Can I make the Festive Fruit Christmas Tree Recipe ahead of time?
Yes, you can prep the fruit and cut your pieces ahead of time, but I recommend assembling the tree as close to serving as possible to keep the fruit looking fresh and vibrant. If needed, assemble then store the whole tree loosely covered in the fridge for a few hours.
-
What if I don’t have a star cookie cutter for the pineapple and kiwi stars?
That’s totally fine! You can cut pineapples and kiwi into bite-sized chunks or use any small-shaped cutter you have. The star shapes add a festive touch but aren’t essential to enjoy this recipe.
-
How do I keep the fruit from browning?
Using fresh fruit and assembling just before serving helps most with browning. For pears and apples, a light brush of lemon juice can slow browning, but for this recipe, the other vibrant fruits usually distract from minor browning on the trunk pear.
-
Can this recipe be made with other fruits?
Absolutely! Feel free to swap in your favorite fruits or seasonal ones that you prefer. Just ensure they’re firm enough to hold on toothpicks and complement the color scheme.
Final Thoughts
This Festive Fruit Christmas Tree Recipe holds a special place in my holiday traditions because it’s such a joyful, interactive way to bring family and friends together. I remember the first time I made it with my kids—they loved arranging the fruit and then proudly showing it off. Plus, it’s a delicious break from all the sweets that come with the season! I highly recommend giving this a try this year—it’s not only gorgeous but makes healthy eating festive and fun. Trust me, your guests will be asking for the recipe!
Print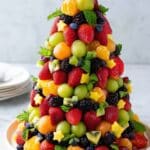
Festive Fruit Christmas Tree Recipe
- Prep Time: 20 minutes
- Cook Time: 0 minutes
- Total Time: 20 minutes
- Yield: 12 servings
- Category: Appetizer
- Method: No-Cook
- Cuisine: Holiday
- Diet: Vegetarian
Description
Create a festive and healthy Fruit Christmas Tree centerpiece using a variety of fresh fruits such as pineapple, pear, strawberries, kiwi, grapes, and more. This vibrant and easy-to-assemble recipe is perfect for holiday parties and a fun, kid-friendly treat that adds color and flavor to your celebrations.
Ingredients
Fruit Base
- 1 small or medium pineapple
- 1 pear
Fruit Decorations
- Fresh blackberries (small pack)
- Fresh strawberries (small pack, whole or halved/fourth as needed)
- 3 kiwi (cut into small stars with cookie cutter)
- 3 fresh clementines (peeled and segmented)
- Green grapes (small pack)
- Fresh blueberries (small pack)
Additional Items
- Fresh mint leaves
- Toothpicks
- Large skewer
Instructions
- Prepare the Fruit: Wash and pat dry all fruit thoroughly with paper towels to remove any moisture, which helps the fruit stay fresh and ensures toothpicks hold securely.
- Shape the Pineapple: Cut off the very top and bottom of the pineapple to create a stable base. Then slice off a top portion to use with a star-shaped cookie cutter to cut out a pineapple star, which will serve as the tree topper. Continue shaping the pineapple into a cone by making angled cuts around the sides to resemble a tree.
- Prepare the Pear Base: Trim the bottom of the pear so it can stand upright securely. Attach the pear to the top of the pineapple by pushing a large skewer through the pineapple into the pear, stabilizing the structure.
- Assemble the Tree Topper: Insert a toothpick into the top of the pear and secure the pineapple star onto it, creating a decorative tree topper.
- Cut Stars from Pineapple Off-Cuts: Use a star-shaped cookie cutter on pineapple off-cuts to create small pineapple stars to decorate the tree.
- Add Large Fruit Decorations: Attach larger fruit pieces such as strawberries, clementine segments, and green grapes evenly around the pineapple tree using toothpicks to form the base decoration layer.
- Add Smaller Fruit Decorations: Fill in the gaps around the larger fruits with smaller pieces like blackberries, blueberries, and the small pineapple and kiwi stars. This layering adds color and texture variety.
- Decorate with Mint Leaves: Insert mint leaves around the tree to add a fresh color contrast and to cover any visible spots of the pineapple base.
- Final Touch: Place the pineapple star securely on top of the tree as the finishing touch.
- Storage: Any leftover fruit can be stored in an airtight container in the refrigerator for up to 2 days to maintain freshness.
Notes
- This festive fruit Christmas tree makes a colorful and healthy centerpiece that is ideal for holiday gatherings.
- The recipe is adaptable to the size and amount of fruit you have on hand.
- The use of fresh mint leaves provides a lovely fresh aroma and vibrant green to mimic pine needles.
- Perfect for a kid-friendly treat, encouraging fruit consumption through fun presentation.
- For longer-lasting freshness, prepare the tree just before serving.
Nutrition
- Serving Size: 1 serving
- Calories: 68 kcal
- Sugar: 13 g
- Sodium: 2 mg
- Fat: 0.2 g
- Saturated Fat: 0.02 g
- Unsaturated Fat: 0.13 g
- Trans Fat: 0 g
- Carbohydrates: 18 g
- Fiber: 3 g
- Protein: 1 g
- Cholesterol: 0 mg


