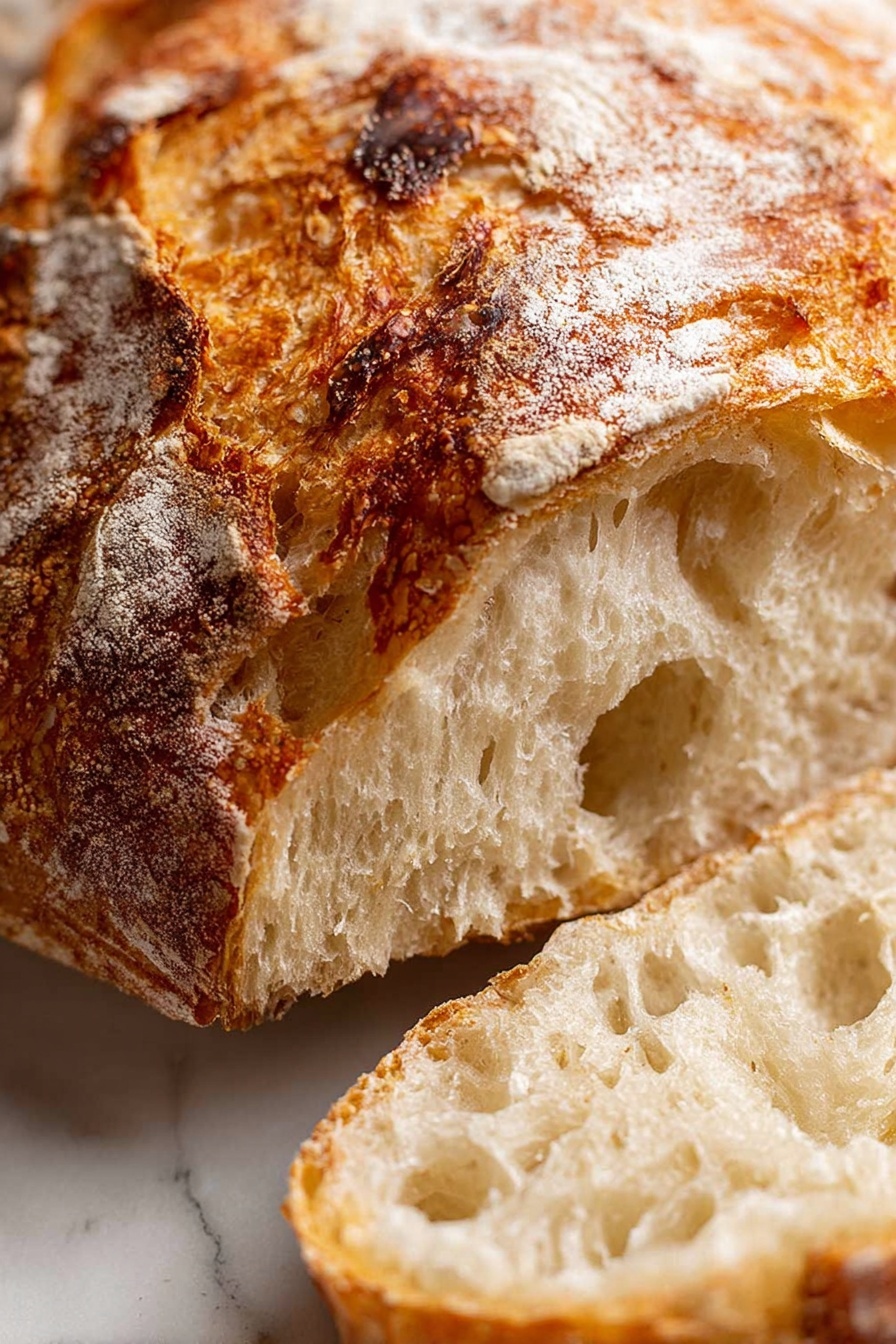
If you’ve ever dreamed of baking your own crispy, chewy artisan bread at home without wrestling with hours of kneading, you’re in the right place. This Easy No-Knead Artisan Yeast Bread Recipe is honestly one of my favorite discoveries—it’s foolproof, ridiculously simple, and rewards you with a crusty loaf that looks and tastes like you bought it from an upscale bakery. Stick around because I’m sharing all my best tips to make sure you succeed, even if you’re a first-time baker.
Why You’ll Love This Recipe
- No Kneading Required: I used to dread kneading dough, but this recipe skips it entirely while still delivering incredible texture.
- Minimal Ingredients: You only need basic pantry staples, so no complicated shopping trips needed.
- Perfect Artisan Crust: The baking method creates a crispy, chewy crust that’ll make your family think you’re a professional baker.
- Flexible Timing: You can refrigerate the dough for up to three days, making it super convenient for busy schedules.

Ingredients You’ll Need
This recipe keeps it simple but smart. Each ingredient plays a crucial role in that perfect airy crumb and crispy crust you’re after. Plus, knowing what to look for helps you avoid disappointing results—I’ve been there!
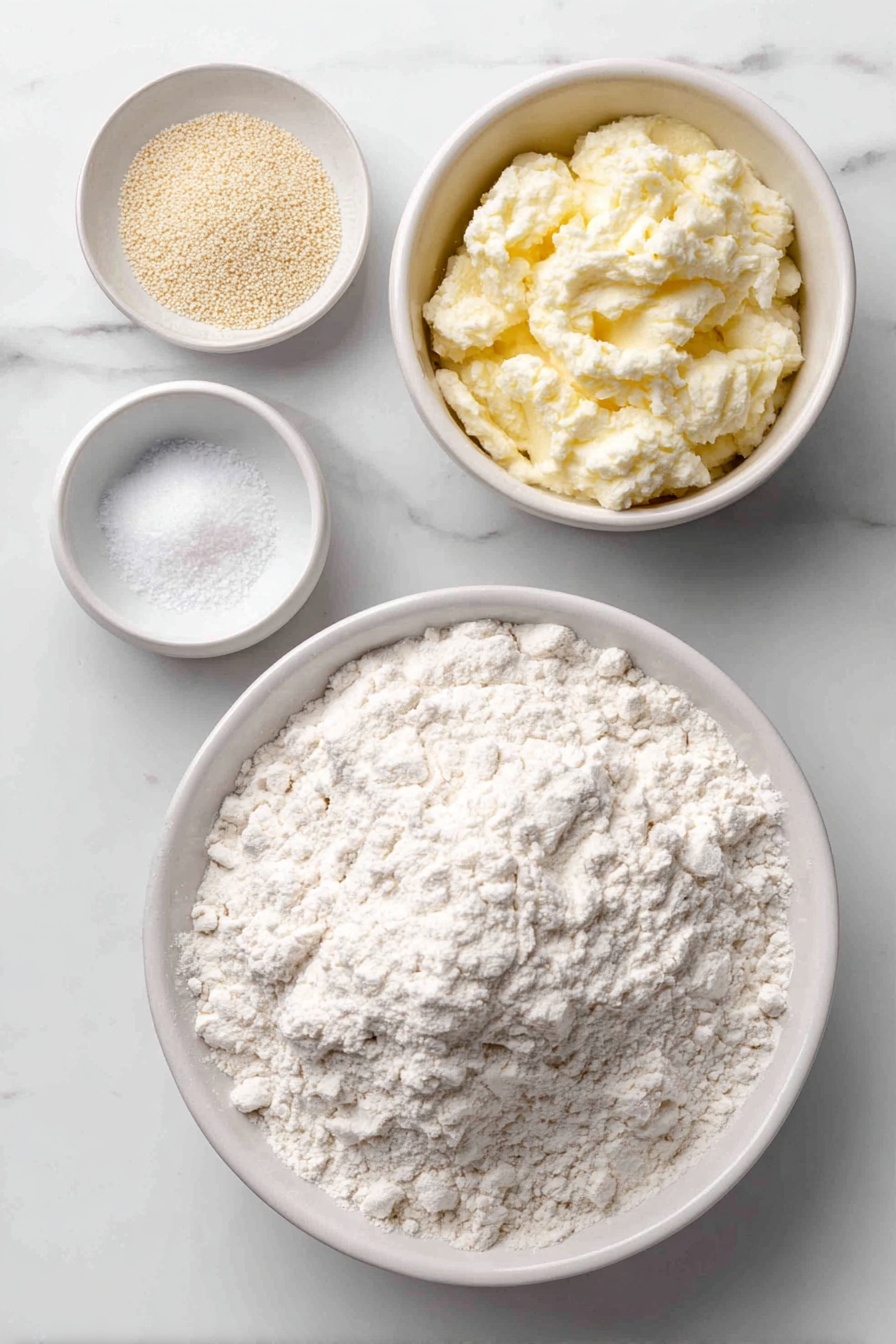
- Flour: I recommend bread flour for the best chew, but plain/all-purpose flour works well too if that’s what you have on hand.
- Instant or Rapid Rise Yeast: This speeds things up, but I’ll share how to use active dry yeast too—no worries if that’s what’s hiding in your pantry.
- Cooking or Kosher Salt: Avoid table salt here; kosher salt provides cleaner flavor and helps control fermentation.
- Warm Water: Not boiling, just warm—think bath temperature, up to 130°F (55°C). Too hot and you risk killing the yeast; too cold, and it won’t activate properly.
- Extra Flour for Dusting: This keeps the dough from sticking when you’re shaping it—simple but essential.
Variations
One of the reasons I adore this Easy No-Knead Artisan Yeast Bread Recipe is how easy it is to tweak! Over time, I’ve experimented with little twists that keep this loaf exciting. You should absolutely make it your own.
- Add-Ins: I sometimes fold in rosemary, olives, or sun-dried tomatoes during the shaping step for extra flavor—my guests love the surprise.
- Whole Wheat Version: Swap half the flour for whole wheat for a nuttier taste and heartier texture. It’s a bit denser but still delicious.
- Cheese Bread: Mixing in shredded cheese before rising transforms it into a savory dream—I recommend sharp cheddar or parmesan.
- No Dutch Oven Bake: If you don’t have a dutch oven, no worries. I’ll share an easy alternative so you can still get that fantastic crust.
How to Make Easy No-Knead Artisan Yeast Bread Recipe
Step 1: Mix the Dough with Just a Spoon
Start by whisking flour, yeast, and salt in a large bowl to evenly distribute everything—that’s key for a consistent rise. Then pour in warm water and stir with the handle of a wooden spoon until no dry flour spots remain. The dough will be very wet and sticky—don’t worry, this is exactly what you want. If it seems too runny, sprinkle a little more flour, or add a splash more water if it’s too stiff. This is where I remind myself that nature (the yeast) is doing the heavy lifting, not me!
Step 2: Let It Rise Till It Doubles and Gets Bubbly
Cover the bowl with cling wrap or a plate and leave it on your kitchen counter for 2 to 3 hours. You’ll know it’s ready when it’s doubled in size, jiggles a bit like jelly, and bubbles form on top. The first time I tried this, I couldn’t help sneaking peeks to watch the magic happen! If after an hour it seems stalled, try moving the dough somewhere warmer—around 75°F (24°C) works great.
Step 3: Optional Flavor Boost by Refrigerating
Here’s a bonus tip: If you have time, refrigerate your dough for up to 3 days after the first rise. This slow fermentation deepens the flavor and improves the crumb. When ready to bake, take it out and let it warm up on the counter for about 45–60 minutes before shaping. Trust me, it’s worth the wait!
Step 4: Preheat Your Oven and Dutch Oven
Set your oven to 450°F (230°C). Place a 10-inch (26 cm) dutch oven with its lid inside while the oven preheats—about 30 minutes. This preheating step is crucial because baking the dough in a hot, covered pot traps steam, creating that irresistible crust. If you don’t have a dutch oven, I’ll share a no-dutch-oven hack in the notes below.
Step 5: Shape the Dough Without Stressing Over It
Sprinkle a tablespoon of flour onto your work surface and use a dough scraper or spatula to gently fold the dough inwards about six times, forming a rough ball. It doesn’t have to be perfect—I always remind myself that rustic shapes add character! Then carefully flip the dough upside down onto a large piece of parchment paper, seam side down, and gently nudge it into a round-ish loaf. Don’t worry about it being lopsided—that’s the secret to more crusty ridges and crunchy bits!
Step 6: Bake Your Artisan Bread
Pull your blazing hot dutch oven out of the oven (use oven mitts—it’s HOT) and lift the parchment paper with your dough into the pot. Cover it with the lid and bake for 30 minutes. Then remove the lid and bake for another 12 minutes to deepen that gorgeous golden crust. Your kitchen will smell amazing—I always want to dig right in!
Step 7: Cool and Slice
Once baked, transfer the bread onto a cooling rack and let it rest for at least 10 minutes before slicing. This cooling step lets the crumb set and keeps the bread from getting gummy inside.
Pro Tips for Making Easy No-Knead Artisan Yeast Bread Recipe
- Trust Your Dough’s Feel: The wet, shaggy dough looks intimidating but is perfect for light, airy bread—don’t add too much flour.
- Warm Spot Is Your Friend: If your kitchen’s cold, place the dough near (not on) a warm appliance to help it rise faster.
- Keep That Lid On: Baking covered traps steam, which is key for the crust; don’t be tempted to peek too soon.
- Use Parchment Paper: It makes transferring super easy and prevents sticking, saving you a frustrating cleanup.
How to Serve Easy No-Knead Artisan Yeast Bread Recipe

Garnishes
I’m a sucker for brushing my fresh-out-of-the-oven bread with a bit of olive oil or softened butter and sprinkling flaky sea salt on top—it intensifies the flavors and makes every bite sublime. Fresh herbs like thyme or rosemary on top before baking also add an aromatic touch I can’t resist.
Side Dishes
This versatile bread goes wonderfully with soups—my go-to is creamy tomato bisque or a hearty vegetable stew. It’s also fantastic alongside cheese boards or dipped in a mix of olive oil, balsamic vinegar, and herbs. My family also loves it toasted for breakfast with jam or avocado.
Creative Ways to Present
For special dinners, I’ve turned this loaf into an edible bread bowl for chili or creamy dips by hollowing out the center—always a crowd-pleaser. Another fun idea is slicing it thin and baking those slices until crisp for homemade crostini. Trust me, everyone notices the effort even though it’s so simple!
Make Ahead and Storage
Storing Leftovers
I store leftover bread wrapped loosely in a clean tea towel on the counter to keep the crust somewhat crispy while preventing it from drying out too fast. If you want to keep it fresher longer, a paper bag inside a bread box works wonders. Avoid plastic bags on crusty bread or it gets soggy quickly.
Freezing
If you bake a double batch or want to save some for later, slice the cooled bread and freeze it in an airtight bag. I love pulling out slices as needed for toasting or sandwiches—it’s super convenient. Just make sure the bread is fully cooled before freezing to avoid sogginess.
Reheating
To revive leftover bread, I pop slices in the toaster or warm the whole loaf in a 350°F (175°C) oven wrapped loosely in foil for about 10 minutes. This refreshes the crust and gives you that great texture again—almost like freshly baked.
FAQs
-
Can I use active dry yeast instead of instant yeast in this Easy No-Knead Artisan Yeast Bread Recipe?
Absolutely! Just remember to proof active dry yeast by dissolving it in the warm water with a pinch of sugar first and letting it sit for about 5–10 minutes until foamy. Then add it to the flour mixture. This helps wake up the yeast and ensures a good rise.
-
What if I don’t have a dutch oven—can I still make this bread?
Yes! Use a heavy oven-safe pot with a lid or place a baking tray inverted on the rack above your dough during baking to trap steam. Alternatively, bake the dough on a preheated baking stone and place a pan of hot water in the oven to create steam. It won’t be exactly the same, but you’ll still get a great crust.
-
Why is my dough not rising as expected?
Check your water temperature: If it’s too hot or cold, yeast won’t activate properly. Also, make sure your yeast is fresh and hasn’t expired. Lastly, a cold kitchen can slow fermentation; using a warm spot or extending the rising time can help.
-
How can I tell when the bread is fully baked?
Your bread should be deeply golden with a crispy crust. You can also tap the bottom—it should sound hollow. If you have a kitchen thermometer, the internal temperature should be around 200°F (93°C).
Final Thoughts
This Easy No-Knead Artisan Yeast Bread Recipe has truly changed how I bake at home. It’s approachable, consistent, and tastes like it took way more effort than it actually does. I love sharing it with friends because it proves anyone can bake beautiful bread with minimal fuss. I can’t wait for you to try it and hear how much your family goes crazy for the gorgeous crust and airy crumb—you’re going to feel like a bread champion!
Print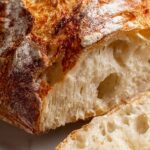
Easy No-Knead Artisan Yeast Bread Recipe
- Prep Time: 5 minutes
- Cook Time: 42 minutes
- Total Time: 2 hours 47 minutes (including rise time, excluding optional refrigeration)
- Yield: 10 servings (10-12 slices)
- Category: Bread
- Method: Baking
- Cuisine: Artisan
Description
This World’s Easiest Yeast Bread recipe is an artisan-style no-knead bread that delivers a crispy, chewy crust and airy, holey interior similar to expensive sourdough. Using simple ingredients and minimal effort, it requires just mixing, rising, and baking in a Dutch oven for stunning bakery-quality bread right at home. Perfect for beginners and busy cooks, this forgiving recipe allows for flexible timing with options to refrigerate the dough for enhanced flavor.
Ingredients
Dough
- 3 cups (450g) bread or plain/all-purpose flour
- 2 tsp instant or rapid rise yeast (see note for active dry yeast substitution)
- 2 tsp kosher or cooking salt (NOT table salt)
- 1 1/2 cups (375 ml) very warm tap water (up to 55°C/130°F, not boiling)
For Dusting and Shaping
- 1 1/2 tbsp flour (for dusting work surface and dough)
Instructions
- Mix Dough: In a large bowl, combine the flour, yeast, and salt. Add the warm water and use the handle of a wooden spoon to stir until all the flour is incorporated. The dough will be wet and sloppy, not kneadable but not runny. Adjust with a little more water or flour if needed for the right consistency.
- Rise: Cover the bowl with cling wrap or a plate and leave it on the counter for 2 to 3 hours until the dough doubles in volume. It will look wobbly like jelly with bubbles on top. If after one hour it hasn’t risen much, place it somewhere warmer.
- Optional Refrigeration: At this point, you may bake immediately or refrigerate the dough, covered, for up to 3 days to develop more flavor. If refrigerated, remove the dough and let it come to room temperature for 45 to 60 minutes before baking.
- Preheat Oven and Dutch Oven: Place a 26cm (10 inch) or larger Dutch oven with its lid inside your oven and preheat to 230°C (450°F) or 220°C fan for 30 minutes. This ensures the pot is piping hot for baking the bread.
- Shape the Dough: Sprinkle your work surface with 1 tablespoon of flour. Scrape the dough out onto the surface and dust the top with 1/2 tablespoon flour. Using a dough scraper or similar tool, fold the sides of the dough inward about six times to roughly form a round shape, mainly to deflate bubbles. Don’t worry about perfect shape—rustic is better.
- Transfer to Parchment Paper: Slide a large sheet of parchment paper next to the dough. Flip the dough upside down onto the paper so the seam side is down and the smooth side is up. Shape it gently into a round shape on the paper.
- Bake Bread: Carefully remove the hot Dutch oven from the oven. Lift the dough on the parchment paper and place it into the pot. Cover with the lid and bake for 30 minutes.
- Finish Baking Uncovered: Remove the lid and bake for an additional 12 minutes or until the bread is deep golden and crispy on top.
- Cool: Remove the bread from the pot and place it on a wire rack. Let it cool for at least 10 minutes before slicing to allow the crumb to set.
Notes
- Use instant or rapid rise yeast for fastest proofing. If using normal active dry yeast, proof it first in water before mixing.
- Use kosher or cooking salt, not table salt, for best texture and flavor.
- The dough should be very warm but not hot—up to 55°C/130°F—to activate the yeast without killing it.
- Rising time depends on room temperature; locate in a warmer spot if dough isn’t rising well.
- Refrigerating the dough up to 3 days enhances the flavor and allows flexible baking schedule.
- If you don’t have a Dutch oven, bake on a preheated heavy baking tray or cast iron skillet, placing a metal bowl over the dough to create steam for a crispy crust.
- The recipe is forgiving; slight variations in flour or water won’t ruin the bread.
- Tomorrow, try making the Cheese Bread variation for a tasty twist.
Nutrition
- Serving Size: 1 slice
- Calories: 155
- Sugar: 1 g
- Sodium: 469 mg
- Fat: 1 g
- Saturated Fat: 0.2 g
- Unsaturated Fat: 0.8 g
- Trans Fat: 0 g
- Carbohydrates: 32 g
- Fiber: 2 g
- Protein: 5 g
- Cholesterol: 0 mg


