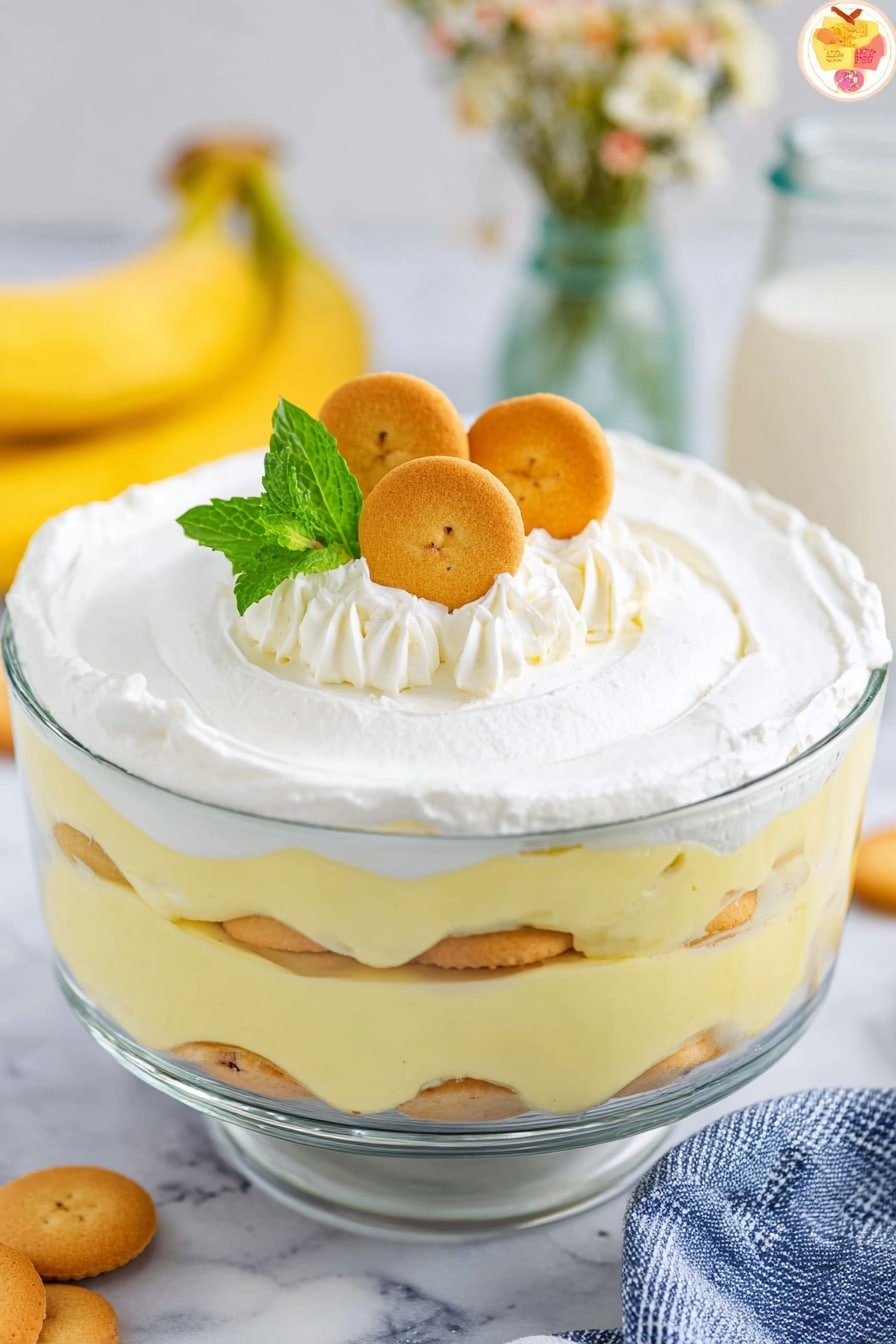
If you’re searching for a dessert that’s comfort in a bowl, easy to whip up, and always a crowd-pleaser, you’ve hit the jackpot with this Easy Banana Pudding Recipe. I absolutely love how it balances creamy textures with that nostalgic crunch of Nilla wafers and fresh banana slices. Whether you’re new to banana pudding or just looking for a reliable, fuss-free recipe, stay with me—I promise this one’s fan-freaking-tastic and will quickly become your go-to!
Why You’ll Love This Recipe
- No-Cook Wonder: This recipe skips baking and stovetop pudding prep, so it’s quick and beginner-friendly.
- Family Favorite: I’ve seen my kids and guests gobble it up every single time—it’s always a winner.
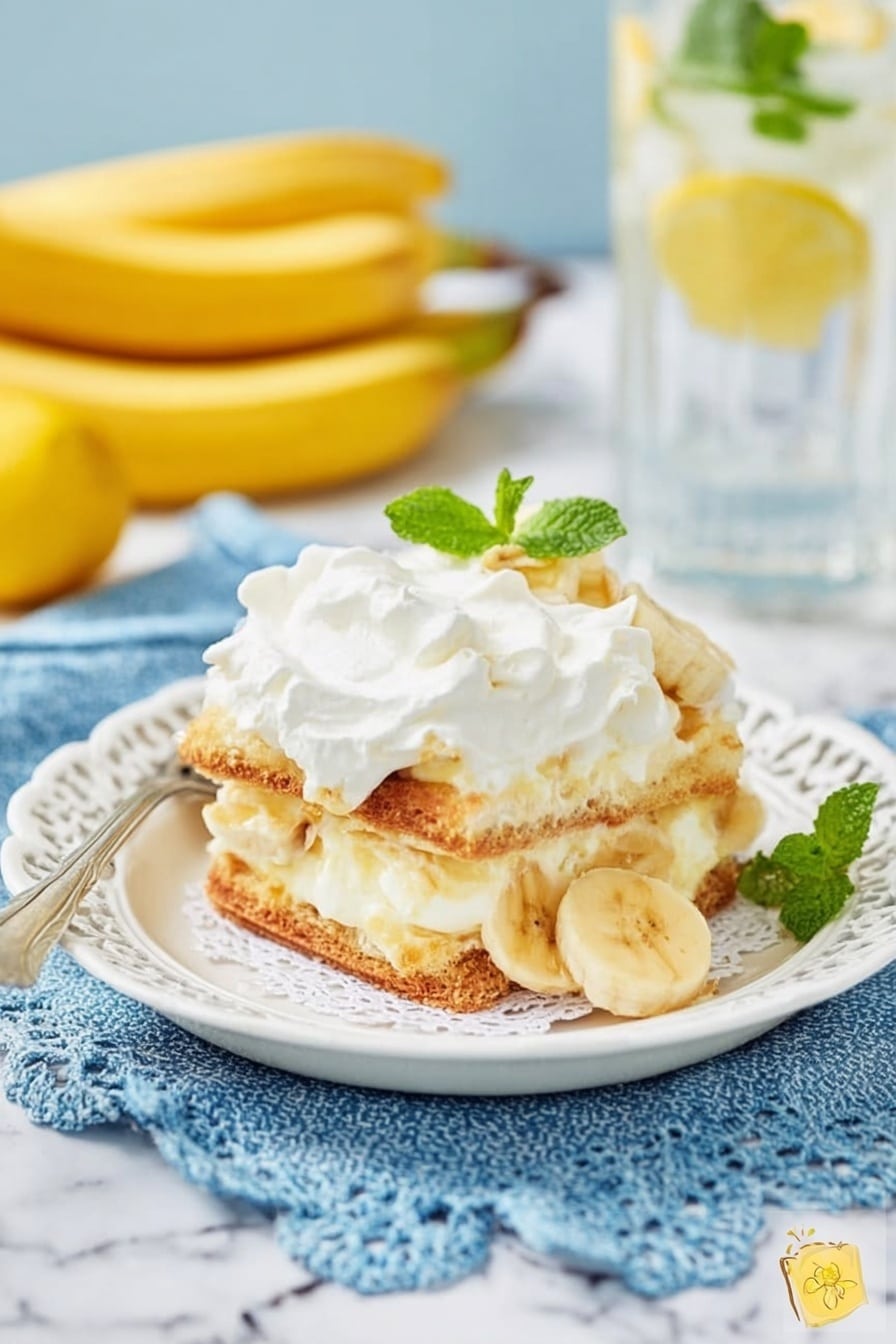
- Layered Bliss: The combination of creamy, crunchy, and fruity layers creates a delightful texture harmony you’ll savor.
- Make-Ahead Friendly: It tastes even better after chilling a while, making this perfect for parties or a sweet weeknight treat.

Ingredients You’ll Need
These ingredients together create that classic banana pudding magic. I find using cream cheese adds just the right tang and richness, while the instant pudding mix gives it that velvety smoothness without fuss. Trust me, grabbing a good quality whipped topping and ripe bananas makes a big difference in flavor and texture.
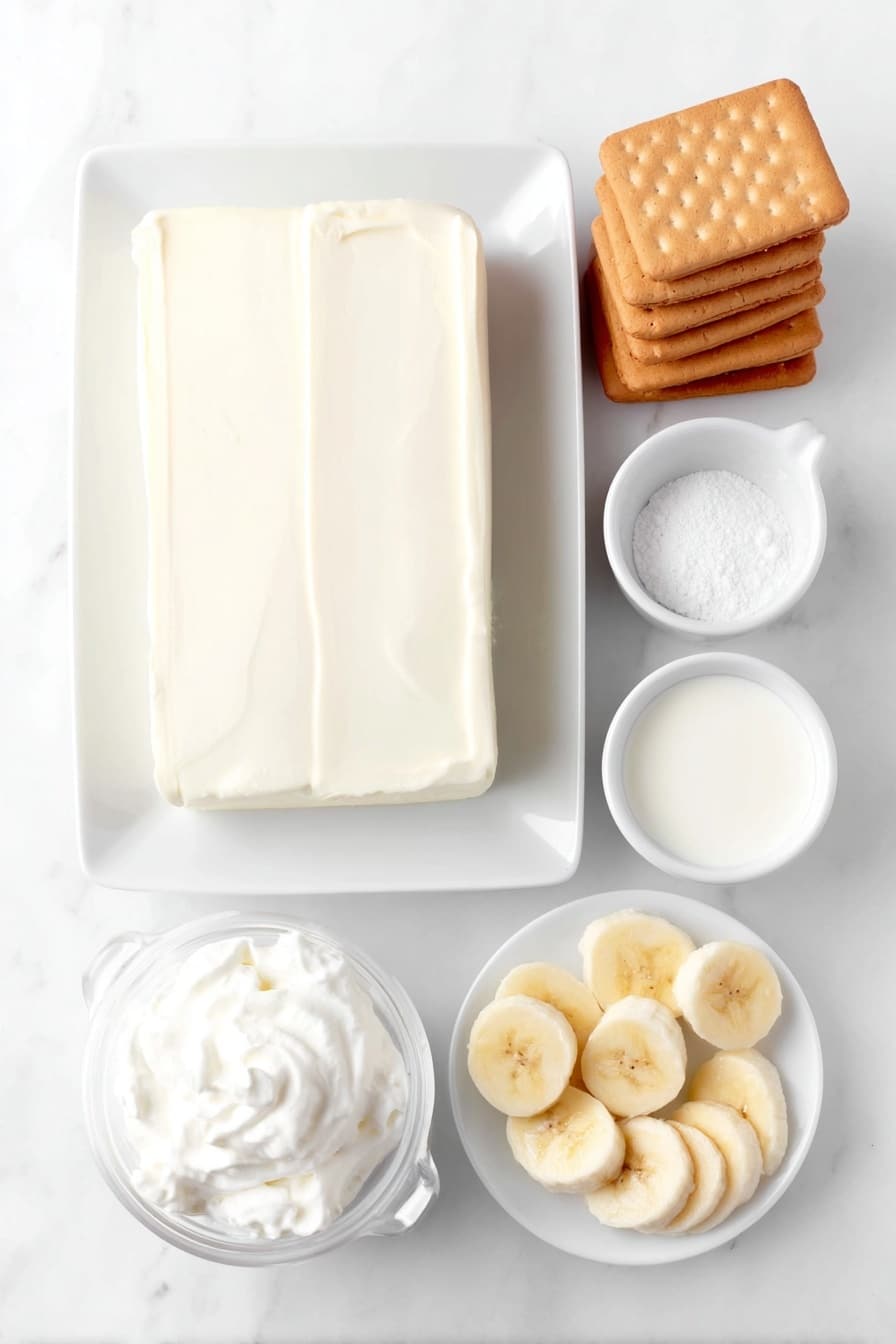
- Cream Cheese: Make sure it’s softened to room temperature for easy mixing and a creamy texture.
- Sweetened Condensed Milk: This adds the perfect sweetness and creamy body—don’t skip it!
- Instant Vanilla Pudding Mix: Using a larger box helps give you a thicker, luscious pudding layer.
- Milk: I use 2% or higher fat content for creamier pudding; whole milk is even better if you want extra richness.
- Vanilla Extract: Enhances the flavors beautifully—fresh vanilla is your friend here.
- Whipped Topping (Cool Whip): Half gets folded into the pudding mixture and the rest spreads on top for a fluffy finish.
- Nilla Wafers: Classic crunch that softens just right after chilling—don’t substitute or you’ll miss the nostalgia!
- Bananas: Choose ripe but firm bananas so they don’t turn mushy too fast in the pudding layers.
Variations
I love how flexible this Easy Banana Pudding Recipe is. Over the years, I’ve tweaked it a little here and there depending on what I have on hand or who I’m serving it to. Don’t hesitate to make it your own, adding a twist to suit your taste buds!
- Coconut Banana Pudding: I swapped out half the whipped topping for coconut cream once, and it gave the pudding such a tropical vibe my family went crazy for it.
- Dairy-Free Version: Using a dairy-free cream cheese and plant-based milk worked surprisingly well—great for friends with dietary restrictions.
- Chocolate Banana Pudding: Mixing in some chocolate pudding mix along with the vanilla adds a decadent chocolate twist my husband keeps requesting.
- Extra Crunch: I sometimes add chopped pecans between layers for some nutty texture and flavor.
How to Make Easy Banana Pudding Recipe
Step 1: Whip Up the Cream Cheese Mixture
Start by beating the softened cream cheese in a large bowl with an electric mixer on medium speed until it becomes perfectly smooth and fluffy—no lumps allowed! This step is the backbone of your pudding’s creaminess, so take your time here. If your cream cheese isn’t soft enough, it might end up clumpy, so I usually leave mine out to reach room temp before starting.
Step 2: Add Sweetened Condensed Milk, Pudding Mix, Milk, and Vanilla
Next, pour in the sweetened condensed milk, the instant vanilla pudding mix, your milk, and the vanilla extract. Mix everything together with the electric mixer until it’s well combined and creamy. This mixture will start to thicken as you blend it, so it’s key not to rush.
Step 3: Fold in Half the Whipped Topping
Now, gently fold in half of the thawed whipped topping using a spatula. Doing it gently keeps the pudding light and airy—something I learned after accidentally overmixing on my first try, which made it too dense.
Step 4: Layer Your Pudding
Grab a trifle dish, large bowl, or a 9×13-inch baking dish and start layering: one-third of your Nilla wafers on the bottom, followed by a single layer of sliced bananas, and then one-third of the pudding mixture poured evenly over the top. Repeat this layering two more times, making three layers total. This balance ensures every bite has a nice mix of flavors and textures.
Step 5: Top and Chill
Spread the remaining whipped topping over the final pudding layer. Cover the dish tightly with plastic wrap and refrigerate it for at least 1 to 2 hours. This chilling period is what softens those wafers and lets all the flavors meld together beautifully. If you can wait overnight, even better—the pudding tastes creamier the next day.
Pro Tips for Making Easy Banana Pudding Recipe
- Cream Cheese Softening: Always let the cream cheese reach room temperature first—it blends so much easier and keeps your pudding silky.
- Banana Ripeness: Use bananas that are ripe but still firm; overly ripe ones will get mushy when layered and change the texture.
- Layer Lightly: Avoid pressing down too hard when layering—gentle placement keeps the wafers from becoming gummy fast.
- Chill Time Matters: Be patient with chilling; the pudding not only thickens but tastes so much better after resting.
How to Serve Easy Banana Pudding Recipe
Garnishes
I like to sprinkle a few crushed Nilla wafers or a light dusting of cinnamon on top before serving for a little extra flair. Sometimes, fresh banana slices on top make the presentation pop and invite everyone to dig in immediately. A mint leaf here and there adds a fresh, unexpected twist too!
Side Dishes
This pudding shines as a dessert all on its own, but if you want to pair it, light coffee or a fruity iced tea complement its sweetness nicely. For celebrations, I often serve it alongside simple sugar cookies or buttery shortbread for variety.
Creative Ways to Present
For special occasions, try layering your banana pudding in individual parfait glasses or mason jars—this way, everyone gets their own cute serving. I also love assembling it in a clear trifle bowl so the gorgeous layers are visible; it instantly elevates the look at family gatherings!
Make Ahead and Storage
Storing Leftovers
I keep leftovers covered tightly in the same dish or transfer them to an airtight container. Stored in the fridge, they usually last 3 to 4 days—just give it a gentle stir before serving to refresh the layers a bit.
Freezing
Freezing banana pudding is tricky because bananas get mushy and the whipped topping changes texture. I’ve tried freezing it, but it’s best enjoyed fresh or refrigerated. If you do freeze, expect some texture shifts after thawing.
Reheating
This pudding is best served cold, so I don’t recommend reheating. If you want something warm, banana pudding isn’t the treat—stick to refrigerator servings to keep that luscious texture intact.
FAQs
-
Can I use homemade pudding instead of instant pudding mix?
You could, but instant pudding mix helps this Easy Banana Pudding Recipe set up without cooking, saving you time. Homemade pudding often requires cooking and chilling, changing the texture and prep steps considerably.
-
What can I substitute for Nilla wafers?
If you can’t find Nilla wafers, try vanilla-flavored cookies or simple shortbread. Just keep in mind that the traditional wafer’s light crunch and delicate flavor are part of what makes this pudding so special.
-
How ripe should the bananas be?
Look for bananas that are ripe with a few brown speckles but still firm to the touch. Overripe bananas will turn mushy quickly in the pudding layers and affect the overall texture.
-
Can I prepare this dessert the night before?
Absolutely! In fact, making it ahead improves the flavor and texture by allowing the wafers to soften perfectly and the pudding to thicken. Just make sure it’s well covered in the fridge.
-
Is this recipe kid-friendly?
Definitely! It’s sweet but not overly so, creamy, and fun to eat. Kids love the layers and the familiar flavors of banana and cookie, making it a hit at family gatherings.
Final Thoughts
This Easy Banana Pudding Recipe has earned a permanent spot in my recipe binder because it’s honestly one of those dependable desserts that never disappoints. Whether you’re feeding a crowd or craving a simple homemade treat, it delivers that perfect blend of creamy, sweet, and nostalgic flavors every time. I can’t wait for you to try it and make it yours—once you do, it might just become the dessert everyone asks you to bring!
Print
Easy Banana Pudding Recipe
- Prep Time: 25 minutes
- Cook Time: 0 minutes
- Total Time: 25 minutes
- Yield: 12 servings
- Category: Dessert
- Method: No-Cook
- Cuisine: American
Description
This decadent Banana Pudding recipe combines creamy layers of cream cheese, sweetened condensed milk, and instant vanilla pudding with fresh banana slices and crunchy Nilla wafers. It requires no cooking and is quick to assemble, making it perfect for a delicious and comforting dessert that’s sure to impress family and friends.
Ingredients
Filling
- 8 ounce block cream cheese, softened to room temperature
- 14 ounce can sweetened condensed milk
- 5 ounce package INSTANT vanilla pudding mix (larger box)
- 3 cups milk (2% or higher)
- 2 teaspoons vanilla extract
- 8 ounce tub whipped topping (COOL WHIP), thawed (divided use)
Layers
- 11 ounce box Nilla wafers (divided use)
- 5-7 bananas, peeled and sliced (divided use)
Instructions
- Prepare the cream cheese mixture: In a large bowl, beat the softened cream cheese using an electric mixer on medium speed until smooth and fluffy. This will create a creamy base for the pudding layers.
- Mix in pudding ingredients: Add the sweetened condensed milk, instant vanilla pudding mix, milk, and vanilla extract to the cream cheese. Continue mixing until all ingredients are well combined and the mixture is smooth.
- Incorporate whipped topping: Gently stir in half of the thawed whipped topping to the pudding mixture to add lightness and creaminess.
- Layer the pudding: In a trifle dish, large bowl, or 9×13-inch baking dish, start with one-third of the Nilla wafers, creating a single layer at the bottom.
- Add banana slices: Place a single layer of sliced bananas over the Nilla wafers, ensuring even coverage.
- Pour pudding mixture: Pour one-third of the prepared pudding mixture on top of the bananas, spreading it evenly to cover all the fruit.
- Repeat layering: Continue layering with the remaining Nilla wafers, banana slices, and pudding mixture until all components are used, ending with pudding on top.
- Top with whipped topping: Spread the remaining whipped topping evenly over the final pudding layer for a beautiful and creamy finish.
- Chill the pudding: Cover the dish with plastic wrap and refrigerate for at least 1 to 2 hours. This allows the pudding to thicken and the Nilla wafers to soften, perfecting the texture.
- Serve and enjoy: After chilling, serve the banana pudding chilled for a delightful, sweet dessert.
Notes
- This Banana Pudding is a no-cook dessert, meaning no baking or stovetop cooking is required.
- Using instant pudding mix speeds up preparation and ensures a smooth texture.
- Allowing the pudding to chill sufficiently is key to softening the Nilla wafers and enhancing the flavor.
- For best results, use ripe but firm bananas to avoid mushiness.
- You can substitute light whipped topping for a lower calorie option if desired.
Nutrition
- Serving Size: 1 serving
- Calories: 458 kcal
- Sugar: 54 g
- Sodium: 408 mg
- Fat: 14 g
- Saturated Fat: 8 g
- Unsaturated Fat: 4 g
- Trans Fat: 0 g
- Carbohydrates: 72 g
- Fiber: 1 g
- Protein: 10 g
- Cholesterol: 20 mg


