
If you’re looking for a cozy, velvety soup that feels like a warm hug on chilly days, then this Creamy Roasted Cauliflower Soup Recipe is your new best friend. I absolutely love how roasting the cauliflower first brings out this deep, nutty flavor that turns a simple soup into something truly special. Stick with me because I’m about to walk you through making this unbelievably smooth and comforting soup that my family goes crazy for — it’s seriously fan-freaking-tastic.
Why You’ll Love This Recipe
- Roasting Boosts Flavor: Roasting the cauliflower caramelizes it beautifully, making the soup rich and deeply flavorful.
- Silky Creamy Texture: Blending with heavy cream and butter turns it into a luscious, smooth delight you’ll want to savor.
- Simple Ingredients, Big Impact: Easy pantry staples come together to create a satisfying, impressive dish.
- Versatile and Comforting: Perfect for a quick weeknight dinner or a fancy starter for guests.

Ingredients You’ll Need
These ingredients combine to create a full-bodied soup with layers of flavor—plus, they’re all pretty straightforward. When shopping, look for fresh cauliflower heads that are firm and free of brown spots for the best taste. And don’t skimp on the butter and cream; they’re the secret to that indulgent texture.
- Cauliflower: Choose fresh, dense florets; they roast beautifully and become so tender.
- Olive Oil: Use good quality olive oil for roasting to add a subtle richness without overpowering.
- Fresh Thyme Leaves: Fresh herbs are key here—they provide an aromatic, earthy note that pairs so well with cauliflower.
- Salt: Enhances natural flavors and balances the sweetness from roasting.
- Black Pepper: Freshly ground for a gentle kick and depth.
- Vegetable Stock: Use a good quality or homemade stock to build the soup’s foundation.
- Double/Heavy Cream: Adds that creamy, dreamy finish — make sure it’s at room temperature to blend smoothly.
- Butter: For richness and that lovely silky mouthfeel.
- Onion: Finely diced, it creates sweetness and depth when sautéed.
- Garlic: Brings a subtle punch without overpowering the delicate cauliflower flavor.
- Nutmeg: Just a pinch brightens the flavors and adds warmth.
- Cheddar Cheese: Great for topping for extra flavor and melty goodness.
- Fresh Chives: Adds a pop of color and a mild onion flavor on top.
Variations
While I adore this soup just as it is, I’m all for mixing things up to suit your tastes or dietary needs. I’ve played around with a few tweaks, and I encourage you to make this recipe your own.
- Dairy-Free: Swap out butter for coconut oil and use full-fat coconut milk instead of cream for a silky, dairy-free version—I promise the richness still shines through.
- Spicy Kick: Add a pinch of smoked paprika or a dash of cayenne when sautéing onions if you like a bit of heat; it gives the soup an unexpected depth.
- Cheesy Twist: Try topping with a mix of grated Gruyère and Parmesan instead of cheddar—my family loved this during a holiday dinner.
- Seasonal Herb Swap: Don’t have fresh thyme? Rosemary or sage works great too—just mind the quantities, as they can be more potent.
How to Make Creamy Roasted Cauliflower Soup Recipe
Step 1: Roast the Cauliflower to Perfection
Start by preheating your oven to 200°C (390°F). Place your bite-sized cauliflower pieces on a large baking tray. Toss them with olive oil, fresh thyme leaves, salt, and black pepper—make sure each floret gets a lovely coating. Roast them for about 20 to 30 minutes, turning halfway through so they char evenly. You’re aiming for tender florets with just a hint of golden brown edges. This roasting step is a game changer; it gives the soup its signature depth, and the aroma from your kitchen alone will make you eager to dig in.
Step 2: Sauté the Aromatics
While the cauliflower roasts, melt your butter in a large pot over medium heat. Add the finely diced onion and cook slowly until it’s soft and just starting to take on some color—this usually takes about 7 to 8 minutes. Then add the garlic and give it another minute or so; you want it fragrant but not burnt. This base layer is where your soup’s sweetness and flavor deepen nicely, so patience here really pays off.
Step 3: Simmer and Blend
Add the roasted cauliflower to the pot with the onions and garlic, then pour in enough vegetable stock to just cover everything. Put the lid on and let it simmer gently for about 20 minutes so the flavors can mingle and soften the cauliflower even more. When it’s ready, turn off the heat and use a hand blender to puree everything until it’s completely smooth. I like to add more stock here if the soup feels too thick for my taste—this is where you tailor the texture just right. Stir in the cream and a pinch of nutmeg, then season well with salt and pepper. At this point, you’ll want to taste and adjust seasoning—trust me, it makes a difference!
Step 4: Serve with Style
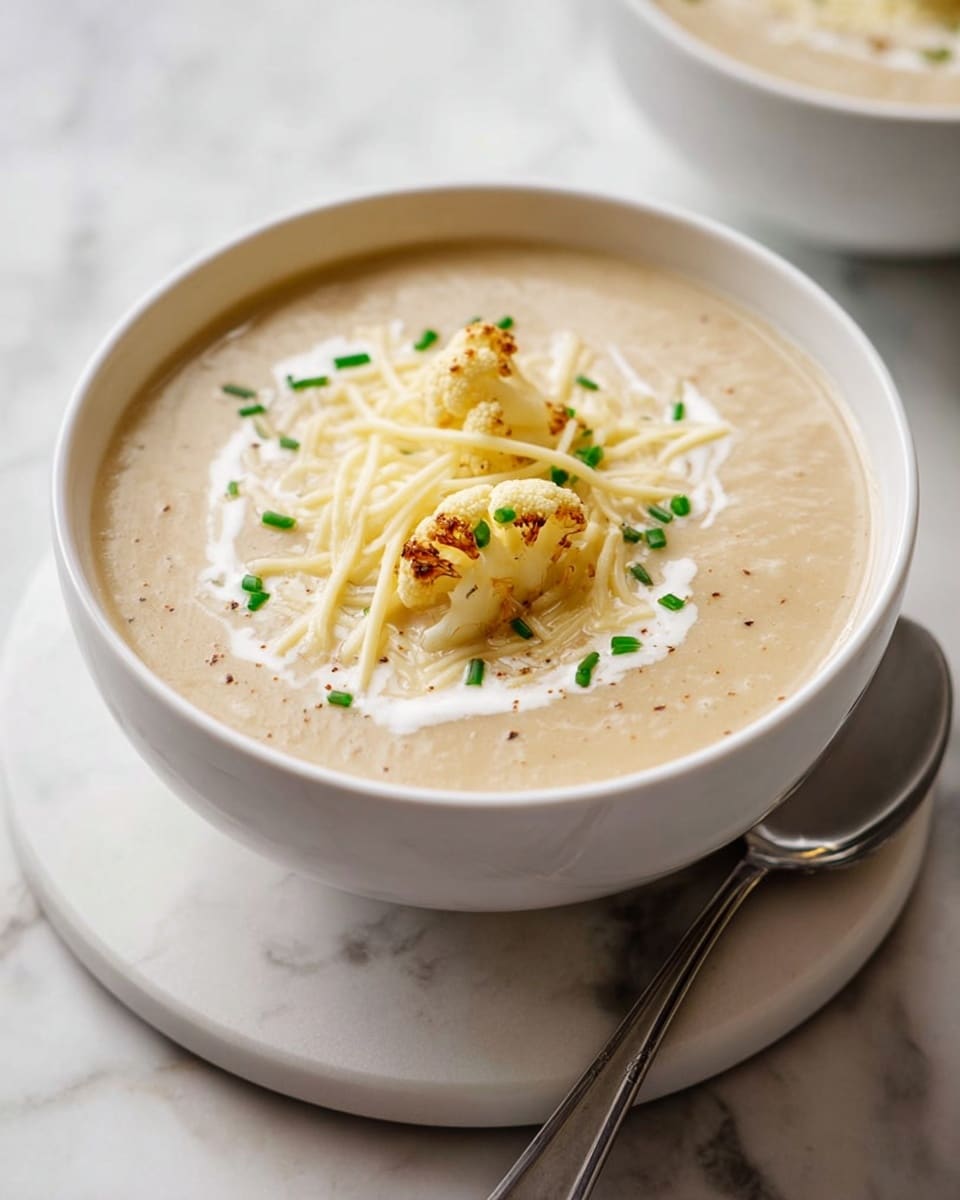
Ladle the soup into bowls and drizzle a bit of cream over the top for a pretty finish. Sprinkle on some grated cheddar cheese and fresh chives to add color and extra flavor contrast. I even like to save a few roasted florets to float on the surface—they add a nice texture and look so inviting. Now it’s time to sit back and savor every spoonful.
Pro Tips for Making Creamy Roasted Cauliflower Soup Recipe
- Don’t Skip Roasting: I used to just steam cauliflower, but roasting unlocks flavors that steaming just can’t match.
- Use Room Temperature Cream: This helps it incorporate smoothly without curdling or separating in the hot soup.
- Adjust Thickness with Stock: Add extra vegetable stock gradually if the soup is too thick; it’s easier than diluting later.
- Season Gradually: Season your soup in stages and taste often to avoid over-salting—a common mistake I learned from experience!
How to Serve Creamy Roasted Cauliflower Soup Recipe
Garnishes
I absolutely swear by a combo of freshly grated cheddar and finely diced chives as garnishes. The cheese adds a sharp, melty contrast that balances the soup’s creaminess, while the chives bring freshness and a subtle oniony punch. If you don’t have chives, leftover thyme leaves or a sprinkle of toasted seeds give it a lovely earthy crunch.
Side Dishes
This soup pairs wonderfully with crusty sourdough bread or garlic toast for dipping. For something heartier, a crisp green salad with lemon vinaigrette cuts through the richness and keeps things light. When entertaining, I love serving it alongside roasted chicken or a grilled cheese sandwich and calling it a day.
Creative Ways to Present
For a special occasion, try serving the soup in mini bread bowls—it looks charming and adds an extra layer of flavor. Sometimes I’ve ladled it into small espresso cups as a fun appetizer at dinner parties, and guests always comment on how gorgeous and comforting it is.
Make Ahead and Storage
Storing Leftovers
Once cooled, I store the soup in airtight containers in the fridge. It usually keeps beautifully for 3 to 4 days. When reheating, I do it gently on the stove over low heat, stirring occasionally, to maintain that silky texture without scorching.
Freezing
I’ve frozen this soup a few times with good results—just make sure to leave out the cream when freezing, then stir it in fresh after reheating. This way, you avoid any weird separation or curdling when thawing.
Reheating
The best way to reheat leftover Creamy Roasted Cauliflower Soup Recipe is on the stovetop over low to medium heat. Stir frequently to keep it smooth, and add a splash of stock or cream if it feels too thick. Microwaving works too in short bursts, but I always stir in-between to keep even heat distribution.
FAQs
-
Can I make this soup vegan?
Absolutely! Swap the butter for a plant-based alternative like coconut oil or vegan margarine, and use coconut milk or another creamy plant-based milk in place of the heavy cream. Just remember to keep the roasting and other steps the same for the best flavor.
-
Can I use frozen cauliflower instead of fresh?
While fresh cauliflower gives the best texture and flavor when roasted, you can use frozen cauliflower if needed. Skip the roasting step and simply cook it in the simmering stock until tender before blending—your soup will still be tasty, just slightly different in flavor.
-
How do I prevent the soup from being watery?
Be careful with the amount of stock you add during cooking – it’s best to start with just enough to cover the cauliflower, then thin the soup as needed after blending. Also, roasting the cauliflower helps concentrate flavors so the soup feels rich rather than diluted.
-
Can I prepare this soup in advance?
Yes! You can roast the cauliflower a day ahead and store it in the fridge, then quickly finish the soup when you’re ready to serve. The full soup can also be made ahead, cooled, and refrigerated for up to 3-4 days. Just reheat gently before serving.
Final Thoughts
This Creamy Roasted Cauliflower Soup Recipe has become such a staple in my kitchen because it’s effortlessly delicious and cozy. It’s one of those dishes I love to whip up when I want something comforting yet elegant without a ton of fuss. Trust me when I say it’s worth roasting the cauliflower—it really transforms the soup into something you’ll want to make again and again. So go ahead, try this recipe out like I’m sharing it with my closest friend. You won’t regret it!
Print
Creamy Roasted Cauliflower Soup Recipe
- Prep Time: 15 minutes
- Cook Time: 40 minutes
- Total Time: 55 minutes
- Yield: 6 servings
- Category: Soup
- Method: Baking
- Cuisine: Western
- Diet: Vegetarian
Description
A rich and comforting creamy roasted cauliflower soup made by roasting fresh cauliflower florets with olive oil and thyme, then simmering them with aromatic onions, garlic, and vegetable stock, blended smooth, and finished with double cream and a hint of nutmeg. Topped with cheddar cheese and fresh chives for a deliciously satisfying meal perfect for any season.
Ingredients
Roasted Cauliflower
- 2 lb / 1 kg Cauliflower, diced into bite sized pieces (weight after leaves/stalk removed)
- 2-3 tbsp Olive Oil
- 1 tbsp Fresh Thyme Leaves
- 1/2 tsp Salt
- 1/4 tsp Black Pepper
Soup
- 4 cups / 1 litre Vegetable Stock, or more as needed
- 1/2 cup / 120 ml Double/Heavy Cream, at room temperature
- 2 tbsp Butter
- 1 large Onion, finely diced
- 3 cloves Garlic, finely diced
- 1/4 tsp Nutmeg
- Salt & Black Pepper, to taste
To Serve
- Grated Cheddar Cheese
- Finely diced Fresh Chives
- Extra drizzle of Cream
Instructions
- Roast Cauliflower: Preheat the oven to 200°C (390°F). Place the diced cauliflower florets on a large baking tray and toss them with olive oil, fresh thyme leaves, salt, and black pepper. Spread them out evenly and roast in the oven for 20-30 minutes or until the florets are lightly charred and fork-tender. Toss the cauliflower halfway through cooking for even roasting. Optionally, reserve a few roasted florets for garnishing when serving.
- Sauté Aromatics: While the cauliflower roasts, melt 2 tablespoons of butter in a large pot over medium heat. Add the finely diced onion and cook, stirring occasionally, until soft and just beginning to brown. Add the minced garlic and sauté for an additional minute until fragrant.
- Simmer the Soup: Add the roasted cauliflower to the pot with the onions and garlic. Pour in enough vegetable stock to just cover the cauliflower. Cover the pot with a lid and let the mixture simmer gently for about 20 minutes to meld the flavors together.
- Blend the Soup: Turn off the heat. Using a hand blender, carefully blend the soup until it reaches a smooth consistency. Add more vegetable stock as needed to achieve your preferred thickness. Once smooth, stir in the double cream and sprinkle in 1/4 teaspoon of nutmeg. Season with salt and black pepper to taste.
- Serve: Ladle the creamy soup into bowls and garnish with an extra drizzle of cream, a sprinkle of grated cheddar cheese, and finely diced fresh chives. Enjoy warm for a comforting meal.
Notes
- Cauliflower Weight: Use 1 kg (2 lb) of cauliflower florets after removing leaves and stalks, roughly equivalent to two medium whole cauliflowers.
- Serving Suggestions: The cheddar and chives elevate this simple soup beautifully. If chives are not available, sprinkle leftover thyme leaves for a fresh herbal finish. The recipe comfortably serves 4 for a hearty dinner or 6 as a lighter lunch or starter.
- Storage: Allow the soup to cool, then store tightly covered in the refrigerator for 3-4 days. Reheat gently on the stove over low heat or in the microwave with stirring intervals.
- Freezing: The soup freezes well, but it’s best to add the cream after reheating to avoid splitting. Thaw in the fridge before warming up.
- Calories: Based on using 2.5 tablespoons of olive oil, no toppings, and divided into 4 servings.
Nutrition
- Serving Size: 1 cup (approx. 240 ml)
- Calories: 190
- Sugar: 5 g
- Sodium: 400 mg
- Fat: 14 g
- Saturated Fat: 7 g
- Unsaturated Fat: 6 g
- Trans Fat: 0 g
- Carbohydrates: 12 g
- Fiber: 4 g
- Protein: 5 g
- Cholesterol: 30 mg


