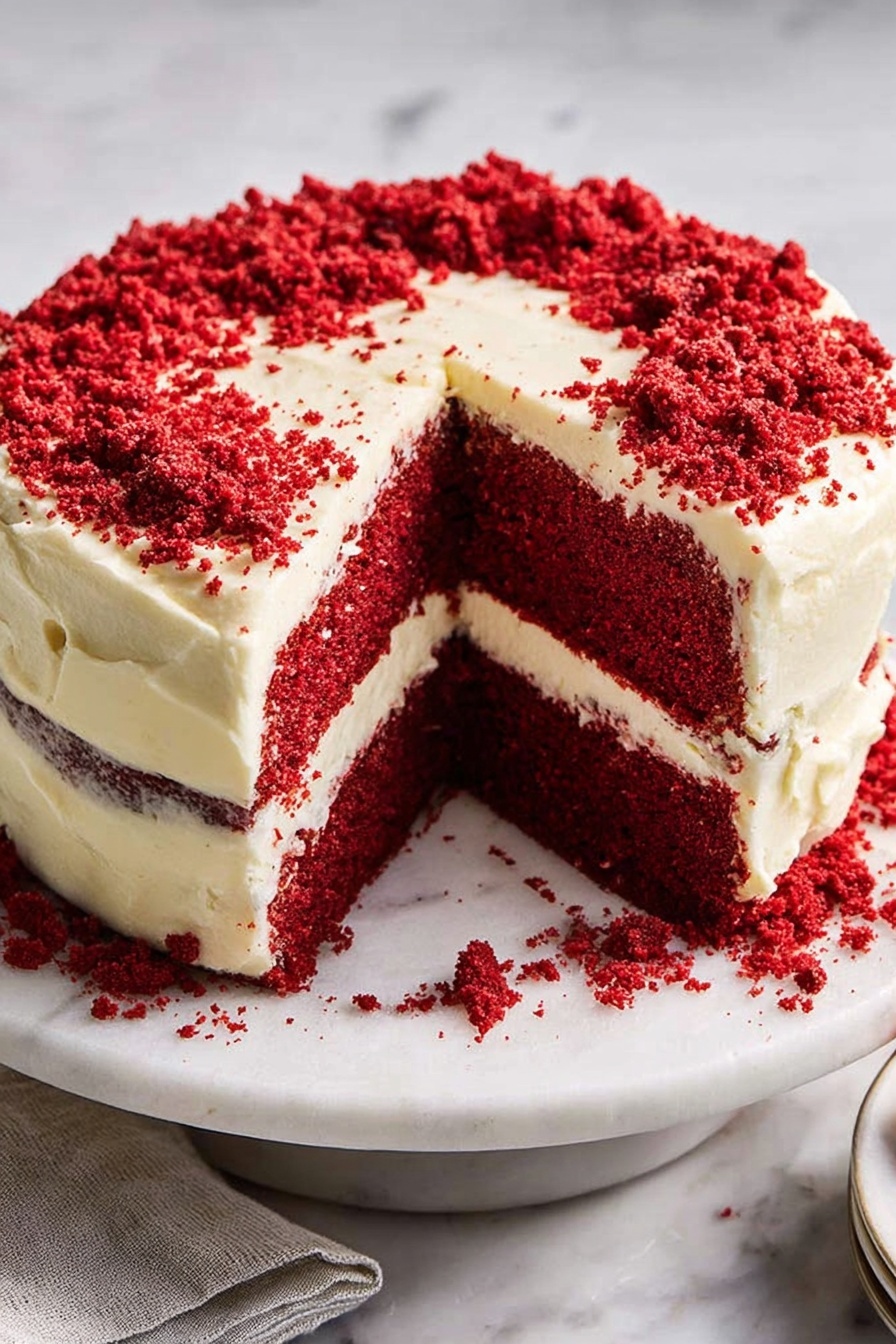
If you’re craving that perfect, velvety, and moist treat that screams celebration, you’re in the right place. This Classic Red Velvet Cake Recipe is the one I turn to when I want a show-stopping dessert that’s reliably delicious and surprisingly easy to nail at home. I absolutely love how this cake’s subtle cocoa flavor combined with a smooth cream cheese frosting just melts in your mouth—plus, that stunning red color always gets compliments. Stick with me, and I’ll share all my best tips to help you make this cake a total crowd-pleaser.
Why You’ll Love This Recipe
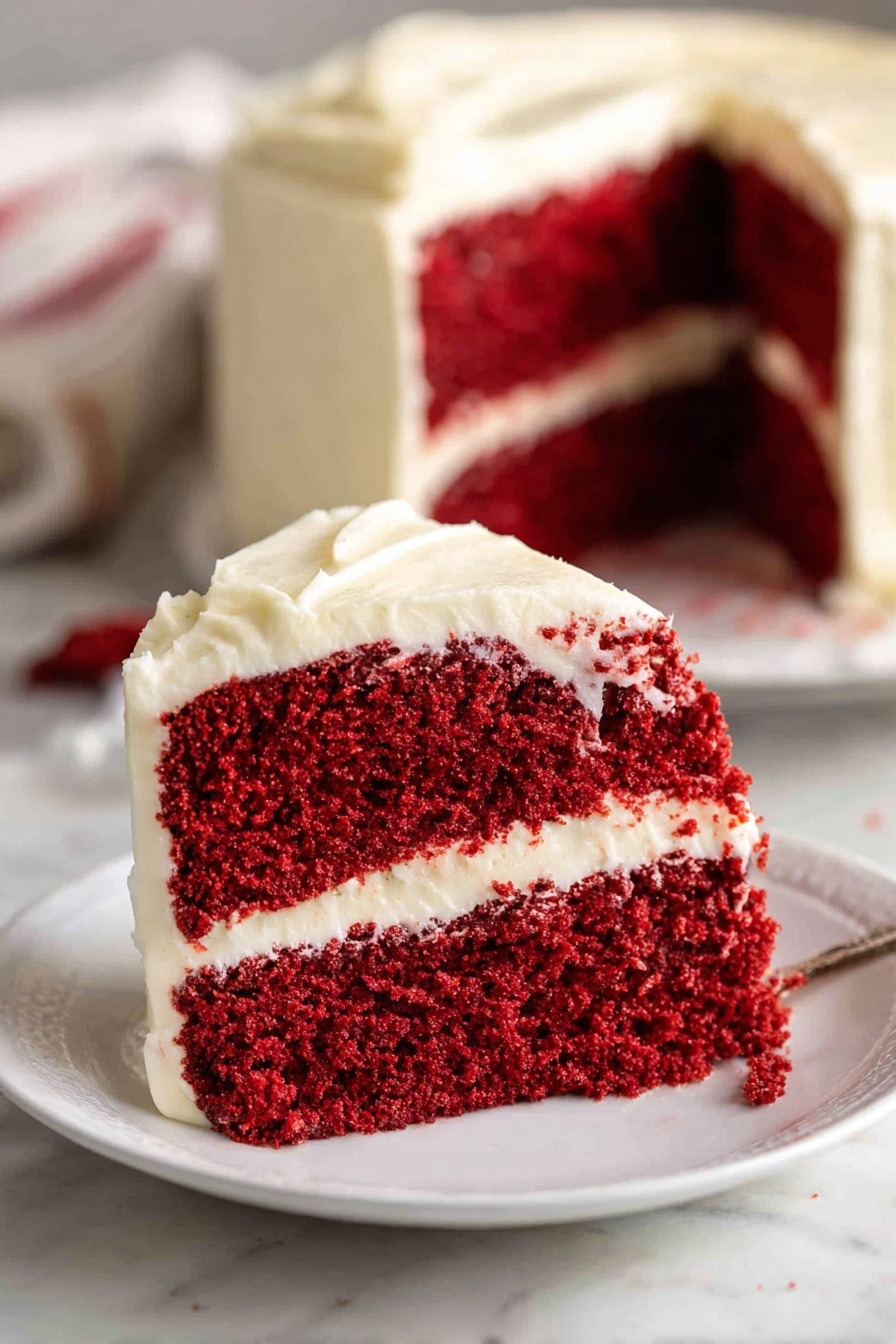
- Reliably Moist and Velvety: This cake’s texture is soft and tender every time thanks to the combination of buttermilk and oil.
- That Iconic Red Hue: The gel food coloring creates that classic, vibrant color without affecting taste.
- Simple Ingredients, Big Flavor: You don’t need fancy or hard-to-find items to make this dessert shine.
- Perfect Cream Cheese Frosting: Tangy and smooth, it balances the slight cocoa and vanilla notes perfectly.

Ingredients You’ll Need
This recipe calls for classic baking staples you likely already have, plus a few little special touches that make it truly stand out. Using cake flour keeps the crumb light and tender, and I always recommend using room temperature ingredients to make everything mix smoothly.
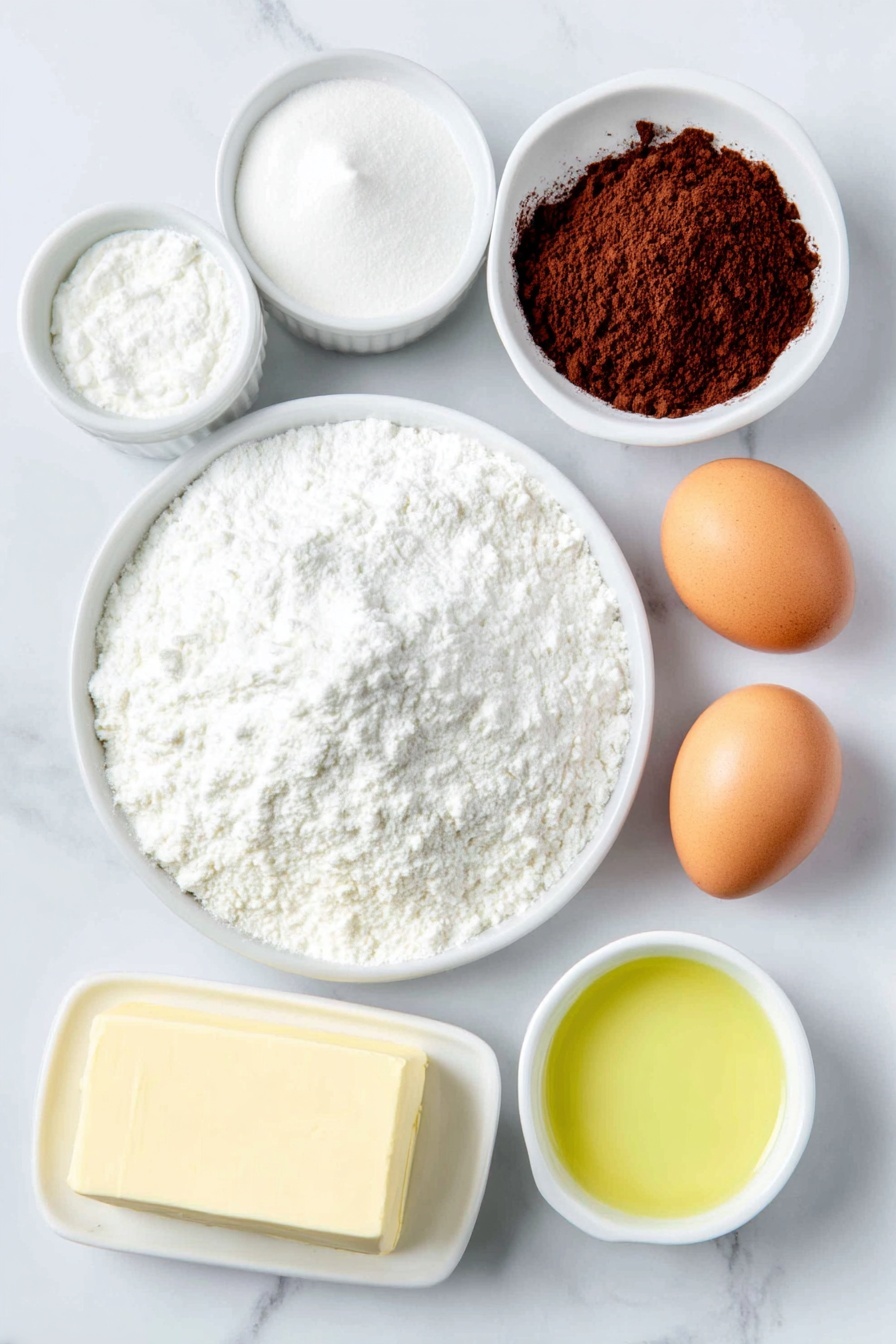
- Plain cake flour: This low-protein flour is key for that delicate crumb; don’t swap it for all-purpose without adjusting.
- Cocoa powder, unsweetened: Just a touch to give depth without overpowering the red flavor.
- Baking soda: Helps the cake rise and stay light—be sure to use baking soda, not baking powder.
- Salt: Balances sweetness and enhances flavor.
- Unsalted butter: I prefer softened, but not melted, to get a nice creamy base when creaming with sugar.
- Caster/superfine white sugar: Dissolves easily, resulting in a smoother batter.
- Eggs: Always use room temperature for better incorporation and rise.
- Vegetable oil: Adds moisture and keeps the cake tender.
- White vinegar: This little acid reacts with the baking soda and buttermilk to help that tender crumb and tangy undertone.
- Vanilla extract (or essence): Boosts the overall flavor and subtle sweetness.
- Buttermilk: Adds moisture and a slight tang—make sure it’s at room temperature to avoid curdling.
- Red food coloring (liquid or gel): I use gel for vibrant color without extra liquid.
- Philadelphia cream cheese: Use softened block cream cheese for the frosting—it gives the smoothest, richest texture.
- Softened unsalted butter: To blend nicely with cream cheese and sugar in frosting.
- Vanilla extract: For frosting flavor that sings.
- Soft icing (powdered) sugar: Sifted to avoid lumps in your frosting.
Variations
I love that this Classic Red Velvet Cake Recipe is so adaptable. Over time, I’ve tweaked it here and there to fit different occasions or dietary needs, and you should definitely feel free to experiment to make it your own.
- Vegan version: I replaced eggs with flax eggs and used vegan cream cheese—still rich and delicious!
- Less red, more cocoa: For a more chocolate-forward flavor, I reduce the food coloring and up the cocoa powder slightly.
- Red velvet cupcakes: This batter works perfectly in cupcake liners for a handheld treat or parties.
- Spiced twist: A pinch of cinnamon or allspice adds a warming note I love during the holidays.
How to Make Classic Red Velvet Cake Recipe
Step 1: Prep your pans and preheat the oven
First things first: preheat your oven to 180°C (350°F), no matter your oven type. Butter two 8-inch round cake pans thoroughly—don’t skip the sides! Then dust them lightly with cocoa powder instead of flour. This trick helps the cakes release cleanly without ruining that signature red color. I discovered this little hack when I had cakes sticking terribly using flour, and cocoa makes the crumb edges more visually appealing, too.
Step 2: Combine and sift your dry ingredients
In a medium bowl, sift together the cake flour, unsweetened cocoa powder, baking soda, and a pinch of salt. Whisk them once or twice to blend evenly. Sifting is crucial here; it stops lumps and helps mix all those active dry ingredients perfectly, which means an even rise and crumb.
Step 3: Cream butter and sugar for a fluffy base
Use an electric mixer or stand mixer with a paddle attachment to beat the softened butter and superfine sugar until the mixture is pale and smooth. This usually takes about 3-4 minutes. Don’t rush this step—it creates tiny air bubbles that give your cake that irresistible light and fluffy texture.
Step 4: Add eggs one at a time
Crack in the eggs one by one, beating well after each addition. The mixture might look curdled at first, but don’t panic—keep mixing until it becomes silky and smooth again. I remember the first time I panicked here and added a dry ingredient too soon, which made the batter seize, so patience is your friend.
Step 5: Mix in oil, vinegar, vanilla, buttermilk, and red food coloring
Now, add the vegetable oil, white vinegar, vanilla extract, buttermilk (room temperature is best), and your red food coloring. Beat these in until your batter looks smooth and beautifully vibrant. The vinegar might seem odd, but it’s great for a subtle tang that brightens the flavor and activates the leavening.
Step 6: Gently fold in the dry ingredients
Add the sifted dry ingredients in two batches, mixing just until combined. It’s okay if a few tiny lumps remain; over-mixing will develop gluten and make your cake tough. I’ve learned this the hard way—always mix gently and stop once you see the flour disappear.
Step 7: Bake and cool
Divide the batter evenly between your prepared pans, smoothing the tops gently. Bake on the middle rack for roughly 25-30 minutes. Insert a toothpick into the center—if it comes out clean or with a few moist crumbs, your cake is ready. Let the cakes rest for 10 minutes in their pans before transferring to a cooling rack. I always find this rest helps the cakes firm up enough to move without cracking.
Step 8: Whip up the classic cream cheese frosting
Beat softened cream cheese and unsalted softened butter together until smooth and creamy. Add vanilla extract, then gradually beat in sifted powdered sugar until reaching your desired spreadable consistency. Taste along the way—I like mine tangy with balanced sweetness. If it’s too thick, a splash of milk helps; too thin, more powdered sugar.
Step 9: Assemble and decorate
Once cakes are fully cool, layer and spread your frosting on top and around the sides. I like to crumb-coat first—a thin layer to catch loose crumbs—then chill briefly before the final coat. It makes a super clean finish. Feel free to get creative here with piping, sprinkles, or serving with fresh berries.
Pro Tips for Making Classic Red Velvet Cake Recipe
- Use Gel Food Coloring: Liquid can thin the batter; gel gives richer color without extra moisture.
- Don’t Overmix the Batter: To keep your crumb tender, mix dry ingredients in just until they disappear.
- Room Temperature Ingredients: Eggs and buttermilk at room temp make for smoother mixing and better rise.
- Cocoa Powder as Pan Dusting: Keeps the cake from sticking and preserves the red hue better than flour.
How to Serve Classic Red Velvet Cake Recipe
Garnishes
I tend to keep garnishes simple—sometimes just a light dusting of cocoa powder or finely chopped nuts on top for a little crunch. Fresh raspberries or strawberries add a beautiful pop of color and complement the subtle chocolate notes. If I’m feeling fancy, edible flowers are a stunning way to dress this cake up for special occasions.
Side Dishes
This cake pairs wonderfully with a fresh cup of coffee or a creamy latte. For parties, I like serving it alongside lightly whipped cream or a scoop of vanilla bean ice cream—the cold creaminess balances the richness perfectly.
Creative Ways to Present
I once turned this Classic Red Velvet Cake Recipe into a layered trifle for a crowd, layering bite-sized cake pieces with cream cheese frosting and fresh berries in a glass bowl—instantly impressive and easy to serve. Another idea is making mini individual cakes or cupcakes and decorating them with piped rosettes for birthdays or showers.
Make Ahead and Storage
Storing Leftovers
Wrap leftover cake tightly with plastic wrap or keep it in an airtight container. I store mine in the refrigerator because of the cream cheese frosting, which helps keep it fresh for up to 3-4 days. Before serving leftovers, I usually let the slices warm up to room temperature for the best flavor and texture.
Freezing
You can freeze this cake either layered or in separate slices. Wrap each piece well in plastic wrap and then foil to prevent freezer burn. When I’ve done this, the cake maintains its moisture and flavor beautifully for up to 3 months. Just thaw overnight in the fridge before bringing to room temp.
Reheating
If you find your cake a bit firmer from refrigeration or freezing, a gentle warm-up in the microwave (10-15 seconds) or letting it sit out for 20-30 minutes makes a huge difference. Avoid overheating, as it can dry out the cake or melt the frosting.
FAQs
-
Can I use all-purpose flour instead of cake flour?
You can substitute all-purpose flour, but expect a slightly denser and less tender crumb. If you do, try removing 2 tablespoons of flour per cup and replacing with cornstarch to mimic cake flour texture.
-
Why is there vinegar in the recipe?
The vinegar reacts with baking soda and buttermilk to help the cake rise and adds a subtle tang that brightens the flavor, enhancing the classic red velvet profile.
-
Can I make this cake without red food coloring?
Technically yes, but it won’t have that signature red color. The recipe’s flavor will still be delicious, with a mild chocolate and vanilla mix.
-
How do I prevent the cream cheese frosting from being too runny?
Make sure your cream cheese and butter are softened but not over-soft or melted. Also, add powdered sugar gradually and chill the frosting if it’s too soft before frosting your cake.
-
Can I make this cake in one pan instead of two?
You can, but cooking time will be longer, and the cake will be thicker. I recommend using two pans for even baking and easier frosting.
Final Thoughts
This Classic Red Velvet Cake Recipe has such a special place in my kitchen and my heart. It’s the one I make when I want to show someone love without fuss. The tender crumb, rich but light enough frosting, and dazzling color always bring smiles around my table. I truly hope you give this recipe a try—you’ll see how easy it is to bake a bakery-worthy cake that everyone will ask for again and again. Catch me next time for more kitchen love!
Print
Classic Red Velvet Cake Recipe
- Prep Time: 30 minutes
- Cook Time: 25 minutes
- Total Time: 55 minutes
- Yield: 10 to 12 servings
- Category: Dessert
- Method: Baking
- Cuisine: American
Description
This classic Red Velvet Cake features a soft, velvety sponge with a perfect balance of buttery flavor, subtle cocoa richness, and a tangy hint from buttermilk. Layered with a smooth and creamy Philadelphia cream cheese frosting, this iconic dessert is moist, colorful, and perfect for all occasions.
Ingredients
Dry Ingredients
- 2 2/3 cups (400 g) plain cake flour
- 2 tbsp (10 g) unsweetened cocoa powder
- 1 tsp (5 g) baking soda (NOT baking powder)
- Pinch of salt
Wet Ingredients
- 1/2 cup (115 g) unsalted butter, softened (1 US stick)
- 1 1/2 cups (330 g) caster or superfine white sugar
- 2 eggs, at room temperature (around 60 g each)
- 1 cup (250 ml) vegetable oil
- 1 tsp white vinegar
- 2 tsp vanilla extract or essence
- 1 cup (250 ml) buttermilk, at room temperature
- 2 1/2 tbsp red food colouring liquid (use gel if in the UK)
Frosting
- 14 oz (400 g) Philadelphia Cream Cheese block, softened but not too soft
- 1/2 cup (115 g) unsalted butter, softened but not too soft
- 1 1/2 tsp vanilla extract
- 4 cups (450 g) soft icing sugar/powdered sugar, sifted
Instructions
- Preheat and Prepare Pans: Preheat your oven to 180°C (350°F) for all oven types. Butter two 21cm (8 inch) round cake pans on the sides and base, then dust them with cocoa powder to prevent sticking.
- Sift Dry Ingredients: Sift together the cake flour, cocoa powder, baking soda, and a pinch of salt into a bowl, then whisk to combine evenly. Set aside.
- Beat Butter and Sugar: Place the softened butter and caster sugar into a large bowl and beat with an electric mixer or stand mixer (using the paddle attachment) until the mixture is smooth and well combined.
- Incorporate Eggs: Add the eggs one at a time to the butter-sugar mixture, beating well after each addition. Initially, the batter may look curdled; continue beating until it becomes smooth.
- Add Liquids and Color: Pour in the vegetable oil, white vinegar, vanilla extract, buttermilk, and red food coloring. Beat everything until fully combined and the batter is smooth.
- Combine Dry Ingredients: Gradually add the sifted dry ingredients to the wet mixture. Beat just until combined; small lumps are okay as over-mixing can toughen the cake.
- Divide and Bake: Evenly divide the batter between the prepared cake pans. Bake on the same shelf for 25 to 30 minutes, or until a toothpick inserted in the center comes out clean.
- Cool the Cakes: Let the cakes rest in their pans for 10 minutes before turning out onto a cooling rack. Allow them to cool completely before frosting.
- Prepare Frosting: Beat the softened cream cheese and butter together until smooth. Add vanilla extract and gradually beat in sifted icing sugar until the frosting is creamy and spreadable.
- Assemble the Cake: Once cakes are fully cooled, spread a thick layer of cream cheese frosting on one cake layer. Top with the second layer and cover the entire cake with the remaining frosting. Smooth the surface or create decorative swirls as desired.
Notes
- The recipe video above demonstrates the process visually.
- This cake’s sponge is soft, moist, and rich with subtle chocolate and vanilla notes, plus a tang from the buttermilk.
- Stick to either weight/metric or volume measurements to ensure baking accuracy; avoid mixing units in one step.
- For UK bakers, use gel red food coloring and refer to notes on ingredient substitutions especially for cream cheese.
- The cake yields approximately 10 to 12 servings, depending on slice size.
- After enjoying this cake, try the Red Velvet Cupcakes recipe for a delightful variation.
Nutrition
- Serving Size: 1 slice (approx. 120 g)
- Calories: 380 kcal
- Sugar: 35 g
- Sodium: 230 mg
- Fat: 22 g
- Saturated Fat: 8 g
- Unsaturated Fat: 12 g
- Trans Fat: 0.3 g
- Carbohydrates: 42 g
- Fiber: 1.5 g
- Protein: 4 g
- Cholesterol: 55 mg


