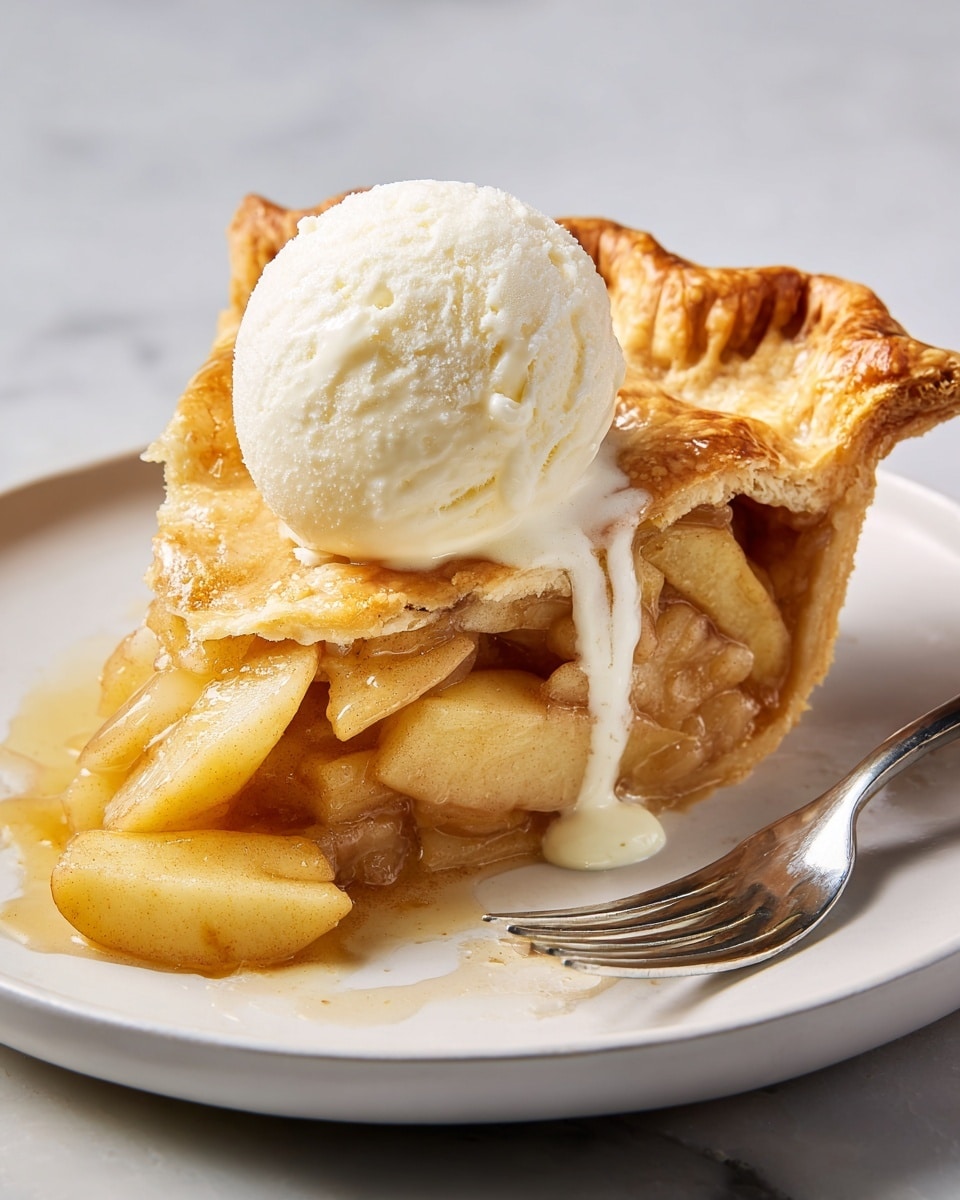
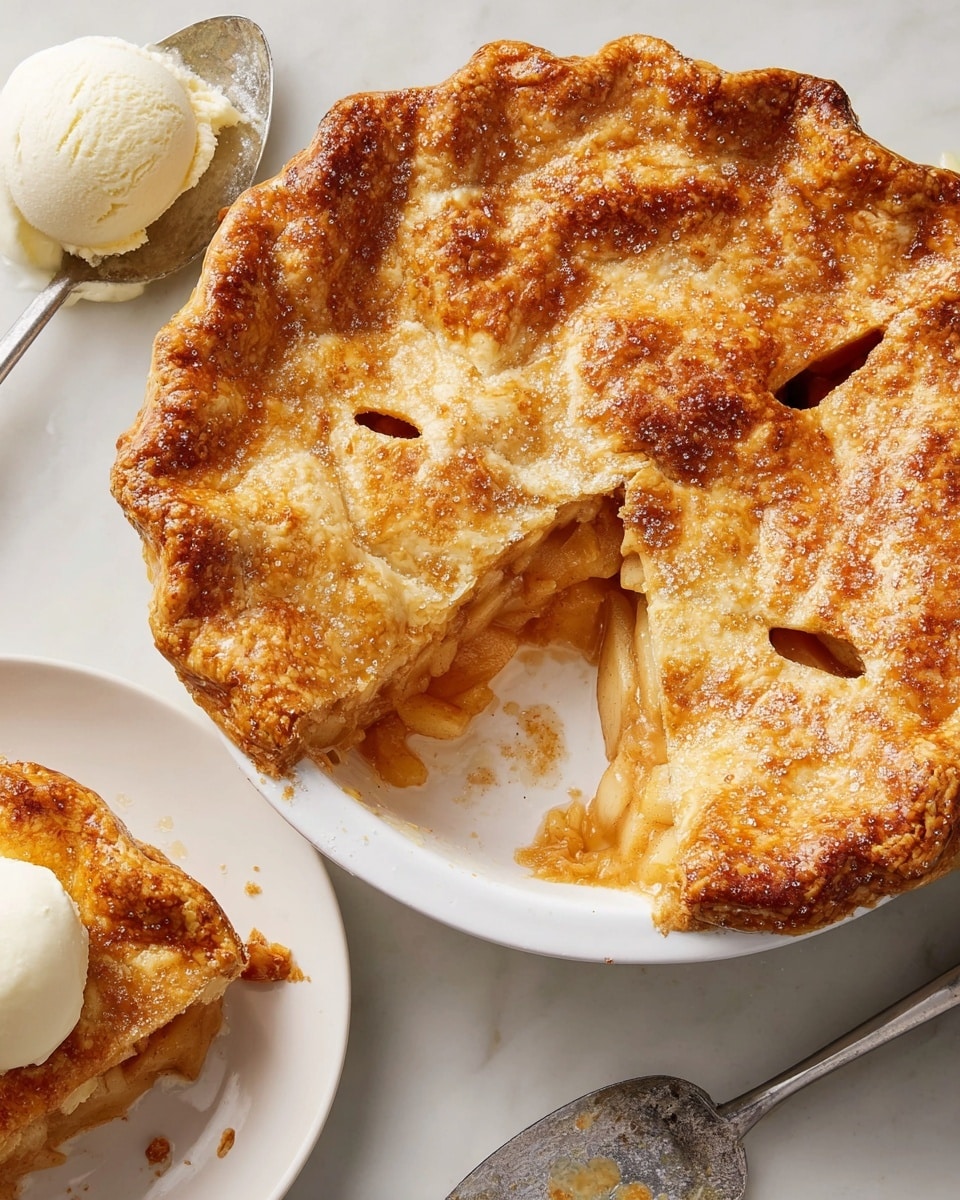
If there’s one dessert that instantly takes me back to cozy family gatherings and fall afternoons, it’s this Classic Homemade Apple Pie Recipe. The blend of tart and sweet apples, cozy cinnamon, and buttery flaky crust creates a warm, comforting experience that feels just like a big, delicious hug. Whether you’re baking for a holiday, weekend treat, or just because you deserve it, this apple pie never fails to impress.
What I love most about this Classic Homemade Apple Pie Recipe is how it combines simple, wholesome ingredients with a bit of patience to yield a pie that smells heavenly and tastes even better. You’ll find that the mix of Granny Smith, Honeycrisp, and Gala apples gives the perfect balance of flavors and textures, and the homemade crust? It’s flaky, buttery, and just the right amount of crisp. Trust me, once you try making this, it might just become your go-to dessert.
Why You’ll Love This Recipe
- Perfect Apple Variety Mix: Using a blend of tart and sweet apples creates a delicious balance in every bite.
- Flaky Homemade Crust: The double crust, chilled properly, gives you that classic buttery crunch that store-bought crusts can’t match.
- Easy Yet Impressive: This recipe looks and tastes like it took hours but comes together smoothly with a few key steps.
- Crowd-Pleaser: My family goes crazy for this pie — it’s a guaranteed hit at every dinner or party.
Ingredients You’ll Need
Let’s talk ingredients — you want fresh, quality items here to make your Classic Homemade Apple Pie Recipe shine. Mixing a few different apple types really elevates your filling, and using fresh lemon juice keeps the flavors vibrant and prevents browning.
- Assorted apples: Granny Smith for tartness, Honeycrisp for sweetness, and Gala for a nice balance; peeling and slicing them thin helps them cook evenly.
- Granulated sugar: I prefer not to swap this out to keep that perfect sweetness level.
- All-purpose flour: Not just for thickening the filling but also for dusting your rolling surface.
- Fresh lemon juice: Keeps apple slices from browning and adds a subtle brightness.
- Ground cinnamon: Adds classic warmth — don’t skip it!
- Pure vanilla extract: Just a splash deepens the flavor beautifully.
- Kosher salt: Balances the sweetness and highlights flavors.
- Unsalted butter: Small cubes dotted on the apples melt into pockets of richness during baking.
- Pie crust dough: Homemade is best, and chilling it prevents shrinking; if you’re pressed for time, store-bought can work, but it won’t be quite the same.
- Egg and water: Together to make an egg wash for that beautiful golden crust.
- Coarse sugar: Sprinkled on top for extra sparkle and crunch.
Variations
One of the best parts about this Classic Homemade Apple Pie Recipe is how easy it is to make your own. I often tweak it depending on what I have on hand or the occasion. Don’t hesitate to experiment!
- Spiced Up: I sometimes add a pinch of nutmeg or ground ginger to the filling for a little extra warmth, especially around the holidays.
- Crust Swap: If you want to save time, I have used a store-bought crust, but homemade definitely wins for flakiness and taste.
- Gluten-Free: Try using a gluten-free flour blend for your dough; I’ve had success, though it takes a bit more care in handling.
- Crunch Factor: Toss in some chopped toasted pecans or walnuts into the filling for a nice crunchy bite — my family loves this twist.
How to Make Classic Homemade Apple Pie Recipe
Step 1: Perfectly Prep Your Filling
Start by mixing your apples with sugar, flour, lemon juice, cinnamon, vanilla, and salt in a large bowl. I like to toss everything gently but thoroughly so every slice is coated evenly. This combination not only flavors the apples but also thickens the juices as it bakes, making sure your filling isn’t watery. Once mixed, transfer to your pie dish and dot the butter over the top — those little cubes melt into golden spots of deliciousness.
Step 2: Roll Out and Chill Your Dough
On a lightly floured surface, roll out one batch of chilled pie dough into a 12-inch circle. The trick I learned is to wrap it around your rolling pin carefully and unroll it onto your pie dish, letting the dough gently slump down without stretching it. Stretching makes the crust shrink during baking, so be gentle! Pop it in the fridge for about 30 minutes or freeze for 10 to help it hold its shape.
Step 3: Assemble and Prepare for Baking
Preheat your oven to 425ºF and place a baking sheet in the center rack to warm up — this helps the bottom crust bake evenly. Roll out your second pie dough batch into a 12-inch circle and carefully drape it over the filled pie. Trim the edges to about an inch, then fold and crimp to seal. Brush the top with an egg wash made from one egg and a tablespoon of water, which gives your crust that irresistible golden sheen. Don’t forget to cut 5-6 small slits in the center to let steam escape and sprinkle with coarse sugar for a beautiful finish.
Step 4: Bake to Perfection
Place your pie on the preheated baking sheet and bake for 20 minutes at 425ºF. Then reduce the heat to 375ºF and continue baking for about 40 minutes more. Keep an eye on the edges — if they start to get too dark, tent them with foil to prevent burning. You’ll know your pie is ready when the crust is beautifully golden and the filling is bubbling through the vents. After baking, transfer the pie to a wire rack to cool completely — patience here really pays off because it helps the filling set.
Pro Tips for Making Classic Homemade Apple Pie Recipe
- Keep Apples Uniform: I slice my apples thin and consistently so they cook evenly—no one likes an undercooked chunk in the middle!
- Chill Your Dough: I learned not to rush rolling and chilling dough—you’ll get a flakier crust that holds up beautifully during baking.
- Use the Hot Baking Sheet Trick: Placing the pie on a preheated baking sheet makes the bottom crust crisp instead of soggy.
- Don’t Skip the Cooling Time: Letting the pie cool for at least two hours before slicing prevents a runny filling and keeps slices neat.
How to Serve Classic Homemade Apple Pie Recipe
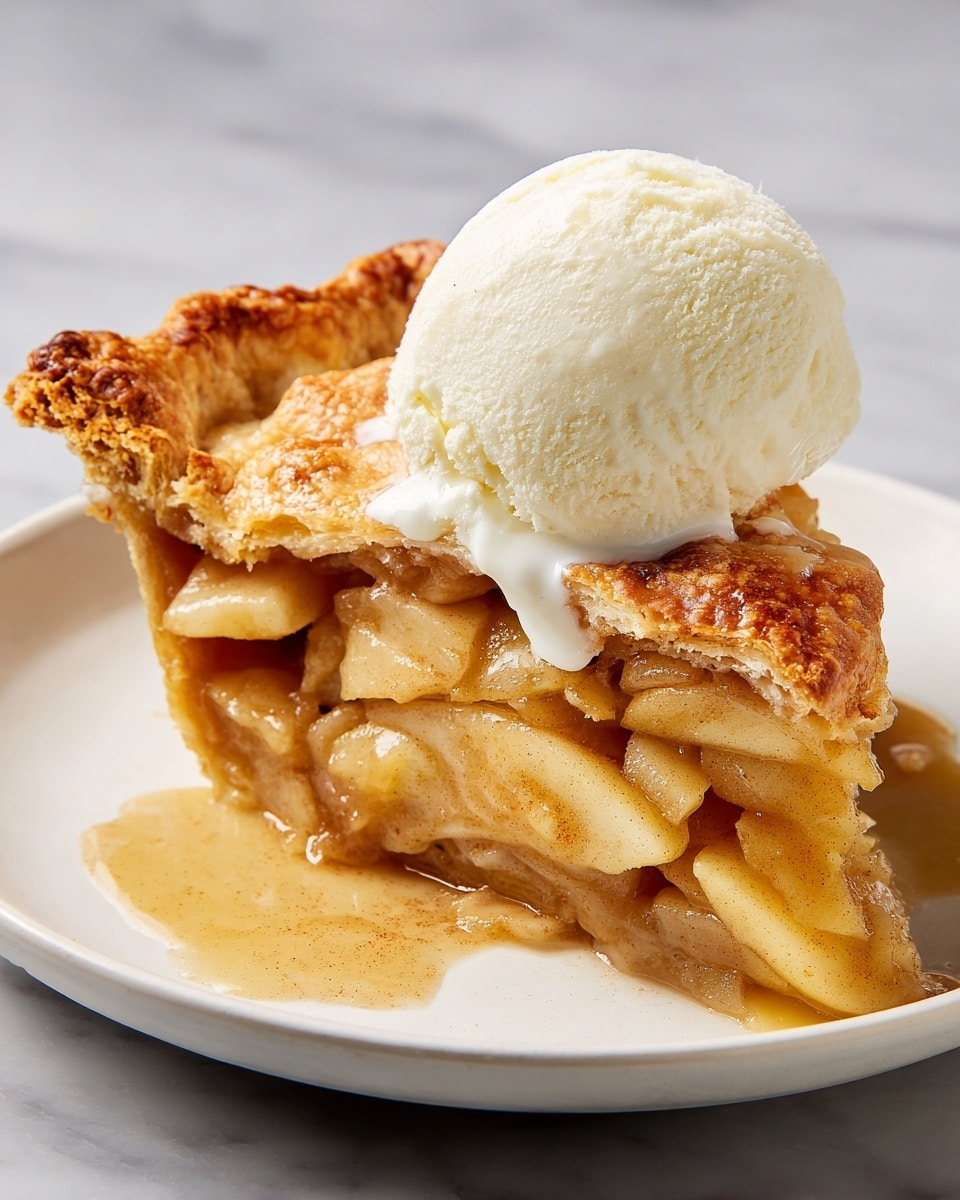
Garnishes
I always serve this pie with a scoop of rich vanilla ice cream on top or a dollop of freshly whipped cream. Sometimes I add a sprinkle of cinnamon or a drizzle of caramel sauce for extra indulgence — trust me, these little garnishes make it feel like dessert perfection.
Side Dishes
A cup of hot coffee or cozy chai tea pairs wonderfully with a slice of this apple pie. If you want to get fancy, you can even try it with a bold cheddar cheese slice on the side—it sounds unusual but so traditional and tasty.
Creative Ways to Present
For a special occasion, I sometimes cut the crust into leaf shapes and arrange them on top instead of a full crust to make a beautiful lattice-like pattern. It’s a lovely rustic look that wows guests and tastes just as delicious.
Make Ahead and Storage
Storing Leftovers
Once cooled, I cover leftovers loosely with foil or plastic wrap and keep the pie refrigerated. It stays delicious for about 3-4 days — the flavors even deepen a little, which I love. Just bring it to room temperature or warm it slightly before serving again.
Freezing
I’ve frozen unbaked pies before by wrapping tightly in plastic and foil—just thaw in the fridge overnight before baking. You can also freeze baked slices, but I recommend wrapping individual pieces well to avoid freezer burn and preserve freshness.
Reheating
To reheat leftover slices, I warm them gently in a 350ºF oven for about 15 minutes. This brings back that fresh-baked crispness in the crust without making it soggy, and the filling gets warm and bubbly again like just baked.
FAQs
-
What type of apples are best for making classic homemade apple pie?
For this Classic Homemade Apple Pie Recipe, a mix of tart and sweet apples works best. Granny Smiths offer tartness and firmness, Honeycrisp adds sweetness and juiciness, and Gala brings softness and natural sugar. This combination ensures your filling has good texture, flavor, and doesn’t turn mushy.
-
Can I use store-bought pie crust instead of making homemade?
Absolutely! While homemade crust makes a big flavor and texture difference, store-bought crust can work in a pinch. Just make sure to chill it well before rolling and avoid over-handling to keep it flaky.
-
How do I prevent the crust edges from burning?
During baking, if you notice the edges turning too dark, cover them loosely with strips of aluminum foil or a pie shield partway through baking. This shields the crust while letting the rest bake to golden perfection.
-
Can I make the apple pie ahead of time?
Yes! You can assemble the entire pie, cover it tightly, and refrigerate for up to 24 hours before baking. Just allow it to come back to room temperature for about 30 minutes before placing it in the oven.
-
How long should I let the pie cool before serving?
It’s best to let the pie cool at least two hours on a wire rack so the filling sets properly. I learned that rushing this step can lead to juicy filling running out when sliced, and that’s no fun!
Final Thoughts
This Classic Homemade Apple Pie Recipe holds a special place in my kitchen and heart—it’s the kind of dessert that brings everyone together, warm and happy. I hope when you try this recipe, you’ll find the same joy I do in sharing it with the people you love. Trust me, once you taste that flaky crust wrapped around tender, spiced apples, you’ll keep coming back for more. So go ahead, bake this pie, savor those moments, and enjoy all the compliments heading your way!
Print
Classic Homemade Apple Pie Recipe
- Prep Time: 45 mins
- Cook Time: 1 hr
- Total Time: 4 hrs 45 mins
- Yield: 8 servings
- Category: Dessert
- Method: Baking
- Cuisine: American
Description
Classic homemade apple pie featuring a tender, flaky double crust and a spiced apple filling made with a mix of Granny Smith, Honeycrisp, and Gala apples. This recipe results in a beautifully golden, bubbly pie with a perfect balance of sweetness and tartness, ideal for any occasion.
Ingredients
Filling
- 3 1/2 lb. assorted apples (such as Granny Smith, Honeycrisp, and/or Gala), cored, peeled, thinly sliced
- 2/3 cup granulated sugar
- 2 Tbsp. all-purpose flour
- 2 Tbsp. fresh lemon juice
- 1 tsp. ground cinnamon
- 1/2 tsp. pure vanilla extract
- 1/4 tsp. kosher salt
- 2 Tbsp. unsalted butter, cut into small pieces
Crust and Assembly
- 2 batches pie crust, made and chilled at least 2 hours
- All-purpose flour, for rolling
- 1 large egg
- 1 Tbsp. water
- Coarse sugar, for sprinkling
Instructions
- Prepare the filling: In a large bowl, toss together the thinly sliced apples, granulated sugar, all-purpose flour, fresh lemon juice, ground cinnamon, pure vanilla extract, and kosher salt until everything is well combined and the apples are evenly coated.
- Fill the pie dish: Transfer the apple mixture to the prepared 9″ pie dish, spreading evenly. Dot the top of the filling with small pieces of unsalted butter to add richness and moisture during baking.
- Roll out bottom crust: On a lightly floured surface, roll one batch of pie dough into a 12″ circle. Carefully wrap the dough around a rolling pin and gently unfurl it into the 9″ pie dish. Lift the edges and allow the dough to slump down naturally without stretching the dough. Refrigerate the pie shell for 30 minutes or freeze for 10 minutes to firm up.
- Preheat oven and prepare for baking: Place a rack in the center of the oven and preheat the oven to 425ºF (220ºC). Put a large baking sheet on the rack to preheat along with the oven. This will help catch any drips and ensure even heat distribution.
- Roll out and place top crust: Roll out the second batch of dough on a lightly floured surface into a 12″ circle. Carefully drape this dough over the apple filling. Trim the excess dough to leave a 1″ overhang all around. Fold the overhang up and over itself, then crimp the edges to seal and create a decorative border.
- Apply egg wash and cut slits: In a small bowl, whisk together the large egg and water. Brush this egg wash over the entire surface of the top crust to help it brown nicely. Cut 5 to 6 small slits in the center of the crust to allow steam to escape during baking. Sprinkle the crust with coarse sugar to add crunch and sweetness.
- Bake the pie: Place the pie dish on the preheated baking sheet in the oven. Bake at 425ºF (220ºC) for 20 minutes to set the crust. Then reduce oven temperature to 375ºF (190ºC) and continue baking for about 40 more minutes. If the edges of the crust begin to darken too much, cover them loosely with foil to prevent burning. Bake until the crust is golden brown and the filling is bubbly.
- Cool before serving: Remove the pie from the oven and transfer it to a wire rack. Let the pie cool completely for at least 2 hours before slicing and serving. This cooling time helps the filling to set and flavors to meld.
Notes
- Use a mix of tart and sweet apples for the best flavor and texture balance.
- Make sure to chill the pie crust ahead of time to prevent shrinking and help with flakiness.
- Don’t stretch the dough when fitting it into the pie dish to avoid shrinking during baking.
- Cover the pie edges with foil if they brown too quickly during baking.
- Letting the pie cool thoroughly prevents runny filling and makes slicing easier.
Nutrition
- Serving Size: 1 slice (1/8th of pie)
- Calories: 350
- Sugar: 24g
- Sodium: 120mg
- Fat: 14g
- Saturated Fat: 8g
- Unsaturated Fat: 5g
- Trans Fat: 0g
- Carbohydrates: 50g
- Fiber: 4g
- Protein: 3g
- Cholesterol: 40mg

