
If you’re looking for a fun and festive holiday treat, I have just the thing for you: a Christmas Cake Pops Recipe that’s irresistibly delicious and surprisingly easy to make. These little cake pops bring all the joy of a holiday cake, but in bite-sized form that’s perfect for parties, gift-giving, or just a cozy night in. Trust me, once you try this, your family and friends will be asking for them year after year.
Why You’ll Love This Recipe
- Super Easy to Make: The recipe uses a boxed cake mix and store-bought frosting to save time without sacrificing flavor.
- Customizable Decorations: You can get creative with candy melts, sprinkles, and themed toppings for a festive touch.
- Perfect Party Treats: These bite-sized pops are a huge hit at holiday gatherings, making sharing fun and mess-free.
- Great for Gifting: Wrapped nicely, these cake pops make thoughtful, homemade gifts that spread holiday cheer.

Ingredients You’ll Need
This Christmas Cake Pops Recipe is all about simple ingredients that come together beautifully. You can find almost everything at your local grocery store, and the candy melts add that perfect pop of holiday color and sweetness.
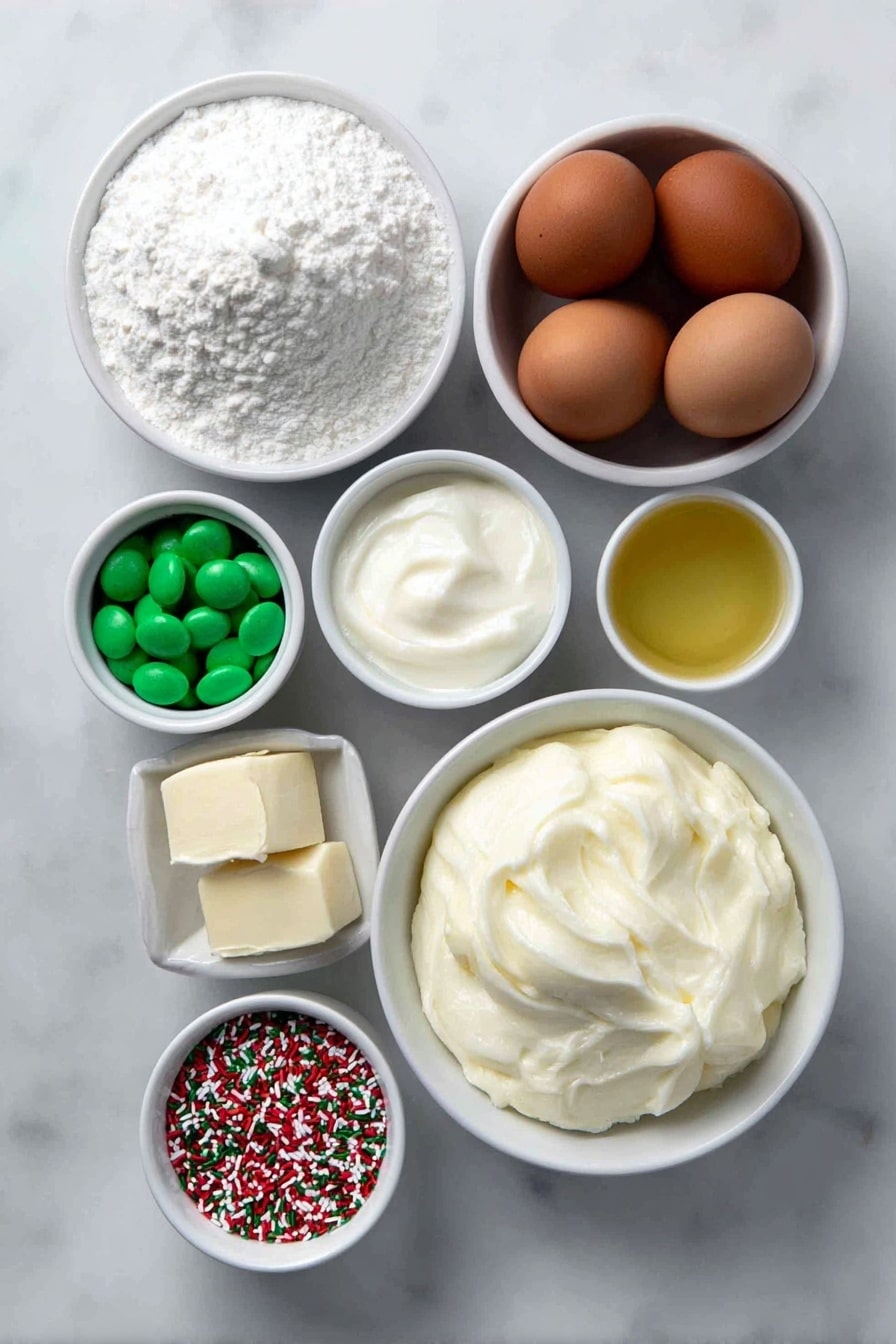
- White Cake Mix: Using a box mix keeps things easy and consistent — stick to white cake for a nice neutral base.
- Water: Just enough to get your cake mix ready to bake; follow package recommendations for best results.
- Vegetable Oil: Helps keep the cake moist, which makes the pops soft and tender.
- Egg Whites: These add structure without extra fat, making your cake light and perfect for crumbling.
- Vanilla Frosting: This binds the crumbled cake together — store-bought works great, or homemade if you prefer.
- Candy Melts: Essential for coating your pops — I recommend red, white, green, or brown to get those festive colors going.
- Sprinkles or Other Candy Melts for Decorating: Use these to jazz up your pops; think pretzels for antlers or mini Reese’s for ornaments.
Variations
One of the things I love about this Christmas Cake Pops Recipe is how easy it is to make it your own. I’ve tried different frostings and decoration styles, and you can absolutely tweak it to match your holiday vibe.
- Flavor Twists: I once swapped vanilla frosting for cream cheese frosting — deliciously tangy and a perfect match for the sweet cake.
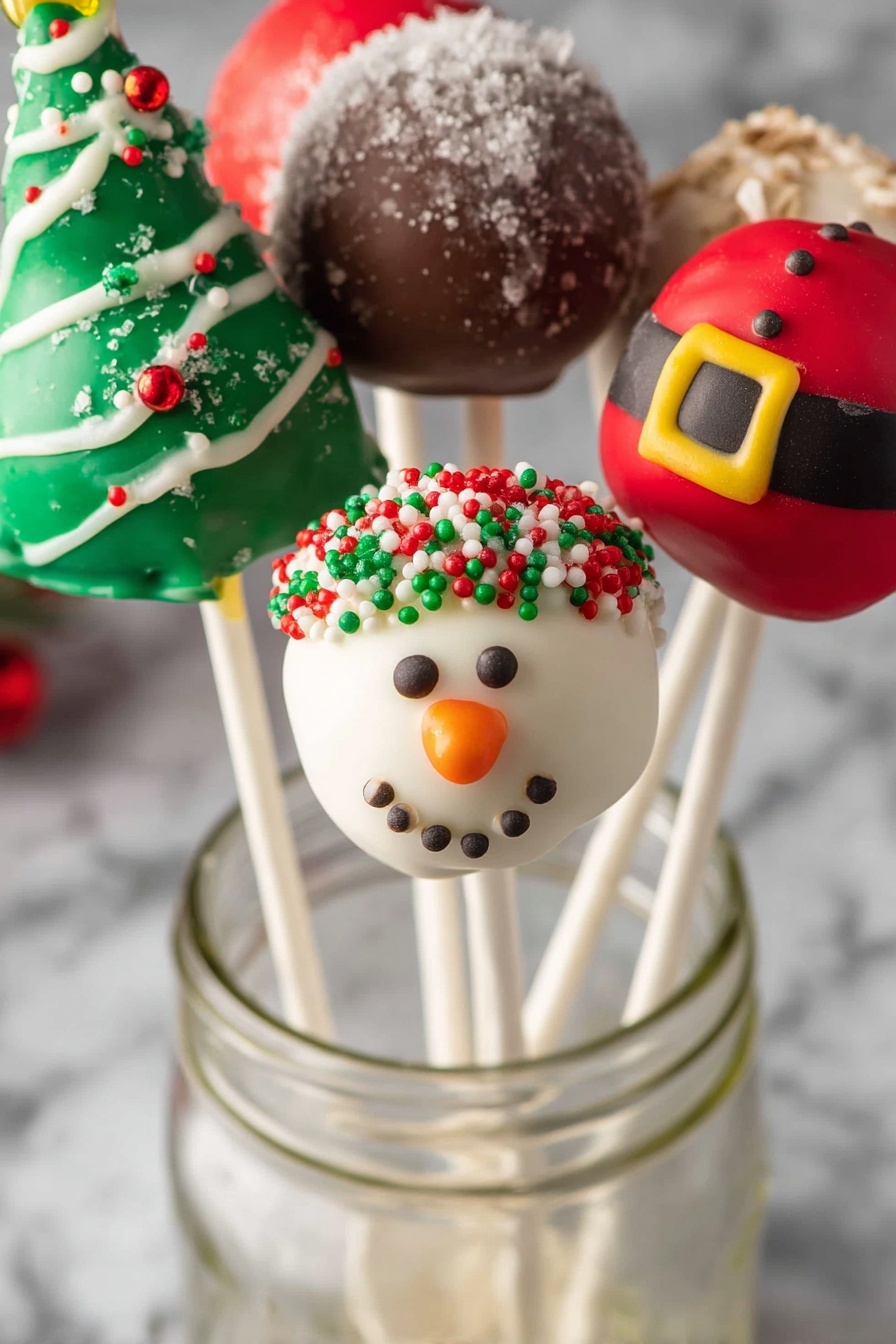
- Decor Style: Sometimes I shape these into trees or snowmen instead of just balls — it’s fun (and super cute) for kids’ parties.
- Dietary Swaps: You can use gluten-free cake mix or vegan frosting if needed — just make sure the frosting still helps the cake stick together.
- Themed Colors: Beyond traditional reds and greens, try gold and silver candy melts for a chic holiday look that stands out.
How to Make Christmas Cake Pops Recipe
Step 1: Bake the Cake to Perfection
Preheat your oven to 325°F and grease a 9×13-inch baking dish well so the cake comes out easily. Mix together your white cake mix, water, vegetable oil, and egg whites in a large bowl. I like to beat it on medium speed for a couple of minutes, stopping to scrape down the sides so everything is evenly combined. Pour the batter into your prepared baking dish and bake for 25 to 30 minutes — a toothpick inserted into the center should come out clean. I learned that baking slightly cooler than package directions helps keep the cake tender and less dry, which is key for great cake pops.
Step 2: Crumble and Mix With Frosting
Once your cake is completely cooled (this is important — warm cake makes the frosting melt), crumble it into a large bowl. The goal is to get small, even crumbs. Then, add your vanilla frosting in and mix everything with a spoon or your hands. You want the texture to be sticky enough to hold together when rolled into balls, but not soggy. This step is where I’ve seen people either add too much or too little frosting; start with less and add more if needed.
Step 3: Shape, Chill, and Stick
Scoop about 24 spoonfuls of the mixture onto a parchment-lined baking sheet, then pop it in the freezer for 10 minutes. This chilling step helps the cake mixture firm up, making it easier to roll or shape — I’ve found this trick really cuts down on mess and frustration. When set, roll each scoop into a smooth ball, or if you’re feeling festive, shape them into little trees. Stick a cake pop stick into each one, then back into the freezer while you prepare your candy melts.
Step 4: Dip and Decorate
Melt your candy melts in a microwave-safe bowl on 50% power, stirring every 30 seconds until smooth. I like to work with red, white, green, and sometimes brown candy melts (brown is great for Reindeer cake pops!). Dip each cake pop into the melted candy, then stick the base into a piece of styrofoam to dry. If you’re adding sprinkles, do it right after dipping before the coating hardens; otherwise, they won’t stick well. For extra flair, melt a second color, place it in a piping bag or Ziploc with a tiny corner snipped off, and add stripes, faces or festive patterns once the first layer sets.
Pro Tips for Making Christmas Cake Pops Recipe
- Use Cold Tools: Chill your mixing bowl and utensils for easier handling of frosting and cake mixture.
- Avoid Overfilling Your Piping Bag: It’s easier to control your candy melt designs with smaller amounts at a time.
- Secure Your Sticks: Dip the tip of each cake pop stick into melted candy melts before inserting into the cake ball to help it stay put.
- Prevent Cracks: Don’t overbake the cake — a moist, tender crumb keeps the cake pops from cracking during dipping.
How to Serve Christmas Cake Pops Recipe
Garnishes
I personally love adding a mix of festive sprinkles — think red and green stars, white snowflakes, or edible glitter for a magical touch. Pretzels make fantastic antlers if you’re creating reindeer pops, and mini Reese’s cups resemble Christmas ornaments beautifully. These simple garnishes really elevate the look without a lot of extra effort.
Side Dishes
Serve these cake pops alongside a cozy holiday drink — maybe some hot cocoa with marshmallows or warm spiced cider. They also pair well with a cheese board for a sweet and savory contrast at your holiday gatherings. My family especially enjoys them as a sweet finish after a festive meal.
Creative Ways to Present
For the holidays, I like to arrange my Christmas Cake Pops Recipe in a decorative styrofoam block wrapped in festive paper or place them standing in a pretty vase filled with holiday ornaments or shredded colored paper. You could also individually wrap each pop in clear cellophane tied with a ribbon — perfect for gifting or as place settings at your dinner table.
Make Ahead and Storage
Storing Leftovers
I keep leftover cake pops in an airtight container in the fridge, which keeps them fresh for up to a week. Just be sure they’re fully set before storing to prevent any candy melts from sticking together.
Freezing
These cake pops freeze really well! After your pops are completely dipped and decorated, freeze them on a tray until solid, then transfer to a freezer-safe container. They’ll keep for about 1 month. When you’re ready, let them thaw in the fridge overnight for best results.
Reheating
Since these are best served cold or at room temperature, I typically don’t reheat cake pops. Just let frozen ones thaw naturally in the fridge, and they’re good to enjoy — the candy coating stays nice and crisp, while the cake inside is soft and delicious.
FAQs
-
Can I use a different cake flavor for this Christmas Cake Pops Recipe?
Absolutely! While white cake gives a nice neutral base for colorful decorations, you can substitute chocolate, spice, or even red velvet cake mix depending on your preference. Just remember the crumb needs to be moist and mild enough to work well with frosting as a binder.
-
How do I prevent cake pops from falling off the sticks?
A good trick I discovered is to dip the cake pop stick in melted candy before inserting it into the cake ball. This “glue” helps secure the stick firmly. Also, chilling the cake balls well before dipping helps them hold together better.
-
Can I make these ahead of time for Christmas parties?
Yes! You can make and fully decorate the cake pops a few days in advance, storing them in an airtight container in the fridge. You can even freeze them for longer storage and thaw as needed.
-
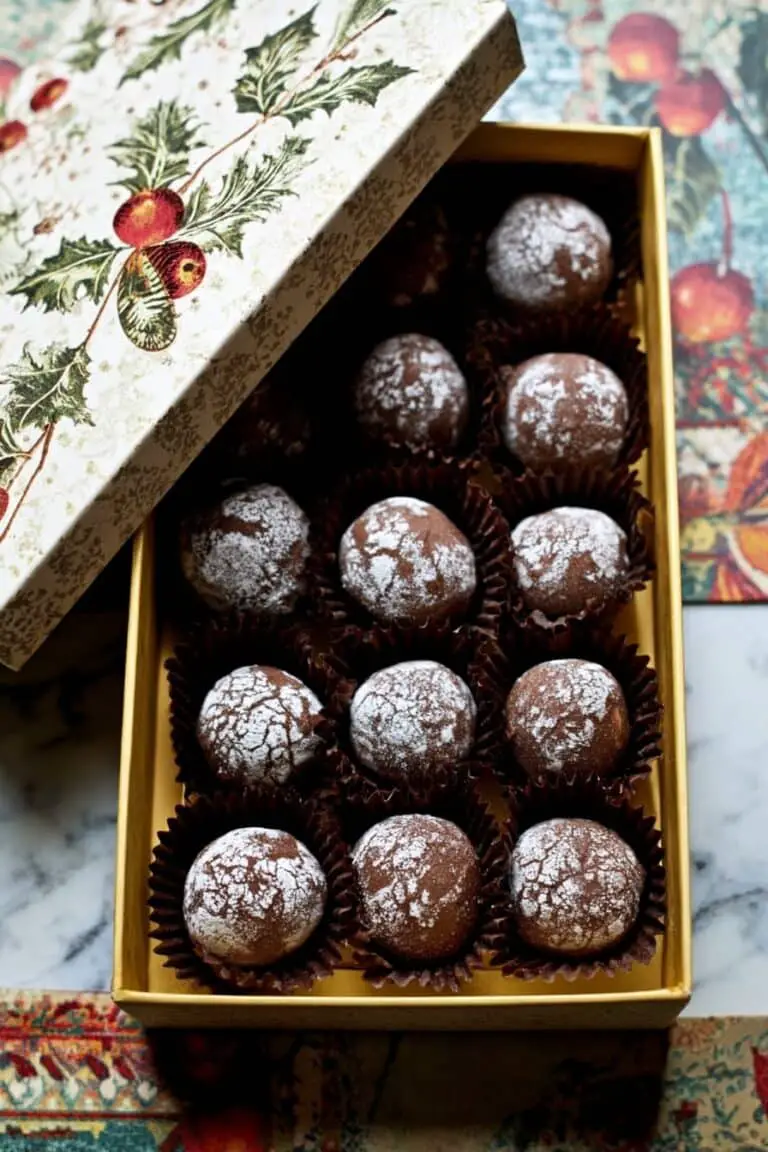
What if I don’t have cake pop sticks?
If you don’t have sticks, you can shape the cake pops into small balls, drizzle with melted candy melts, and let set on parchment paper for cake truffles instead. The festive flavors remain the same!
Final Thoughts
I’ve made this Christmas Cake Pops Recipe countless times, and I never get tired of how much joy they bring to the table. Whether you’re making them with kids, gifting them to friends, or just indulging yourself, these little treats capture the fun and sweetness of the holidays perfectly. Give this recipe a try—you’ll see, once you start, it’s hard to stop making them. Happy baking and happy holidays!
Print
Christmas Cake Pops Recipe
- Prep Time: 10 min
- Cook Time: 25 min
- Total Time: 45 min
- Yield: 24 cake pops
- Category: Dessert
- Method: Baking
- Cuisine: American
Description
These festive Christmas Cake Pops are a delightful holiday treat made from moist white cake mixed with creamy vanilla frosting, dipped in colorful candy melts, and decorated with sprinkles or candy for a fun, customizable finish. Perfect for parties or gift-giving, these pops are both easy to make and visually charming, embodying the joyful spirit of the season.
Ingredients
Cake
- 1 box White Cake Mix
- 1 Cup Water
- ½ cup Vegetable Oil
- 3 Egg Whites
Frosting and Coating
- 16 oz Vanilla Frosting (store bought or homemade)
- 12 oz Candy Melts (red, white, green, or brown for reindeer)
Decorations
- Sprinkles or other Candy Melts for decorating
- Pretzels (if making reindeer)
- Mini Reese’s (for ornaments)
Instructions
- Preheat and Prepare: Preheat your oven to 325°F. Grease a 9×13 inch baking dish to prevent sticking.
- Mix Cake Batter: In a large bowl, combine the white cake mix, water, vegetable oil, and egg whites. Beat on medium speed for 2 minutes, scraping down the sides as needed to ensure even mixing.
- Bake Cake: Pour the batter into the greased baking dish and bake for 25-30 minutes or until a toothpick inserted into the center comes out clean. Remove from oven and let cool completely.
- Crumble and Mix: Once cooled, crumble the cake into fine pieces. Add the vanilla frosting to the crumbled cake and stir until well combined and moldable.
- Chill Mixture: Drop spoonfuls (about 24) of the cake-frosting mixture onto a parchment-lined baking sheet and freeze for 10 minutes. This helps the mixture set for shaping.
- Shape Cake Pops: After chilling, roll each spoonful into a smooth ball or shape into trees if desired. Insert a cake pop stick into each ball or tree, then return them to the freezer to firm up further.
- Melt Candy Coating: In a microwave-safe bowl, melt the candy melts on 50% power, stirring every 30 seconds until completely smooth and melted.
- Dip and Decorate: Dip each cake pop into the melted candy coating, ensuring they are fully covered. Immediately add sprinkles or decorations before the coating hardens. Insert the sticks into styrofoam to stand upright and let the coating set.
- Add Details: For extra decoration, melt additional candy melts of different colors and transfer to a piping bag or a Ziploc bag with a small tip cut off. Pipe stripes, faces, or other designs onto the hardened cake pops as desired.
Notes
- These cake pops are highly customizable—decorate them as snowmen, Christmas trees, reindeer, or ornaments using various candy and decorations.
- Freezing the cake mixture before shaping helps to make rolling easier and less sticky.
- Adding sprinkles or decorations right after dipping ensures they stick well before the candy coating hardens.
- Store cake pops in an airtight container at room temperature or refrigerated if you want to keep them longer.
Nutrition
- Serving Size: 1 cake pop
- Calories: 232 kcal
- Sugar: 25 g
- Sodium: 197 mg
- Fat: 10 g
- Saturated Fat: 3 g
- Unsaturated Fat: 6 g
- Trans Fat: 0.1 g
- Carbohydrates: 34 g
- Fiber: 0.2 g
- Protein: 1 g
- Cholesterol: 15 mg


