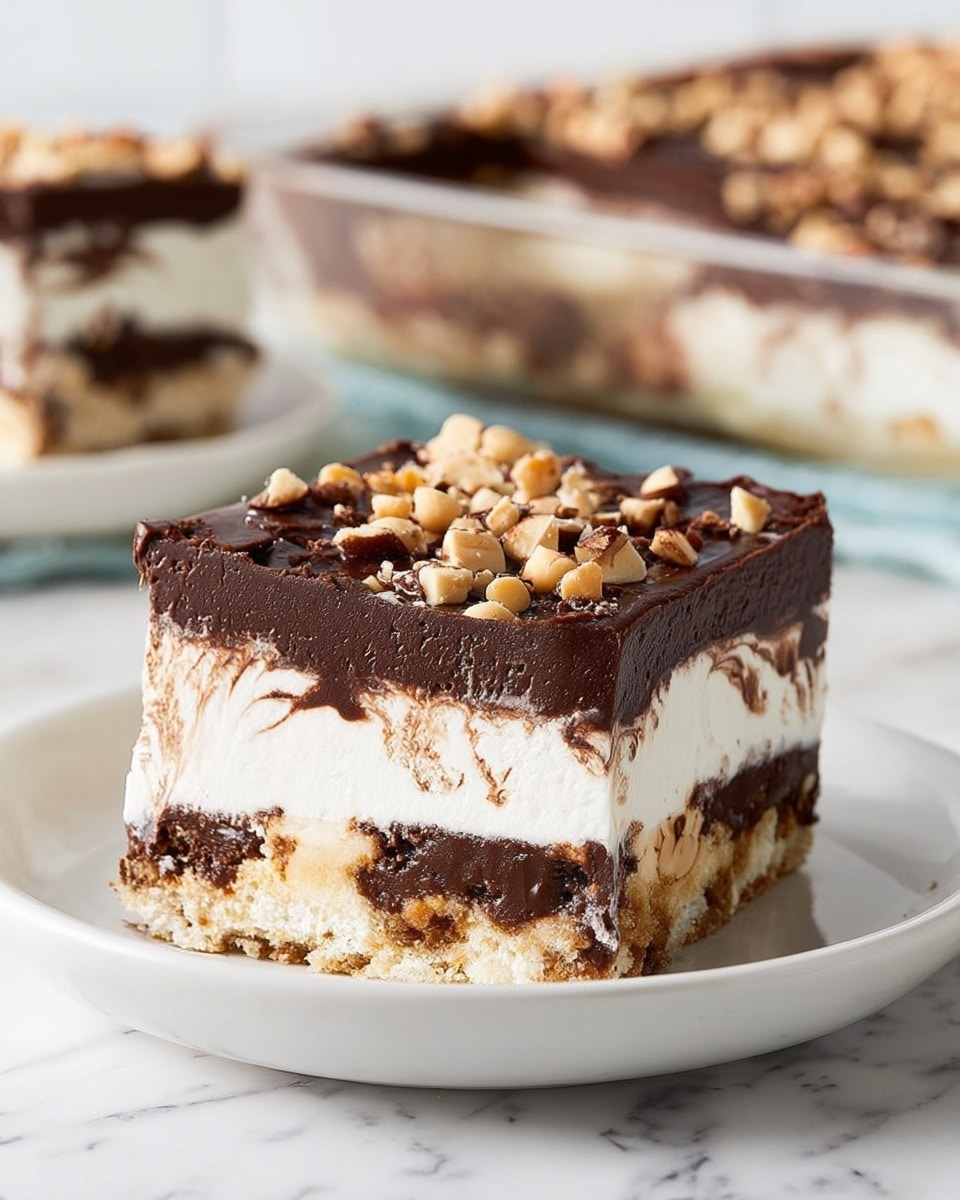
I absolutely love this Buster Bar Ice Cream Cake Recipe because it’s like all your favorite dessert classics rolled into one insanely delicious, no-bake treat. Imagine crunchy fudge-covered graham crackers, creamy vanilla ice cream, gooey hot fudge, crunchy peanuts, and that irresistible magic shell chocolate all layered perfectly in a pan. It’s one of those crowd-pleasers that’s as fun to make as it is to eat.
Whenever I have a party or just want to spoil my family, this recipe is my go-to. It’s so easy to put together, and you don’t need any fancy equipment or baking skills. Plus, it freezes like a dream, so you can make it ahead of time and have a show-stopping dessert ready whenever you want. You’ll find that this Buster Bar Ice Cream Cake Recipe is perfect for birthdays, summer BBQs, or any time you want a delicious frozen treat with a nostalgic twist.
Why You’ll Love This Recipe
- No Bake, No Fuss: This recipe doesn’t require an oven, so it’s perfect for any season or skill level.
- Classic Flavors: It combines favorite ingredients like fudge, peanuts, and magic shell for that nostalgic Buster Bar taste.
- Make Ahead Friendly: You can prep it hours or even a day before, saving you stress on the event day.
- Crowd-Pleaser: Everyone I’ve served this to goes crazy for it — it’s a guaranteed hit!

Ingredients You’ll Need
Every ingredient in this Buster Bar Ice Cream Cake Recipe contributes to that perfect layered texture and flavor. From the fudgy crackers that form a sturdy base to the crunchy peanuts that add contrast, each piece plays its part. Here’s what you’ll gather before getting started.
- Fudge-covered graham crackers: Break them into smaller pieces for an easy-to-spread base that’s sweet and crunchy.
- Vanilla ice cream: I recommend a good-quality creamy vanilla for the best flavor and texture.
- Hot fudge topping: Heating it briefly makes it easier to spread smoothly over the ice cream layer.
- Chocolate magic shell topping: This hardens quickly, so have your peanuts nearby to sprinkle on before it sets.
- Dry roasted peanuts: Adds that classic salty crunch that balances all the sweet layers perfectly.
Variations
I love how flexible this Buster Bar Ice Cream Cake Recipe is, so don’t hesitate to make it your own. Whether you swap out peanuts for another nut or add a drizzle of caramel, personalization only makes this dessert even better. Here are a few ideas I’ve tried and enjoyed.
- Nut swaps: I once replaced peanuts with chopped almonds for a slightly different crunch that my family really liked.
- Ice cream flavors: Vanilla is classic, but chocolate or even peanut butter ice cream works amazingly well too.
- Nut-free version: Simply omit the peanuts and add extra fudge or sprinkle crushed cookies for texture.
- Extra toppings: Try adding mini marshmallows or crushed candy bars on top for a festive touch.
How to Make Buster Bar Ice Cream Cake Recipe
Step 1: Prepare the Base Layer
Start by lightly spraying a 9×13-inch baking dish with nonstick cooking spray—that way, your cake comes out easily. Spread the broken pieces of fudge-covered graham crackers evenly across the bottom; these little pieces form the crunchy foundation of the cake. Don’t pack them too tightly because you want them to hold the ice cream but still leave some air for the layers to meld beautifully.
Step 2: Add and Spread the Ice Cream
Scoop out one container of vanilla ice cream straight onto the cracker base. Use your hands or the back of a spatula to gently press and spread the ice cream evenly. I like to work fast so the ice cream doesn’t melt too much, but if it softens slightly, that’s okay—it’ll help the layers stick together nicely.
Step 3: Spread Warmed Hot Fudge
Remove the lid from the hot fudge topping and microwave it for just 10-15 seconds to loosen it up—it should be pourable, not hot. Quickly spread the fudge evenly over the ice cream, then sprinkle half a cup of peanuts right on top. This combination of fudgy, creamy, and crunchy textures really makes the cake sing.
Step 4: Repeat Ice Cream and Peanuts
Add the remaining container of ice cream on top, spreading it evenly like before. Then sprinkle another half cup of peanuts—you’re building those layers of texture and flavor that make this ice cream cake irresistible.
Step 5: Add Magic Shell and Final Peanuts
For the top layer, remove the lids and foil from the two bottles of chocolate magic shell. Microwave each for 8-10 seconds, screw the lids on tight, and shake well to mix. Squeeze the first bottle over half of the peanut layer and, before it hardens, sprinkle half of the remaining peanuts. Repeat on the other half with the second bottle and the last peanuts. This creates that classic crunchy chocolate shell that hardens just right.
Step 6: Freeze and Serve
Cover your masterpiece and freeze it for at least 4 hours. When it’s time to serve, remove it from the freezer and slice it into 12 pieces—3 slices by 4 slices. I like using a warm knife to get clean cuts without melting the magic shell. Serve immediately and watch your friends and family light up at every bite!
Pro Tips for Making Buster Bar Ice Cream Cake Recipe
- Work Fast with Ice Cream: It melts quickly, so spreading it promptly at room temperature is crucial to keep your layers neat.
- Warm Fudge Gently: Just a few seconds in the microwave is enough—too hot and it melts your ice cream.
- Sprinkle Peanuts Quickly: After pouring magic shell, add peanuts before the shell hardens to get that perfect crunchy top.
- Use a Warm Knife for Slicing: Run your knife under hot water and dry it before slicing to get clean cuts without cracking the shell.
How to Serve Buster Bar Ice Cream Cake Recipe

Garnishes
I usually keep it simple and just let the magic shell and peanuts shine as the natural garnish. But if I’m feeling fancy, I sprinkle a few mini chocolate chips or drizzle a little caramel sauce on each slice before serving. You can even add a dollop of whipped cream for a classic touch—the possibilities are endless!
Side Dishes
This ice cream cake is so rich and flavorful, it pairs beautifully with light accompaniments like fresh berries or a simple fruit salad to balance every bite. Sometimes, I serve it alongside a cup of hot coffee or tea to offset the cold and sweet dessert, which my guests really enjoy.
Creative Ways to Present
For birthdays or special parties, I’ve turned this into individual mini cakes by using muffin tins lined with plastic wrap—easy to scoop out and serve. You can also make layered parfaits in clear glasses, breaking the cake into chunks and layering with whipped cream for a fun twist. It’s a great way to impress without extra effort!
Make Ahead and Storage
Storing Leftovers
If you have leftovers, store the ice cream cake tightly covered with plastic wrap or in an airtight container in the freezer. Keeping it sealed prevents ice crystals from forming and keeps your layers tasting fresh and luscious.
Freezing
Freezing this cake overnight or longer only improves texture and flavor blending. I’ve made it up to 3 days ahead without any drop-off in quality. Just make sure it’s well-wrapped to guard against freezer burn and unwanted odors.
Reheating
This ice cream cake is best enjoyed frozen, so reheating isn’t necessary. When slicing, a warm knife does the trick without melting the dessert. If it’s too hard straight from the freezer, let it sit at room temperature for 5-10 minutes before serving for easier slicing and a softer bite.
FAQs
-
Can I use other ice cream flavors in the Buster Bar Ice Cream Cake Recipe?
Absolutely! While vanilla is classic and helps balance the rich toppings, feel free to experiment with chocolate, peanut butter, or even swirl flavors. Just keep in mind that some flavors might make the cake richer or sweeter, so adjust your toppings accordingly.
-
How long can I store this ice cream cake in the freezer?
For the best taste and texture, I recommend enjoying it within one week. After that, the ice cream and toppings might start to develop freezer burn or icy textures, but if well-wrapped, it can last up to two weeks.
-
Can I make this recipe nut-free?
Yes! Simply omit the peanuts and replace them with extra chocolate chips, cookie crumbs, or even toasted coconut for crunch. It still tastes fantastic without nuts and is a safer option for those with allergies.
-
What kind of magic shell works best?
I usually use store-bought magic shell topping like the popular brands you find in the ice cream aisle. The key is to warm and shake them well before pouring so they harden quickly and evenly for that signature crispy top.
Final Thoughts
This Buster Bar Ice Cream Cake Recipe holds a special place in my heart because it reminds me of summers spent enjoying sweet treats with friends and family. It’s simple, fun, and incredibly rewarding to make, especially when everyone gathers eagerly for a slice. I hope you give it a try—you’ll love how it brings classic flavors together in a cool, crunchy, and creamy dessert that always gets rave reviews. Trust me, once you make this, it’ll be your new favorite ice cream cake too!
Print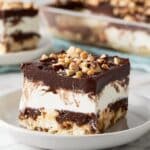
Buster Bar Ice Cream Cake Recipe
- Prep Time: 15 minutes
- Cook Time: 0 minutes
- Total Time: 4 hours 15 minutes
- Yield: 12 slices
- Category: Dessert
- Method: No-Cook
- Cuisine: American
Description
The Buster Bar Ice Cream Cake is a decadent layered dessert featuring a crunchy base of fudge-covered graham crackers, creamy vanilla ice cream, rich hot fudge, crunchy dry roasted peanuts, and a crispy chocolate magic shell topping. Perfectly chilled and served in slices, this no-bake treat combines textures and flavors reminiscent of the classic Buster Bar candy bar in an easy-to-make ice cream cake.
Ingredients
Base and Layers
- 14 fudge-covered graham crackers, broken into smaller pieces
- 96 ounces (2 x 48-ounce containers) vanilla ice cream
- 16 ounces hot fudge topping (e.g., Mrs. Richardson’s brand)
- 14.5 ounces (2 bottles of 7.25 ounces each) chocolate magic shell topping
- 1 1/4 cups dry roasted peanuts (divided: 1/2 cup, 1/2 cup, 1/4 cup)
Instructions
- Prepare the base: Lightly spray a 9×13-inch baking dish with nonstick cooking spray. Evenly spread the broken pieces of fudge-covered graham crackers across the bottom of the dish to form the base layer.
- Add the first ice cream layer: Scoop the vanilla ice cream onto the graham cracker base. Carefully press and spread the ice cream evenly over the crackers, creating a smooth layer.
- Warm and spread hot fudge: Remove the lid from the hot fudge topping and microwave for 10-15 seconds to warm and loosen it for easier spreading. Quickly spread the hot fudge evenly over the ice cream layer.
- Sprinkle peanuts: Evenly sprinkle ½ cup of the dry roasted peanuts over the hot fudge layer.
- Add second ice cream layer: Repeat the ice cream layer by spreading the remaining container of vanilla ice cream over the peanut layer, smoothing it out evenly.
- Sprinkle more peanuts: Sprinkle another ½ cup of peanuts evenly over the second ice cream layer.
- Prepare magic shell topping: Remove lids and foil from the two magic shell topping containers. Microwave each for 8-10 seconds to loosen the chocolate. Screw lids back on tightly and shake well to mix.
- Apply magic shell and peanuts: Squeeze the first magic shell container over half of the peanut-topped ice cream layer. Quickly sprinkle half of the remaining ¼ cup peanuts over the magic shell before it hardens. Repeat with the second magic shell container on the other half, then sprinkle the rest of the peanuts on top before it hardens.
- Freeze the cake: Cover the baking dish and chill the assembled ice cream cake in the freezer for at least 4 hours to allow it to set and harden completely.
- Serve: Just before serving, remove from freezer and slice into 12 pieces (3 slices by 4 slices). Serve immediately for optimal texture and flavor.
Notes
- For easier spreading, warm the hot fudge and magic shell toppings briefly as described to prevent cracking or clumping of chocolate.
- Use a sharp knife dipped in warm water to slice the frozen ice cream cake cleanly without cracking.
- This ice cream cake can be kept frozen for up to 1 week; thaw slightly before slicing for best texture.
- Customize by using different ice cream flavors or nuts if desired.
- If you can’t find fudge-covered graham crackers, substitute with any chocolate-covered cookie or wafer for a similar texture.
Nutrition
- Serving Size: 1 slice (approximately 1/12th of cake)
- Calories: 420
- Sugar: thirty-five grams
- Sodium: 150 mg
- Fat: 22 g
- Saturated Fat: 12 g
- Unsaturated Fat: 8 g
- Trans Fat: 0.3 g
- Carbohydrates: 50 g
- Fiber: 1.5 g
- Protein: 6 g
- Cholesterol: 55 mg

