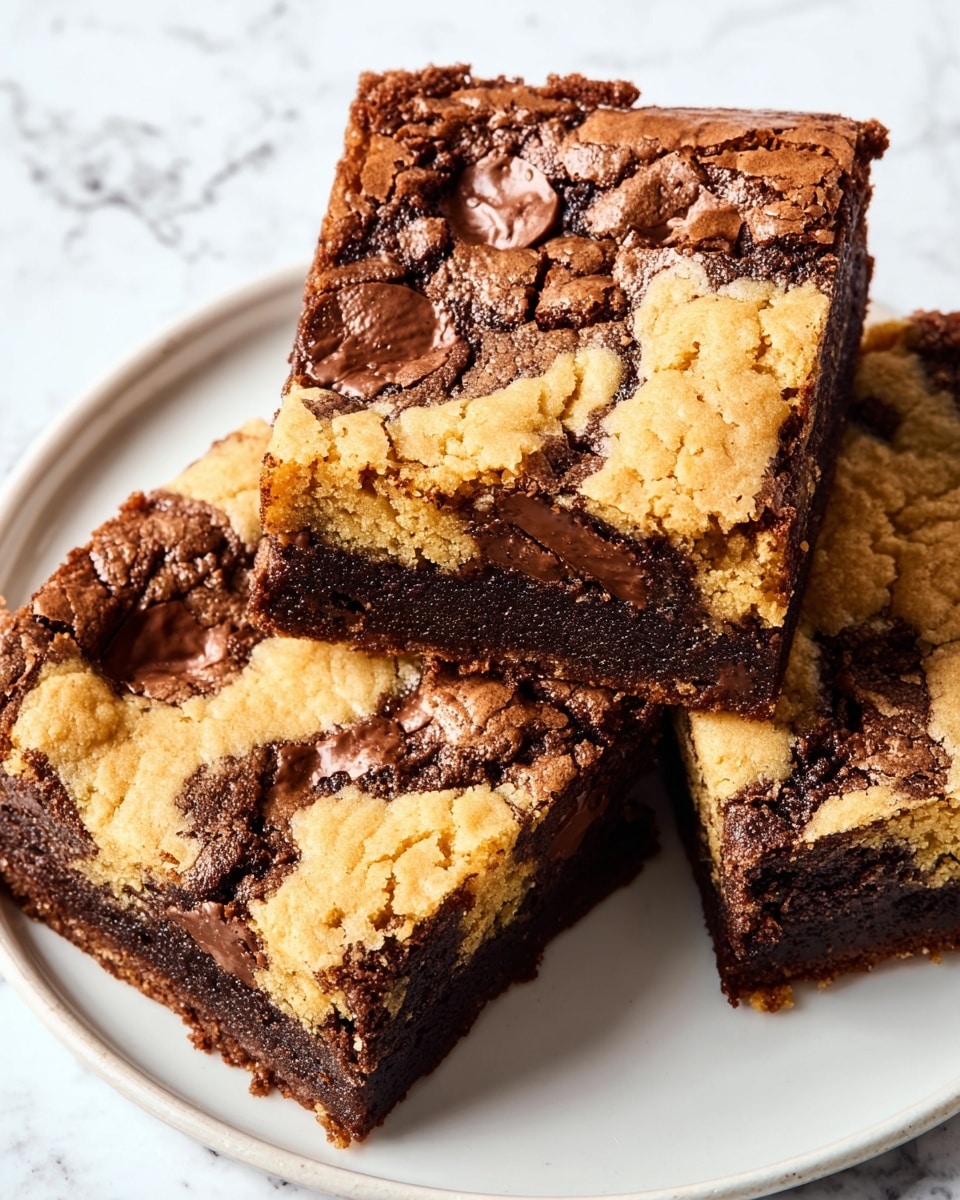
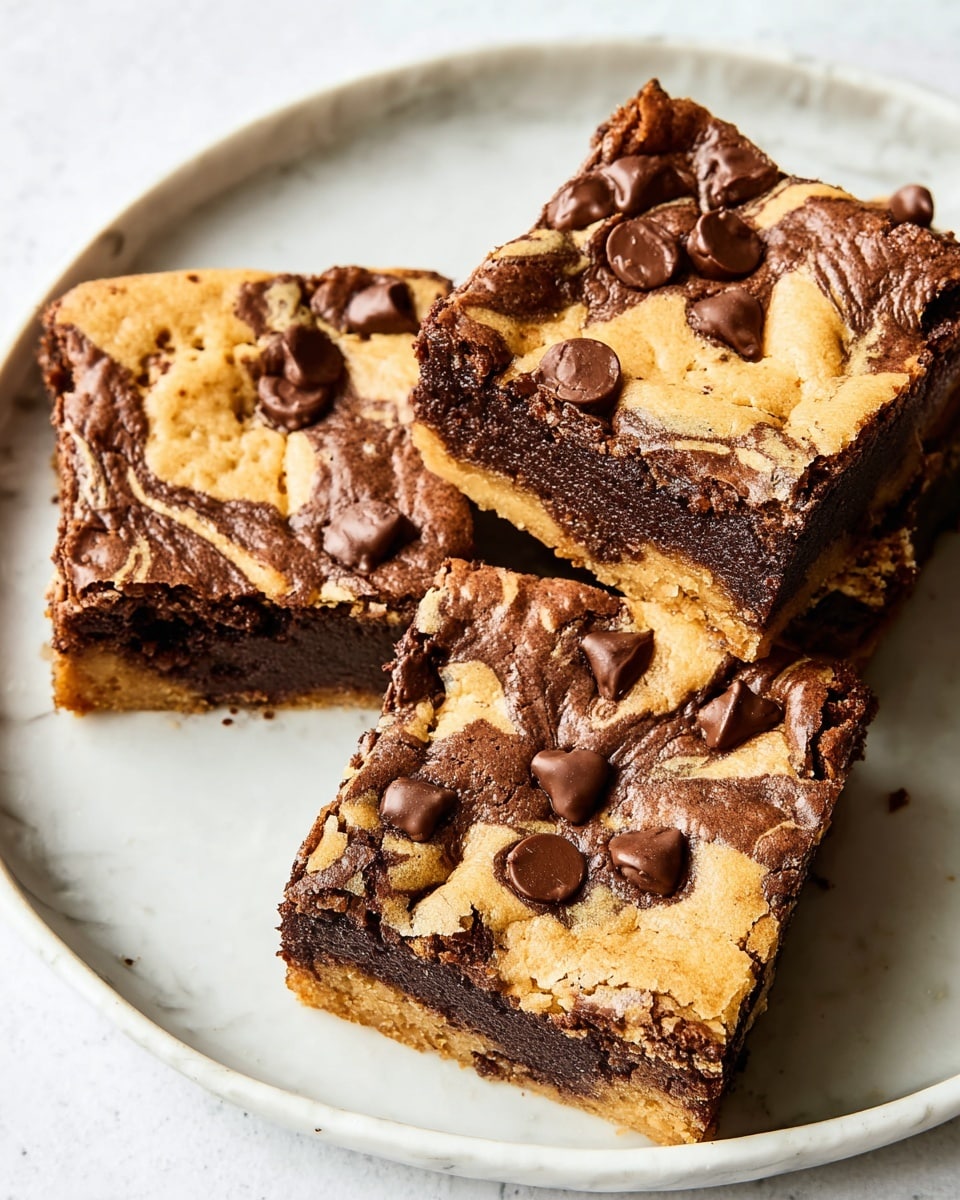
I absolutely love how this Brookie (Chocolate Chip Cookie and Brownie Bar) Recipe brings together two of the most iconic desserts into one glorious treat. Imagine biting into that fudgy, rich brownie layer with gooey chocolate chips, only to follow it with a soft, chewy chocolate chip cookie on top—it’s like having your cake and eating it too, but better! If you’ve ever found it tough to decide between brownies or cookies at a bake sale, this recipe solves that delicious dilemma perfectly.
When I first tried making brookies, I was amazed at how simple it was, yet the result felt like a fancy bakery delight. Whether you’re baking for a crowd, a cozy night in, or want a crowd-pleaser for potlucks, this Brookie (Chocolate Chip Cookie and Brownie Bar) Recipe is a surefire hit. Plus, it bakes in one pan, which means fewer dishes and more time to sneak bites while it cools!
Why You’ll Love This Recipe
- Two Desserts in One: Combines the best of brownies and chocolate chip cookies for double the indulgence.
- Simple Prep: Uses familiar ingredients and straightforward steps, perfect for bakers at any level.
- Perfect for Sharing: Cuts into 20 bars, ideal for parties, potlucks, or family gatherings.
- Baking Tip Included: Avoids glass pans for even cooking and perfect texture every time.

Ingredients You’ll Need
The magic of this Brookie (Chocolate Chip Cookie and Brownie Bar) Recipe starts with classic pantry staples that you probably have on hand. Each ingredient plays a key role in creating the perfect texture and flavor balance between fudgy brownie and chewy cookie.
- Butter: Using softened butter ensures easy mixing and contributes to a tender crumb in both layers.
- Sugar & Brown Sugar: Brown sugar brings moisture and chewiness, while white sugar adds sweetness and crisp edges.
- Eggs: Eggs help bind ingredients and add richness, essential for that melt-in-your-mouth texture.
- Vanilla Extract: A splash of vanilla adds warmth and complements the chocolate flavors beautifully.
- Unsweetened Cocoa Powder: Gives the brownie layer its deep chocolate flavor without being overpowering.
- All-Purpose Flour: Provides the structure for both the brownie and cookie layers.
- Baking Soda & Salt: Leavening and seasoning for lift and flavor balance.
- Chocolate Chips: I always add extra chocolate chips because you can never have too much chocolate!
- Milk Chocolate Chunks (optional): Sprinkled on top last minute for a gooey, melty finish that’s irresistible.
Variations
One of the things I love most about this Brookie (Chocolate Chip Cookie and Brownie Bar) Recipe is how easy it is to make it your own. Experimenting with add-ins or swaps can take it to whole new levels, whether you’re catering to dietary needs or just want to surprise your taste buds.
- Nutty Upgrade: I like adding chopped walnuts or pecans to the brownie layer for a satisfying crunch and nutty aroma.
- Gluten-Free: Swap out all-purpose flour with a gluten-free blend to enjoy brookies without the gluten worries.
- Peanut Butter Swirl: Drizzle peanut butter over brownie batter before adding cookie dough for a rich, nutty swirl that my family goes crazy for.
- Seasonal Spice: Add cinnamon or a pinch of espresso powder to intensify the chocolate flavor and add warmth during cooler months.
How to Make Brookie (Chocolate Chip Cookie and Brownie Bar) Recipe
Step 1: Whip Up the Brownie Batter
Start by preheating your oven to 350°F (175°C)—this makes sure it’s nice and hot when you’re ready to bake. In a large bowl, cream together softened butter, sugar, and brown sugar until it’s light, fluffy, and looks a bit like a cloud—this usually takes about 3-4 minutes. Next, add the eggs one at a time, beating well after each addition to keep that batter creamy. Stir in the vanilla, then sift in your cocoa powder, flour, baking soda, and salt. Mix until everything just comes together; you don’t want to overmix here. Finally, fold in the chocolate chips for extra pockets of melty chocolate. Pour this luscious brownie batter into a 9×13-inch aluminum pan (trust me, avoid glass for best results), and spread it evenly with a spatula.
Step 2: Prepare the Cookie Dough Layer
In a clean large mixing bowl, cream softened butter with brown sugar and white sugar until fluffy, about 3-4 minutes again. Add the egg and vanilla, beating for another minute until combined. Stir in the flour, baking soda, and salt until just mixed, then fold in the chocolate chips. The cookie dough should be thick and spoonable—perfect for dolloping.
Step 3: Layer and Bake to Perfection
Now the fun part: dollop spoonfuls of the chocolate chip cookie dough on top of the brownie batter in your pan. Try to cover as much of the brownie surface as possible, but it doesn’t need to be perfect—those little pockets of brownie peeking through are part of the charm! Bake for 28 to 32 minutes until the edges are set but the center still looks slightly soft—it will continue to cook as it cools. If you decide to add milk chocolate chunks, sprinkle them over the top during the last 5 minutes of baking so they melt but don’t burn. Once baked, remove from the oven and allow the brookies to cool completely. For easier slicing, pop the pan into the freezer for 20-30 minutes to firm up before cutting into bars.
Pro Tips for Making Brookie (Chocolate Chip Cookie and Brownie Bar) Recipe
- Use an Aluminum Pan: I learned the hard way that glass pans make brookies cook unevenly—go aluminum to avoid crunchy edges and underbaked centers.
- Don’t Overmix Layers: Mixing just until combined keeps textures tender; overdoing it can make the layers tough.
- Freeze Before Cutting: Chilling brookies helps get clean, beautiful slices without the cookie layer crumbling apart.
- Add Chocolate Chunks Last: Putting chunks on near the end of bake time gives a gooey, shiny finish that’s irresistible.
How to Serve Brookie (Chocolate Chip Cookie and Brownie Bar) Recipe
Garnishes
I like to keep it simple by dusting fresh brookies lightly with powdered sugar—just a sprinkle adds a sweet, festive touch. If I’m feeling extra fancy, a drizzle of caramel sauce or a scoop of vanilla ice cream on the side never fails to elevate the experience. Fresh berries make a bright contrast too, especially if you’re serving these at a party.
Side Dishes
Since brookies are quite rich, I usually serve them with a tall glass of cold milk or a cup of black coffee to balance the sweetness. Sometimes, I pair them with simple vanilla or cinnamon-spiced yogurt for a surprisingly refreshing combo that my family enjoys.
Creative Ways to Present
For special occasions, I’ve arranged brookie bars on a tiered dessert stand alongside mini cupcakes and fruit skewers—it makes for a colorful and tempting display. You can also cut them into bite-sized squares and serve them on a festive platter with chocolate drizzle and nuts scattered around for an eye-catching party treat.
Make Ahead and Storage
Storing Leftovers
I usually store leftover brookies in an airtight container at room temperature for up to 3 days, but honestly, they rarely last that long in my house! Keeping them tightly sealed ensures they stay soft and fresh without drying out.
Freezing
Freezing brookies works like a charm. I slice them into bars first, then wrap each piece individually in plastic wrap before placing them in a freezer bag. This way, you can grab one or two whenever a sweet craving hits — they’ll keep well for up to 3 months.
Reheating
To reheat, I pop a frozen brookie in the microwave for about 15 seconds or until just warm—this revives the soft texture and melty chocolate without making it rubbery. If I have a few bars, I’ll warm them in a low oven (300°F) for 5-7 minutes to preserve crisp edges.
FAQs
-
Can I use a glass pan instead of an aluminum one for this Brookie recipe?
While you technically can use a glass pan, I strongly recommend sticking with an aluminum pan. I discovered that glass pans cook the brookies much slower and unevenly, causing crunchy edges and an underbaked center. Aluminum pans distribute heat more evenly, resulting in perfectly baked brookies every time.
-
Can I make the brownie and cookie layers ahead of time?
The batter for both layers is best used fresh for optimal texture and rise, but you can prepare the brownie batter a few hours ahead and refrigerate it. The cookie dough layer also holds up well in the fridge for short periods. Just bring both to room temperature before assembling and baking.
-
What’s the best way to cut brookies without them crumbling?
After baking, letting brookies cool completely is crucial. For clean, neat bars, I place the pan in the freezer for 20-30 minutes to firm them up before slicing. Use a sharp knife and wipe it clean between cuts to prevent dragging or crumbling.
-
Can I swap the chocolate chips for another mix-in?
Absolutely! Nuts, white chocolate chips, or even dried fruit like cherries work great as substitutions or additions. Just keep the amount similar to maintain the right texture and baking time.
-
How do I know when the brookies are done baking?
Look for the edges to become firm and set, while the center still looks slightly soft or jiggly—that’s a sign they’ll finish baking as they cool. Avoid overbaking to keep them fudgy and chewy instead of dry.
Final Thoughts
This Brookie (Chocolate Chip Cookie and Brownie Bar) Recipe holds a special place in my heart because it combines the best of two beloved treats into one easy, shareable dessert. Every time I bake it, friends and family can’t get enough, and I love watching their eyes light up at that first bite. If you’re craving a dessert that’s both comforting and impressively delicious, I can’t recommend this enough—give it a try, and don’t be surprised if it becomes your new favorite!
Print
Brookie (Chocolate Chip Cookie and Brownie Bar) Recipe
- Prep Time: 20 minutes
- Cook Time: 30 minutes
- Total Time: 50 minutes
- Yield: 20 bars
- Category: Baking
- Method: Baking
- Cuisine: American
Description
A delightful dessert combining the rich fudgy texture of brownies with the classic chewy chocolate chip cookie on top, known as Brookie bars. These bars feature a dense brownie base topped with a soft chocolate chip cookie layer, baked to perfection and perfect for sharing.
Ingredients
Brownie Layer:
- 3/4 cup Butter (softened)
- 1 cup Sugar
- 1/3 cup Brown Sugar
- 2 large Eggs
- 1 teaspoon Vanilla
- 1/2 cup Unsweetened Cocoa Powder
- 1 cup Flour
- 1/2 teaspoon Baking Soda
- 1/4 teaspoon Salt
- 1/2 cup Chocolate Chips (optional)
Chocolate Chip Cookie Layer:
- 1/2 cup Butter (softened)
- 3/4 cup Brown Sugar
- 1/4 cup Sugar
- 1 large Egg
- 1 teaspoon Vanilla
- 1 1/4 cups Flour
- 1/2 teaspoon Baking Soda
- 1/2 teaspoon Salt
- 1 cup Chocolate Chips
- Milk chocolate chunks (to sprinkle on top, optional)
Instructions
- Prepare Brownie Batter: Preheat your oven to 350°F (177°C). In a large mixing bowl, cream together the softened butter, sugar, and brown sugar for 3-4 minutes until the mixture is light and fluffy. Add eggs one at a time, mixing well after each addition, then stir in the vanilla extract.
- Mix Brownie Dry Ingredients: Add the unsweetened cocoa powder, flour, baking soda, and salt to the wet ingredients. Stir until just combined, then fold in the chocolate chips if using. Pour the batter into a 9 x 13 inch aluminum pan and spread evenly. Avoid using a glass pan as it affects baking time and texture.
- Prepare Cookie Dough: In another large bowl, cream together the softened butter, brown sugar, and sugar for 3-4 minutes. Add the egg and vanilla extract and mix for an additional minute until smooth.
- Mix Cookie Dry Ingredients: Stir in the flour, baking soda, and salt until just combined. Fold in the chocolate chips. Drop spoonfuls of cookie dough evenly over the brownie batter in the pan, trying to cover most of the surface.
- Bake Brookies: Bake in the preheated oven for 28 to 32 minutes or until the edges begin to set up and a toothpick inserted comes out with moist crumbs but not wet batter. If using milk chocolate chunks, sprinkle them on top during the last 5 minutes of baking.
- Cool and Serve: Once baked, let the brookies cool completely in the pan. For easier cutting, place the bars in the freezer for 20-30 minutes before slicing into approximately 20 bars.
Notes
- Do not use a glass pan for baking as brookies will take longer to cook, may become hard on the edges, and underbaked in the center.
- Freezing the bars before cutting helps create clean slices.
- You can omit the chocolate chips or milk chocolate chunks for a less chocolate-intensive version, but they add great texture and flavor.
Nutrition
- Serving Size: 1 bar (approximately 1/20 of recipe)
- Calories: 230
- Sugar: 18g
- Sodium: 130mg
- Fat: 12g
- Saturated Fat: 7g
- Unsaturated Fat: 4g
- Trans Fat: 0g
- Carbohydrates: 29g
- Fiber: 2g
- Protein: 2g
- Cholesterol: 35mg
