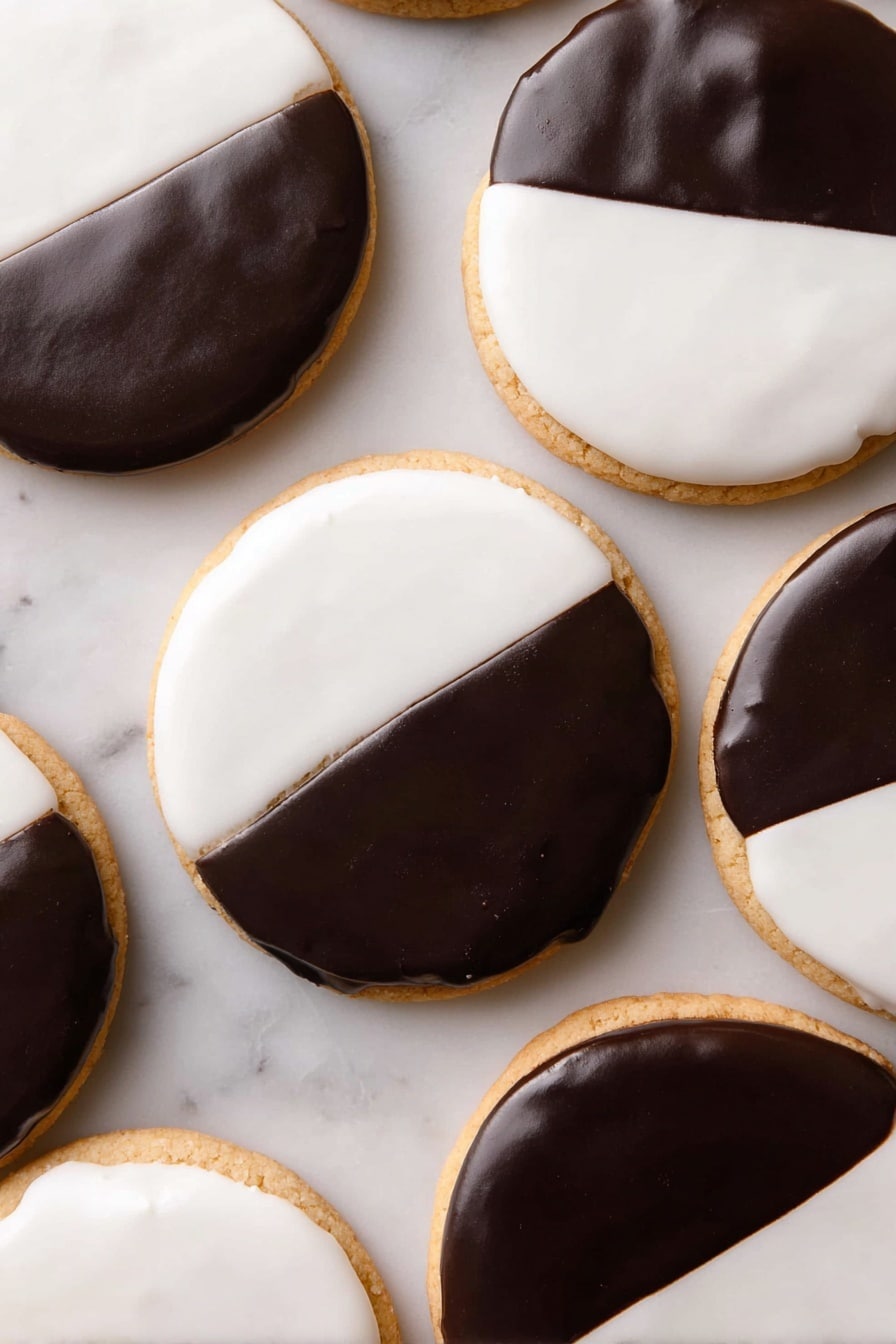
If you’ve ever found yourself torn between choosing chocolate or vanilla, trust me, this recipe solves that delicious dilemma perfectly. I’m excited to share my Black and White Cookies with Vanilla and Chocolate Icing Recipe — a classic New York treat that’s both nostalgic and irresistibly tasty. These cookies aren’t just pretty to look at; they hit that chewy, cakey texture with a beautiful glossy icing that I’ll bet you’ll fall in love with right away.
Why You’ll Love This Recipe
- Perfect Balance: You get the best of both worlds with silky vanilla and rich chocolate icing on every cookie.
- Cakey Texture: Unlike most cookies, these are more like little cakes – soft, tender, and utterly satisfying.
- Simple Ingredients: The pantry staples you already have come together beautifully without fuss.
- Mastered Icing Technique: I’ll guide you through making that signature glossy finish that looks stunning and tastes amazing.

Ingredients You’ll Need
The magic of this Black and White Cookies with Vanilla and Chocolate Icing Recipe lies in its simplicity. Everything works together—from the tangy buttermilk in the batter to the smooth icings—to create a harmonious bite.
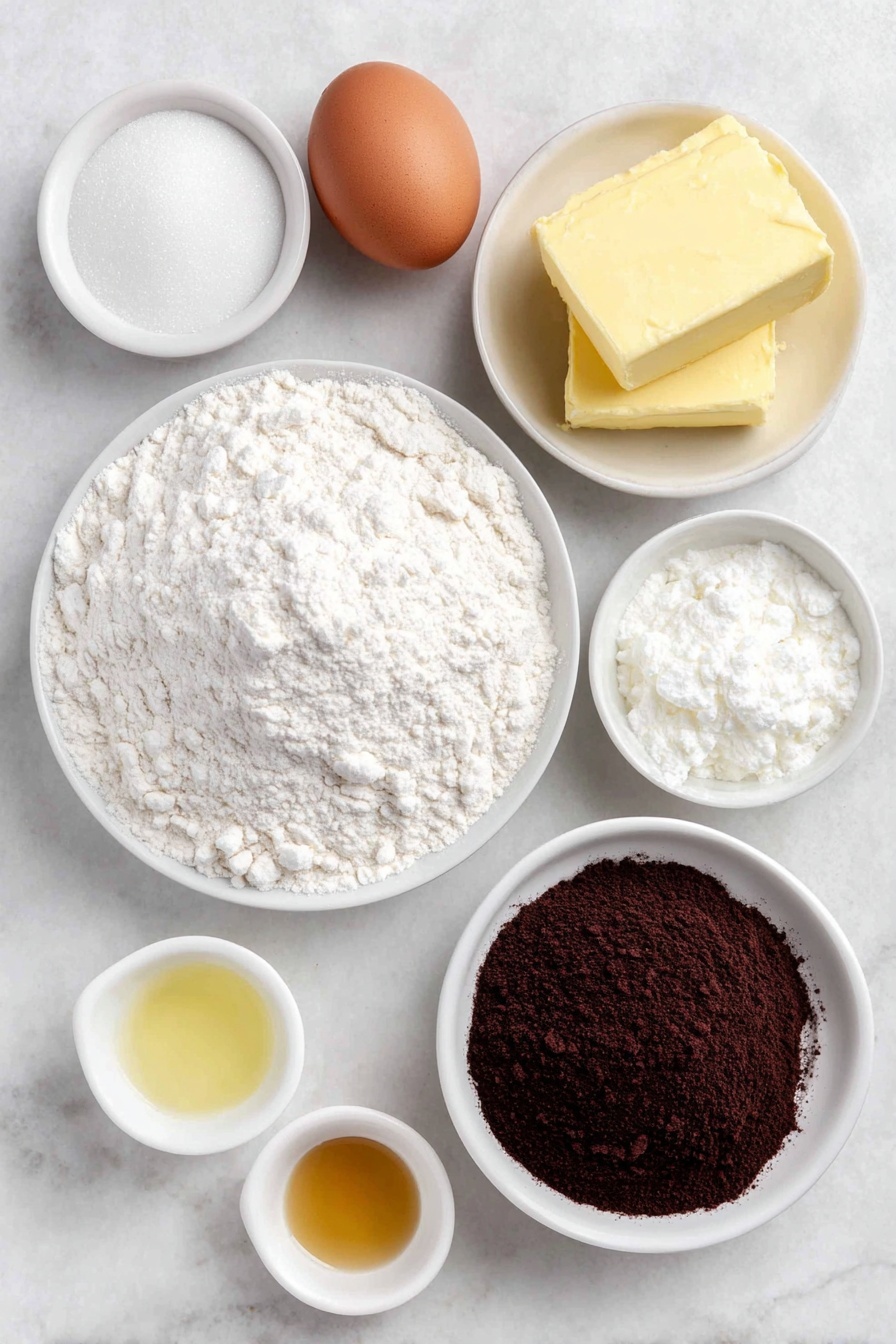
- All-purpose flour: Provides structure and the soft cakey crumb these cookies are famous for.
- Baking soda: Helps the cookies rise just enough to achieve that fluffy texture.
- Salt: Enhances flavor and balances the sweetness.
- Unsalted butter: Room temperature butter blends smoothly for the tender batter.
- Granulated sugar: Sweetens and helps create a light crumb.
- Large egg: Binds ingredients while keeping the texture rich.
- Vanilla extract: Adds warmth and depth to both batter and icing.
- Buttermilk: Offers subtle tanginess and moistness to the cookies.
- Confectioners’ sugar: The foundation of the silky icings.
- Lemon juice: Optional, but it brightens and balances the vanilla icing perfectly.
- Water and light corn syrup: They keep the icing smooth, shiny, and easy to spread.
- Cocoa powder: Dutch-processed works best for deep chocolate flavor in the icing.
Variations
I love how versatile this Black and White Cookies with Vanilla and Chocolate Icing Recipe is—feel free to tweak it to suit your preferences or dietary needs. It’s fun to make it your own.
- Gluten-Free: I’ve swapped in a 1:1 gluten-free flour blend before, and it worked well—just watch your baking time as it can vary a bit.
- Dairy-Free: Using a dairy-free butter alternative and coconut or almond milk mixed with a bit of vinegar for the buttermilk does the trick nicely.
- Flavor Boost: Try adding a touch of almond extract (about ½ tsp) into the batter for a lovely twist.
- Seasonal Touch: Sprinkle some edible gold dust or colored sugar on the vanilla side for festive holidays.
How to Make Black and White Cookies with Vanilla and Chocolate Icing Recipe
Step 1: Prep Like a Pro
Start by preheating your oven to 350°F (175°C). Line two baking sheets with silicone mats or parchment paper—this helps your cookies bake evenly and prevents sticking. Next, whisk together the all-purpose flour, baking soda, and salt in a bowl, setting that dry mix aside for now. This step helps ensure even distribution of leavening agents throughout your batter.
Step 2: Creaming Butter and Sugar
In the bowl of your stand mixer fitted with the paddle attachment, beat the room temperature unsalted butter until smooth and creamy. Then add the granulated sugar and crank the speed up to high. Mixing until light and fluffy is key here—it traps air in the batter, which will make your cookies wonderfully tender. Don’t rush this part; I usually let it go for about 3-4 minutes.
Step 3: Combine Egg and Vanilla
Mix in the egg and vanilla extract next. Scrape down the sides of the bowl to make sure everything gets incorporated evenly. This step adds moisture and flavor, so don’t skip the scrape—it’s a game changer!
Step 4: Alternate Mixing Flour and Buttermilk
Add the dry ingredients and buttermilk in three batches, starting and ending with the flour mixture. Use a low speed to avoid overmixing, which can make the cookies tough. Scrape the bowl again to catch any bits clinging to the sides. The batter should be soft but thick enough to hold its shape when scooped.
Step 5: Drop and Bake
Use a ¼ cup cookie scoop or a greased measuring cup to place dollops of batter onto the lined baking sheets. Keep about 4 inches between each cookie—remember, they’ll spread! I stick to no more than five per sheet for even baking. Bake on the center rack for 13-14 minutes until the centers spring back when touched gently. The cookies will look just barely browned—perfection!
Step 6: Cool and Flip
Once out of the oven, let the cookies cool a few minutes before transferring them to a wire rack—flip them upside down so the bottom becomes the flat top. This tip comes from experience! It gives you a smooth surface to spread your icings on and helps the cookies set nicely.
Step 7: Prepare the Vanilla and Chocolate Icing
While the cookies cool completely, mix the powdered sugar, vanilla, lemon juice (optional but adds lovely brightness), corn syrup, and water in a bowl for the vanilla icing. Stir until smooth, adding water a teaspoon at a time until it’s a spreadable but not runny consistency. Divide nearly half of this icing into a separate bowl for the chocolate icing.
Into the reserved portion, whisk in the cocoa powder, a bit of water, and a teaspoon of corn syrup. Beat on high for that gorgeous glossy finish that will make your cookies look professional. Add more water if needed to match the vanilla icing’s texture—trust me, matching the consistency is key for clean icing lines.
Step 8: Ice Like a Pro
Use a small offset spatula to spread the vanilla icing over half of each cookie. To get a neat, straight line, use the edge of a knife or spatula to gently pull the icing from the center line out to the edges—wipe your tool clean after each swipe. Let this set until it firms up a bit before spreading the chocolate icing on the other half. Push the chocolate icing right up to the center line, smooth it out, and let it set completely. Now you have that iconic black and white look that tastes just as amazing as it looks!
Pro Tips for Making Black and White Cookies with Vanilla and Chocolate Icing Recipe
- Room Temperature Ingredients: I always make sure my butter and egg are at room temp—it helps the batter come together smoothly and gives the best texture.
- Don’t Overmix: Overworking the batter is a common mistake that makes cookies tough; mixing just until combined keeps them tender.
- Icing Consistency Matters: Matching the thickness of both icings ensures a clean dividing line and perfect glossy shine.
- Cooling Trick: Flipping the cookies over before icing gives a smooth surface and stops the icing from sliding off—trust me, it makes all the difference.
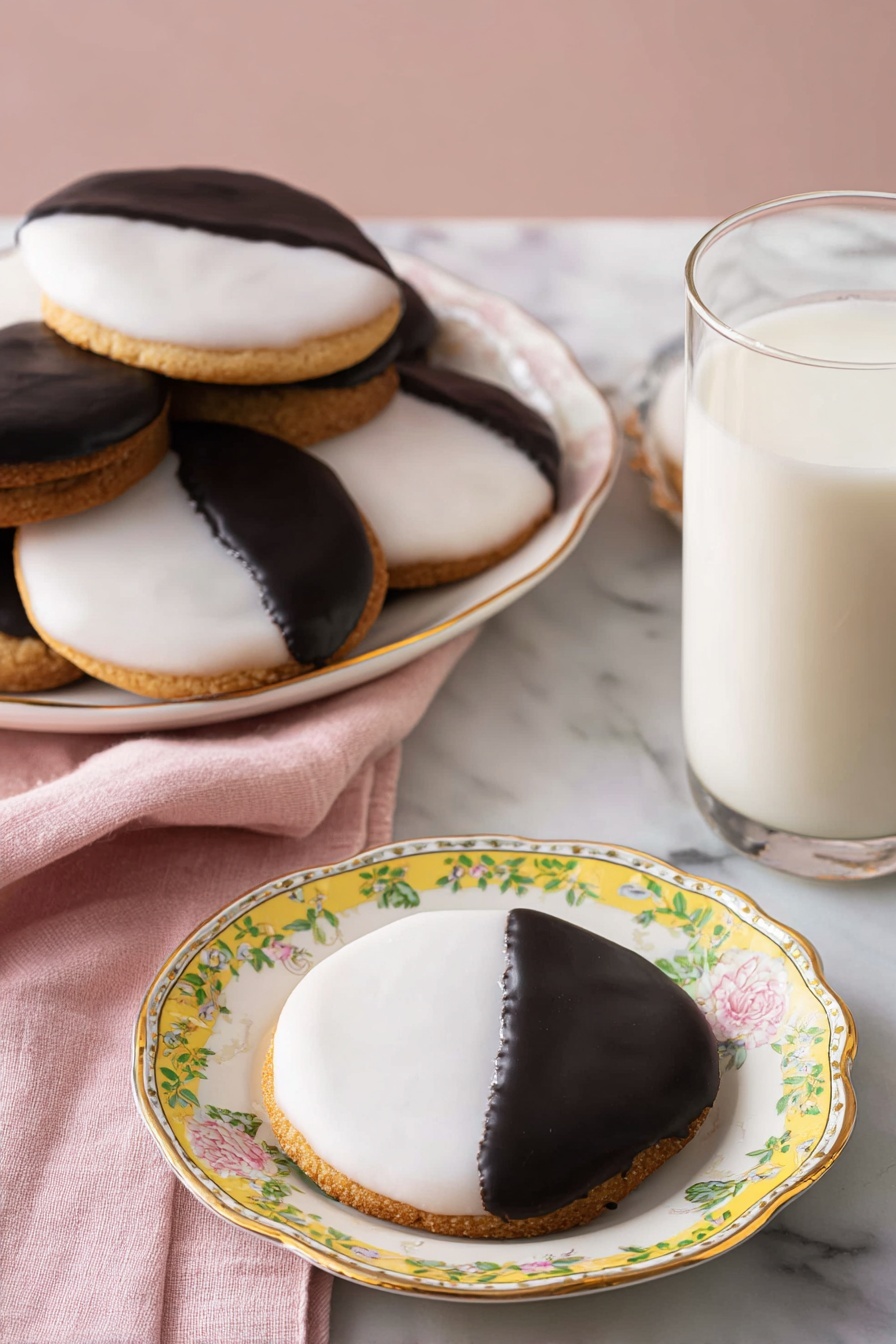
How to Serve Black and White Cookies with Vanilla and Chocolate Icing Recipe
Garnishes
I like to keep it classic, so no fancy sprinkles here. But if you want a little extra flair, a light dusting of powdered sugar or even some colorful sugar crystals on the vanilla side can be fun for parties.
Side Dishes
Pair these cookies with a steaming cup of black coffee or a creamy latte for an afternoon pick-me-up. I’ve also served them alongside whipped cream and fresh berries at brunch, which got rave reviews.
Creative Ways to Present
For special occasions, arrange the cookies on a tiered dessert stand alternating vanilla and chocolate sides facing up—it’s a simple way to wow guests. Another idea I love is wrapping individual cookies in clear cellophane tied with a ribbon for sweet giveaways.
Make Ahead and Storage
Storing Leftovers
Store leftover cookies in an airtight container at room temperature for up to 3 days. They hold their texture and flavor really well when kept sealed away from air.
Freezing
I’ve frozen these cookies both iced and uniced. For uniced, they freeze beautifully for up to a month—just thaw and then ice as usual. If already iced, wrap each cookie tightly in plastic wrap and place in a freezer-safe container to prevent freezer burn.
Reheating
To revive slightly stale cookies, pop them in a 300°F oven for about 5 minutes—just enough to warm and soften without melting the icing. It’s a quick trick I’ve used many times to make my batch feel fresh again.
FAQs
-
Can I use regular milk instead of buttermilk in the batter?
Yes, you can substitute regular milk mixed with 1 tablespoon of lemon juice or vinegar per 1/3 cup of milk as a buttermilk alternative. Let it sit for 5 minutes before using. This mimics the tanginess and acidity of buttermilk crucial for tender cookies.
-
How do I get the icing to set without sticking to everything?
Let the icing set at room temperature on a wire rack until firm to the touch. Avoid stacking iced cookies until completely dry, and be patient—the corn syrup helps create a shiny, stable finish but needs time to harden gently.
-
Can I make these cookies dairy-free?
Absolutely! Swap the butter for a plant-based alternative and replace buttermilk with a dairy-free milk plus lemon juice mix. You’ll want to check your cocoa powder and other ingredients for dairy content to ensure compliance.
-
Why do I need to flip the cookies before icing?
Flipping the cookies exposes the flat bottom, which becomes your smooth flat surface ideal for spreading the icing evenly. This little trick helps prevent icing from sliding off and gives a polished look.
Final Thoughts
This Black and White Cookies with Vanilla and Chocolate Icing Recipe has become a staple in my kitchen and one that guests always ask me to bring along. The balance of flavors and textures is so satisfying, and the process is easier than you might think. Once you master the art of icing, you’ll love how these cookies bring cheerful smiles to your table. So grab your mixer and try it out—you’ll be amazed at how fun and rewarding homemade black and white cookies can be!
Print
Black and White Cookies with Vanilla and Chocolate Icing Recipe
- Prep Time: 20 minutes
- Cook Time: 13-14 minutes
- Total Time: 35 minutes including cooling and icing setup
- Yield: 8 large cookies
- Category: Dessert, Cookies
- Method: Baking
- Cuisine: American
Description
Classic Black and White Cookies featuring a soft and tender base topped with a smooth, glossy split of vanilla and chocolate icing, offering the perfect balance of flavors and textures in each bite.
Ingredients
Dry Ingredients
- 1 ⅓ cups all-purpose flour (160g)
- ½ tsp baking soda
- ½ tsp salt
Wet Ingredients
- 6 Tbsp unsalted butter, room temperature (85g)
- ½ cup granulated sugar (100g)
- 1 large egg, room temperature
- 2 tsp vanilla extract (10mL)
- ⅓ cup buttermilk (80mL)
Vanilla Icing
- 2 cups confectioners’ sugar (240g)
- 2 tsp lemon juice, fresh (optional)
- 2 Tbsp water, plus more as needed
- 1 Tbsp light corn syrup
- ½ tsp vanilla extract
Chocolate Icing
- 3 Tbsp cocoa powder (Dutch-process preferred) (18g)
- A few teaspoons water (as needed)
- 1 tsp light corn syrup
Instructions
- Preheat and prepare baking sheets: Preheat your oven to 350°F (175°C) and line two baking sheets with silicone mats or parchment paper to prevent sticking and ensure even baking.
- Mix dry ingredients: In a medium bowl, whisk together the flour, baking soda, and salt until well combined, then set aside.
- Cream butter and sugar: Using a stand mixer fitted with a paddle attachment, cream the softened butter on medium-high speed until smooth and creamy. Gradually add the granulated sugar and beat until the mixture is light and fluffy.
- Add egg and vanilla: Mix in the egg and vanilla extract until fully incorporated, scraping down the sides of the bowl as needed to ensure even mixing.
- Incorporate dry ingredients and buttermilk: Add the flour mixture and buttermilk alternately in three batches, beginning and ending with the flour mixture. Mix on low speed and combine just until incorporated, then use a spatula to scrape down the bowl and mix any remaining bits.
- Scoop the batter: Using a ¼ cup cookie scoop or lightly greased measuring cup, drop rounded balls of batter onto the prepared baking sheets, spacing them about 4 inches apart to allow spreading. Limit to 5 cookies per sheet.
- Bake: Bake on the center rack at 350°F for 13 to 14 minutes or until the centers of the cookies are springy to the touch and edges are lightly golden.
- Cool the cookies: Let the cookies cool on the baking sheets for a few minutes before carefully transferring them upside down to wire racks to cool completely. Cooling upside down creates a flat top surface ideal for icing.
- Prepare vanilla icing: In a large bowl, whisk together the confectioners’ sugar, vanilla extract, lemon juice (if using), corn syrup, and water until smooth. Add more water as needed to reach a thin, spreadable consistency.
- Prepare chocolate icing: Transfer nearly half the vanilla icing to a separate bowl. Blend in the cocoa powder, a teaspoon of corn syrup, and a few teaspoons of water. Mix on high speed until glossy and smooth, adjusting water to match the vanilla icing’s consistency.
- Ice the cookies: Using a small or offset spatula, spread a thin layer of vanilla icing over half of each cookie’s flat surface. Use the edge of a knife or spatula to create a neat dividing line down the center by gently drawing icing from the center outward. Allow it to set.
- Add the chocolate icing: Spread the chocolate icing over the other half of each cookie, pushing it right to the center. Smooth the surface quickly and allow the icing to fully set before serving.
Notes
- Get the best of both worlds with these Black and White cookies, glazed with both chocolate and vanilla icings, so you don’t have to choose your favorite.
- Use Dutch-process cocoa powder for a richer, smoother chocolate icing.
- Cooling the cookies upside down ensures the bottom becomes flat and perfect for icing.
- Keep spacing generous on baking sheets to prevent cookies merging during baking.
Nutrition
- Serving Size: 1 cookie
- Calories: 347 kcal
- Sugar: 45 g
- Sodium: 238 mg
- Fat: 10 g
- Saturated Fat: 6 g
- Unsaturated Fat: 3 g
- Trans Fat: 1 g
- Carbohydrates: 62 g
- Fiber: 1 g
- Protein: 4 g
- Cholesterol: 47 mg


