
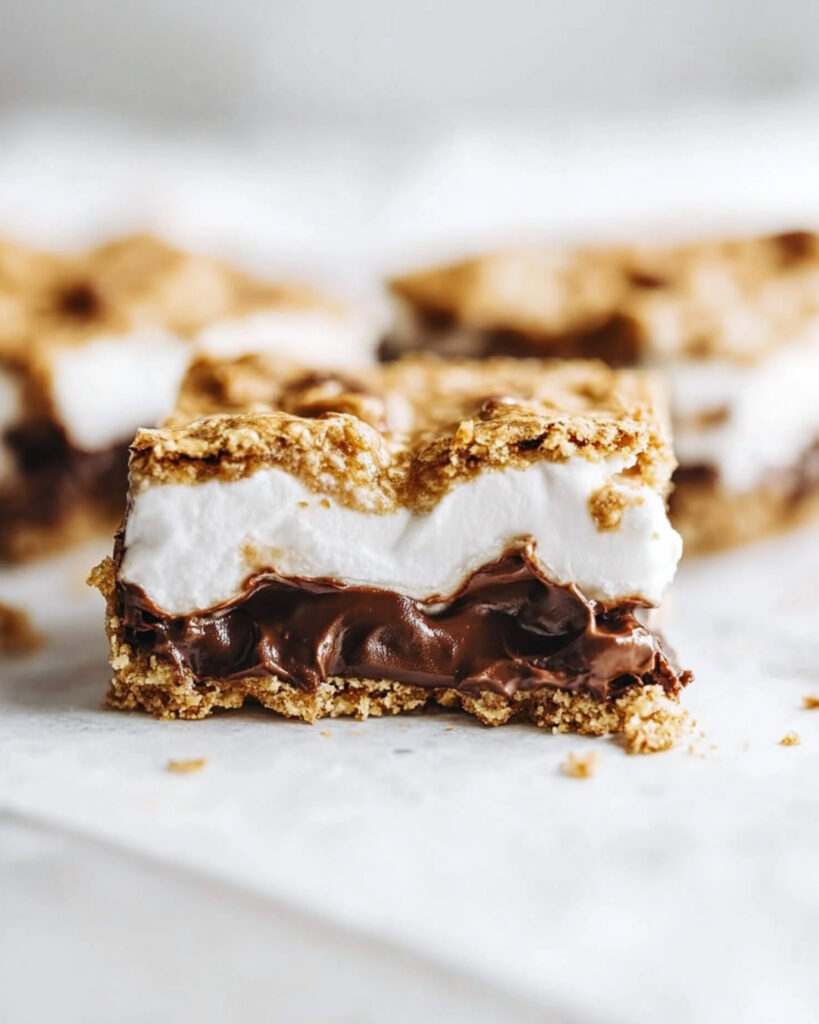
This irresistible twist on the classic campfire treat brings all the nostalgic flavors of s’mores into a convenient, no-fire-needed bar form. The combination of graham cracker-infused cookie dough, creamy peanut butter, rich chocolate, and gooey marshmallow creme creates a dessert that’s perfect for any occasion – from family gatherings to potlucks or just satisfying your sweet tooth cravings at home. These S’mores Bars deliver all the flavor with none of the mess!
Why You’ll Love This Recipe
- No Campfire Needed: Enjoy the classic s’mores experience any time of year, without dealing with open flames or sticky fingers.
- Make-Ahead Friendly: These bars actually improve after a few hours of cooling, making them perfect for preparing before events or gatherings.
- Customizable Layers: The layered approach lets you adjust the ratio of chocolate, marshmallow, and peanut butter to suit your taste preferences.
- Crowd-Pleaser: That familiar combination of graham, chocolate, and marshmallow never fails to impress both kids and adults alike.

Ingredients You’ll Need
- Butter: Creates a rich, tender cookie base. Make sure it’s softened for proper creaming with the sugars.
- White Sugar & Brown Sugar: The combination provides both sweetness and moisture, with brown sugar adding a subtle caramel note.
- Egg: Acts as a binder for the cookie dough and adds structure.
- Vanilla Extract: Enhances all the flavors in the bar with its warm, aromatic quality.
- Baking Powder: Gives a slight lift to the cookie layers, preventing them from becoming too dense.
- All-Purpose Flour: The foundation of our cookie layers, providing structure.
- Coarse Kosher Salt: The larger salt crystals create small pockets of saltiness that beautifully contrast with the sweet components.
- Graham Crackers: Crushed into crumbs, they infuse the cookie base with that distinctive s’mores flavor we all know and love.
- Peanut Butter: Adds a creamy, nutty layer that complements the chocolate wonderfully. Use creamy for the smoothest texture.
- Chocolate Bars: The thick, big ones give you substantial chocolate layers. The type of chocolate (milk, dark, etc.) can be chosen based on your preference.
- Marshmallow Creme: Delivers that signature marshmallow flavor and gooey texture without the hassle of melting actual marshmallows.
Note: You’ll find the complete list of ingredients, along with their exact measurements, in the printable recipe card at the bottom of this post.
Variations
Want to mix things up? Here are some delicious alternatives:
- Chocolate Options: Try dark chocolate for a less sweet version, or mix in chocolate chips for extra texture.
- Nut Butter Alternatives: Swap the peanut butter for almond butter, cookie butter, or Nutella for different flavor profiles.
- Add-Ins: Mix mini chocolate chips, toffee bits, or chopped nuts into the cookie dough for added texture and flavor.
- Cookie Base: Add cinnamon or a pinch of nutmeg to the cookie dough for a warm, spiced version.
How to Make the Best S’mores Bars
Step 1: Prepare Your Oven and Pan
Preheat your oven to 350°F. Having the right temperature is crucial for proper baking of the cookie layers.
Step 2: Create the Cookie Base
Beat the softened butter with both white and brown sugars until light and fluffy. Mix in the egg and vanilla until well combined. Add the flour, baking powder, and salt, mixing just until incorporated. Fold in the graham cracker crumbs to distribute them evenly throughout the dough.
Step 3: Prepare the Top Layer
Line an 8×8 baking dish with parchment paper, leaving some overhang for easy removal. Press half of the dough into the bottom of the pan, spreading it into an even layer. Lift this layer out using the parchment paper and set aside – this will become your top cookie layer.
Step 4: Assemble the Layers
Line the pan with fresh parchment paper and press the remaining dough into the bottom. Layer with chocolate bars, breaking them if needed to fit the pan. Spread the peanut butter in an even layer, followed by the marshmallow creme. Gently flip the reserved top cookie layer onto the marshmallow creme and carefully peel off its parchment paper.
Step 5: Bake to Golden Perfection
Bake for approximately 30 minutes, or until the top is golden brown and the edges look set. The center might still seem slightly soft, but it will firm up as it cools.
Step 6: Cool Completely
Allow the bars to cool in the pan completely before cutting. For the cleanest slices, let them rest for 4-6 hours or refrigerate for a shorter period to help them set up properly.
Pro Tips for Making the Recipe
- Room Temperature Ingredients: Make sure your butter and egg are at room temperature for the smoothest cookie dough.
- Parchment Paper Handling: Spray a little cooking oil on your hands when working with the sticky dough to prevent it from sticking to your fingers.
- Even Layers: Take time to spread each layer evenly for consistent bites throughout your bars.
- Cutting Technique: Use a sharp knife dipped in hot water and wiped clean between cuts for the neatest slices.
- Check for Doneness: Look for golden brown edges and a set top, but don’t worry if the center seems slightly underdone – it will continue cooking as it cools.
How to Serve
These S’mores Bars are incredibly versatile when it comes to serving:
Perfect Pairings:
Serve with a scoop of vanilla ice cream for an indulgent dessert, or pair with cold milk for a classic after-school treat.
Presentation Ideas:
For gatherings, cut into smaller squares and arrange on a platter. Dust lightly with powdered sugar or drizzle with additional melted chocolate for an elegant presentation.
Temperature:
While these bars are delicious at room temperature, try warming individual servings in the microwave for 10-15 seconds to recreate that fresh-from-the-campfire experience.
Make Ahead and Storage
Storing Leftovers
Store these bars in an airtight container at room temperature for up to 3 days. Place parchment paper between layers if stacking to prevent sticking.
Freezing
These bars freeze beautifully! Wrap individual squares in plastic wrap, then aluminum foil, and freeze for up to 2 months. This is perfect for emergency dessert cravings!
Reheating
For that fresh-baked experience, microwave a frozen or refrigerated bar for 10-20 seconds until just warmed through. Be careful not to overheat, or the marshmallow and chocolate will become too gooey.
FAQs
-
Can I use regular marshmallows instead of marshmallow creme?
Yes, you can substitute with regular marshmallows in a pinch! Layer about 2 cups of mini marshmallows or 16 large marshmallows cut into pieces. They won’t spread as smoothly as creme, but they’ll still deliver that classic marshmallow flavor. Just keep a close eye during baking as they might brown more quickly than the creme.
-
Why do my bars need to rest before cutting?
The resting period allows all the layers to set properly. When fresh from the oven, the marshmallow and chocolate are very hot and fluid, making clean cuts impossible. As they cool, these layers solidify, resulting in neater slices and a better texture contrast between the layers.
-
Can I make these without peanut butter for allergies?
Absolutely! You can simply omit the peanut butter for a more traditional s’mores flavor, or substitute with sunflower seed butter or cookie butter for a nut-free alternative. The bars will still be delicious with just the chocolate and marshmallow layers.
-
Why is my top cookie layer cracking during baking?
This usually happens if the dough warms up too much before baking. If your kitchen is warm, try refrigerating the assembled bars for 15 minutes before baking. Also, ensure your top layer isn’t too thin – aim for even thickness throughout to prevent weak spots that might crack.
Final Thoughts
These S’mores Bars transform a beloved campfire classic into a year-round treat that’s perfect for any occasion. With their irresistible combination of graham-infused cookie, smooth chocolate, creamy peanut butter, and gooey marshmallow, they capture everything we love about s’mores in a convenient, shareable form. Whether you’re looking to reminisce about summer camping trips or simply want a crowd-pleasing dessert, these bars deliver big on flavor and nostalgia. Give them a try – they might just become your new favorite way to enjoy s’mores!
Print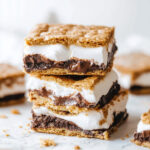
Best S’mores Bars Recipe
- Prep Time: 15 minutes
- Cook Time: 30 minutes
- Total Time: 45 minutes
- Yield: 16 bars
- Category: Desserts
- Method: Baking
- Cuisine: American
- Diet: Vegetarian
Description
These S’mores Bars combine a soft, buttery cookie base with layers of chocolate, peanut butter, and marshmallow creme, offering all the comfort of the classic campfire treat in an easy, oven-baked dessert.
Ingredients
For the Cookie Base
-
-
- 1/2 cup unsalted butter, softened
- 1/2 cup white sugar
- 1/4 cup packed brown sugar
- 1 egg
- 1 teaspoon vanilla
- 1 teaspoon baking powder
- 1 1/4 cup all-purpose flour
- 1 teaspoon coarse kosher salt
- 6 graham crackers, crushed into crumbs (1 graham cracker = 1 rectangle)
-
For the Filling
-
- 1/2 cup peanut butter
- Two 4–ounce chocolate bars (extra big, extra thick)
- One 7-ounce jar of marshmallow creme
Instructions
- Preheat the oven: Preheat the oven to 350 degrees.
- Make the cookie base: Beat the softened butter, white sugar, and brown sugar together until creamy. Add the egg and vanilla, and mix until combined. Stir in the all-purpose flour, baking powder, kosher salt, and graham cracker crumbs until a dough forms.
- Prepare the top layer: Line an 8×8 baking dish with parchment paper and press half of the dough into the bottom of the pan. Carefully lift out the parchment paper with the dough and set it aside. This will be your top cookie layer.
- Assemble the bars: Line the baking dish again with parchment paper and press the remaining dough into the bottom of the pan. Add a layer of chocolate bars, followed by the peanut butter, and then the marshmallow creme. Carefully place the prepared cookie dough layer on top of the filling and peel away the parchment paper.
- Bake the bars: Place the assembled bars in the preheated oven and bake for 30 minutes, or until the top is golden brown.
- Rest the bars: Let the baked bars rest for 4–6 hours or refrigerate them to allow them to solidify for cleaner slicing. This step ensures the perfect texture for serving.
Notes
- Allowing the bars to refrigerate or sit for a few hours helps achieve cleaner slices when cutting.
- You can adjust the level of sweetness by using dark chocolate instead of milk chocolate.
- To make these bars nut-free, you can omit the peanut butter or replace it with a nut-free spread.
Nutrition
- Serving Size: 1 bar
- Calories: 210
- Sugar: 18 g
- Sodium: 150 mg
- Fat: 10 g
- Saturated Fat: 5 g
- Unsaturated Fat: 3 g
- Trans Fat: 0 g
- Carbohydrates: 28 g
- Fiber: 1 g
- Protein: 3 g
- Cholesterol: 25 mg

