
This luscious Basque Cheesecake is a game-changer in the dessert world – a rustic, caramelized masterpiece that breaks all the rules of traditional cheesecake making. With its beautifully burnished top and incredibly creamy center, this Spanish-inspired treat requires minimal effort but delivers maximum flavor. Perfect for both casual gatherings and special occasions, you’ll be amazed at how something so simple can taste so extraordinarily decadent!
Why You’ll Love This Recipe
- Foolproof Perfection: Unlike traditional cheesecakes that crack easily, this recipe is incredibly forgiving – the rustic, caramelized top is supposed to look beautifully imperfect.
- Incredible Texture: The contrast between the deeply caramelized exterior and the silky, almost custard-like interior creates a texture experience that’s simply irresistible.
- Impressive Yet Simple: Despite looking like something from a high-end bakery, this cheesecake requires basic ingredients and minimal technique – perfect for both novice and experienced bakers.
- No Water Bath Required: Skip the fussy water bath step that traditional cheesecakes demand – this recipe embraces simplicity without sacrificing quality.

Ingredients You’ll Need
- Cream Cheese: Full-fat, room temperature cream cheese forms the foundation of this cheesecake, providing that rich, tangy base that’s essential for authentic flavor. Don’t even think about using low-fat versions!
- Granulated Sugar: Sweetens the cheesecake and helps create that incredible caramelized top that’s signature to the Basque style.
- Eggs: Provides structure and richness to the cheesecake. Room temperature eggs blend more smoothly into the batter.
- Heavy Cream: Creates that luscious, silky texture that makes this cheesecake melt in your mouth. Farm-fresh double cream would take this to another level if you can find it!
- Vanilla Extract: Adds wonderful aromatic depth that complements the rich dairy elements.
- Salt: Just a teaspoon balances the sweetness and enhances all the other flavors.
- All-Purpose Flour: Only a small amount is needed – it helps stabilize the cheesecake while maintaining that dreamy, creamy texture.
Note: You’ll find the complete list of ingredients, along with their exact measurements, in the printable recipe card at the bottom of this post.
Variations
Flavor Twists
- Citrus Infusion: Add lemon or orange zest for a bright, aromatic variation.
- Chocolate Lover’s Version: Fold in 1/2 cup melted dark chocolate for a chocolate Basque cheesecake.
- Espresso Dreams: Add 1-2 tablespoons of espresso powder for a coffee-infused version.
Serving Options
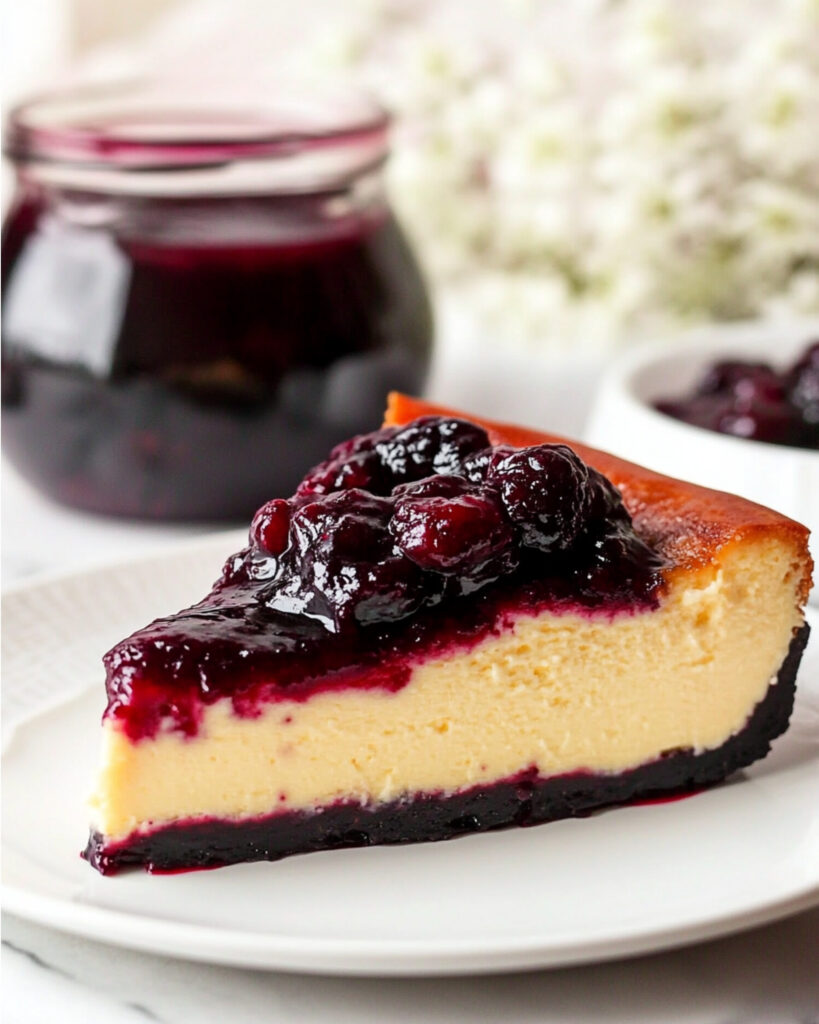
- Berry Compote: Top with a quick homemade berry compote for a stunning color contrast.
- Boozy Touch: Spike your cheesecake with a splash of your favorite liqueur – amaretto, Grand Marnier, or bourbon work beautifully.
- Salted Caramel: Drizzle with warm salted caramel sauce for an extra layer of indulgence.
How to Make Basque Cheesecake
Step a1: Prepare Your Pan
Preheat your oven to 425°F. Line a 9 or 10-inch springform pan with parchment paper, creating a criss-crossed double layer. The paper should extend about 2 inches above the pan edges. Try wetting, scrunching, and then drying the parchment to make it more pliable.
Step 2: Cream the Cheese and Sugar
Whip the cream cheese for 2 minutes in a stand mixer with the whisk attachment or a large bowl with a hand mixer. Add the sugar and mix on medium speed for about 2 minutes until smooth and lump-free.
Step 3: Add Eggs One by One
With the mixer on low speed, add eggs one at a time. Wait until each egg is almost fully incorporated before adding the next. This patience prevents overmixing and ensures that silky texture.
Step 4: Mix in Remaining Wet Ingredients
Still on low speed, add the heavy cream, vanilla extract, and salt. Mix just until everything comes together.
Step 5: Incorporate the Flour
Sift the flour into the bowl and mix for about 20 seconds – just enough to incorporate it without developing gluten.
Step 6: Bake to Burnished Perfection
Pour the batter into your prepared pan, place it on a rimmed baking sheet, and bake for 50-65 minutes. Look for a deeply golden-brown top with a center that still jiggles when gently shaken.
Step 7: Cool Completely
Let the cheesecake cool to room temperature on a wire rack, then refrigerate it (still in the pan) for at least 8 hours or overnight.
Step 8: Serve With Style
Remove from the fridge 1-2 hours before serving to take the chill off. Use the parchment edges to lift the cheesecake from the pan, then slice with a hot knife for clean cuts.
Pro Tips for Making the Recipe
- Mind Your Mixing: Pay close attention to mixing speeds and times. Slow and gentle mixing is key to achieving that perfect silky texture.
- Room Temperature Ingredients: Ensure all ingredients are at room temperature for the smoothest, lump-free batter.
- Trust the Jiggle: Don’t overbake! The center should still have a significant wobble when you remove it from the oven – it will set as it cools.
- Patience Pays Off: The overnight refrigeration isn’t optional – it’s essential for developing the perfect texture and flavor.
- Sweetness Control: Feel free to adjust the sugar between 1¼ to 2 cups depending on your sweetness preference without affecting the texture.
How to Serve
Perfect Pairings
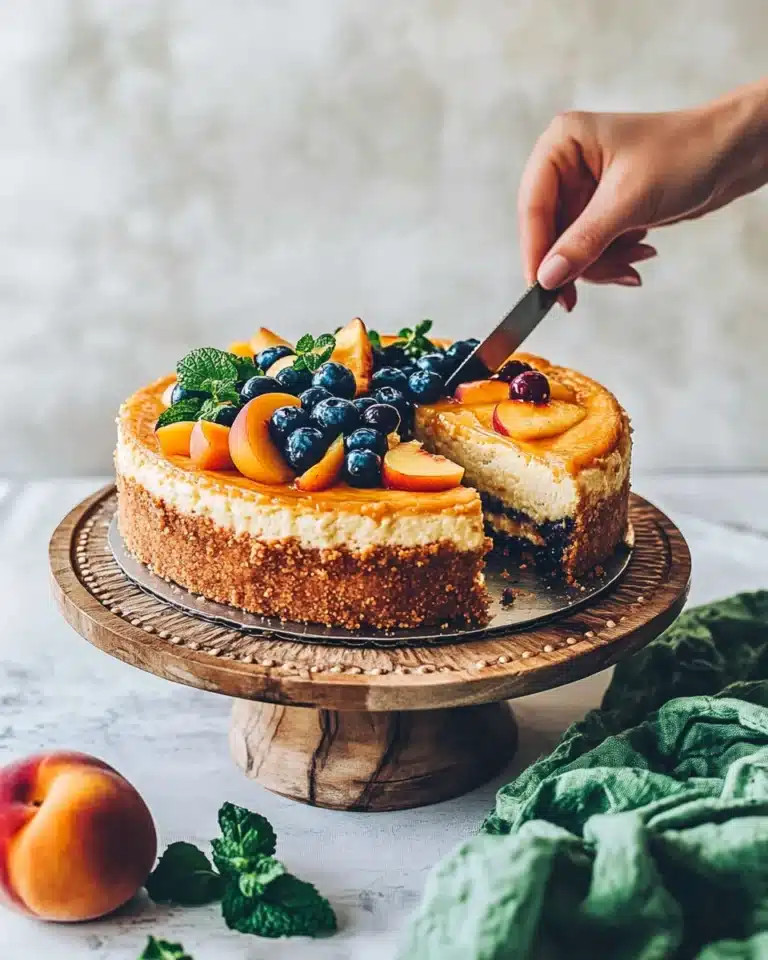
Serve this cheesecake with fresh berries for a bright contrast, or a dollop of lightly sweetened whipped cream to complement the rich texture.
Temperature Matters
For the best eating experience, remove the cheesecake from the refrigerator 1-2 hours before serving. The flavors bloom and the texture becomes even more luscious at room temperature.
Special Occasion Serving
For an impressive dessert table, serve thin slices alongside tiny espresso cups for the perfect flavor counterpoint.
Make Ahead and Storage
Storing Leftovers
Store the cheesecake covered in the refrigerator for up to a week. The flavor actually deepens after a day or two!
Freezing
This cheesecake freezes beautifully for up to 3 months. Cool completely, then wrap tightly in plastic wrap and aluminum foil. A cardboard cake round provides excellent support during freezing.
Reheating
Never microwave or heat this cheesecake! Simply thaw frozen cheesecake overnight in the refrigerator, then bring to room temperature before serving.
FAQs
-
Why did my cheesecake puff up and then sink?
This is completely normal and part of the Basque cheesecake charm! The dramatic rise and subsequent fall creates that distinctive dense, creamy center that makes this dessert so special.
-
Can I use a different size pan?
Yes, but you’ll need to adjust baking times accordingly. A smaller pan will require longer baking time and result in a taller cheesecake, while a larger pan will cook faster and create a thinner cake. Either way, watch for that caramelized top as your visual cue.
-
My top got very dark – did I do something wrong?
Not at all! A deeply caramelized, almost burnt-looking top is the signature of Basque cheesecake. This caramelization adds complex flavor that balances beautifully with the creamy interior.
-
Can I make this without a springform pan?
Absolutely! A regular cake pan will work, but make sure to line it generously with parchment paper that extends well above the edges to help lift the cheesecake out after cooling.
Final Thoughts
This Basque Cheesecake is truly a revelation – it turns everything you thought you knew about cheesecake upside down. Its rustic appearance hides an incredibly sophisticated flavor profile that will surprise and delight your guests. Don’t be intimidated by its fancy name or dramatic look – this might just be the easiest impressive dessert you’ll ever make. Give it a try this weekend, and I guarantee it will become a staple in your dessert repertoire!
Print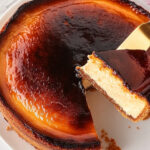
Basque Cheesecake Recipe
- Prep Time: 15 minutes
- Cook Time: 1 hour
- Total Time: 11 hours 15 minutes (including chilling time)
- Yield: 12 servings
- Category: Desserts
- Method: Baking
- Cuisine: Spanish
- Diet: Vegetarian
Description
This burnt Basque cheesecake is a creamy, caramelized dessert that perfectly balances the richness of cream cheese with the sweetness of sugar. With its impressively rustic appearance and a texture that’s delightfully smooth, it’s a simple yet elegant treat that’s sure to wow your guests. Whether enjoyed plain, with a fruit compote, or your favorite cheesecake topping, this indulgent delight is perfect for every occasion.
Ingredients
-
Cheesecake Base
- 32 ounces cream cheese (908g, full-fat, room temperature)
- 1 1/2 cups granulated sugar (300g)
- 5 large eggs (room temperature)
- 1 1/2 cups heavy cream (360mL, room temperature)
- 1 tablespoon vanilla extract
- 1 teaspoon salt
- 1/3 cup all-purpose flour (sifted)
Instructions
- Prepare the Pan
Preheat the oven to 425°F and line a 9- or 10-inch springform pan with a criss-crossed double layer of parchment paper. Wet, scrunch, and dry the parchment paper for ease of use. Ensure the parchment sticks up about 2 inches above the pan. Set aside. - Beat Cream Cheese and Sugar
In a large bowl or stand mixer fitted with a whisk attachment, whip the cream cheese for about 2 minutes until light and fluffy. Add sugar gradually on medium speed and beat until completely smooth, about 2 more minutes. Scrape down the sides as needed to remove lumps. - Incorporate the Eggs
Add the eggs, one at a time, mixing on low speed. Wait until the previous egg is almost fully incorporated (only a slight yellow remains) before adding the next. This ensures a silky batter without overmixing. - Mix the Remaining Wet Ingredients
Reduce the mixer to low speed and slowly add the heavy cream, vanilla extract, and salt. Mix until fully combined and smooth. - Add Flour
Sift the all-purpose flour into the mixture and mix on low for about 20 seconds, just until incorporated. Avoid overmixing to maintain the creamy texture. - Pour and Bake
Pour the cheesecake batter into the prepared pan. Place the pan on a rimmed baking sheet and bake on the middle oven rack for 50 to 65 minutes. You’ll know it’s done when the top is golden brown and the center is still jiggly. The cheesecake will puff up during baking and sink as it cools—this is normal. - Cool and Set
Allow the cheesecake to cool in its pan on a wire rack until it reaches room temperature. Then transfer it to the refrigerator to chill for at least 8 hours, preferably overnight. - Serve
Carefully remove the cheesecake from the pan by lifting it using the parchment paper edges. For clean slices, heat a chef’s knife under hot water before slicing. Serve the cheesecake plain or with your preferred topping, like fruit compote.
Notes
- For a richer flavor, you may substitute regular heavy cream with double cream, if available locally.
- Ensure all your ingredients are at room temperature before starting—this contributes to a smooth batter.
- Slow and minimal mixing of the eggs and cream helps eliminate air bubbles and results in a silky cheesecake texture.
- To store, keep leftovers in the refrigerator for up to 1 week. This cheesecake can also be frozen for up to 3 months. Cool completely before wrapping tightly in plastic wrap and foil.
- The cheesecake is meant to have a rustic, imperfect look, so don’t stress about it being picture-perfect.
Nutrition
- Serving Size: 1 slice
- Calories: 240
- Sugar: 25g
- Sodium: 320mg
- Fat: 32g
- Saturated Fat: 18g
- Unsaturated Fat: 14g
- Trans Fat: 0g
- Carbohydrates: 28g
- Fiber: 0g
- Protein: 6g
- Cholesterol: 140mg

