
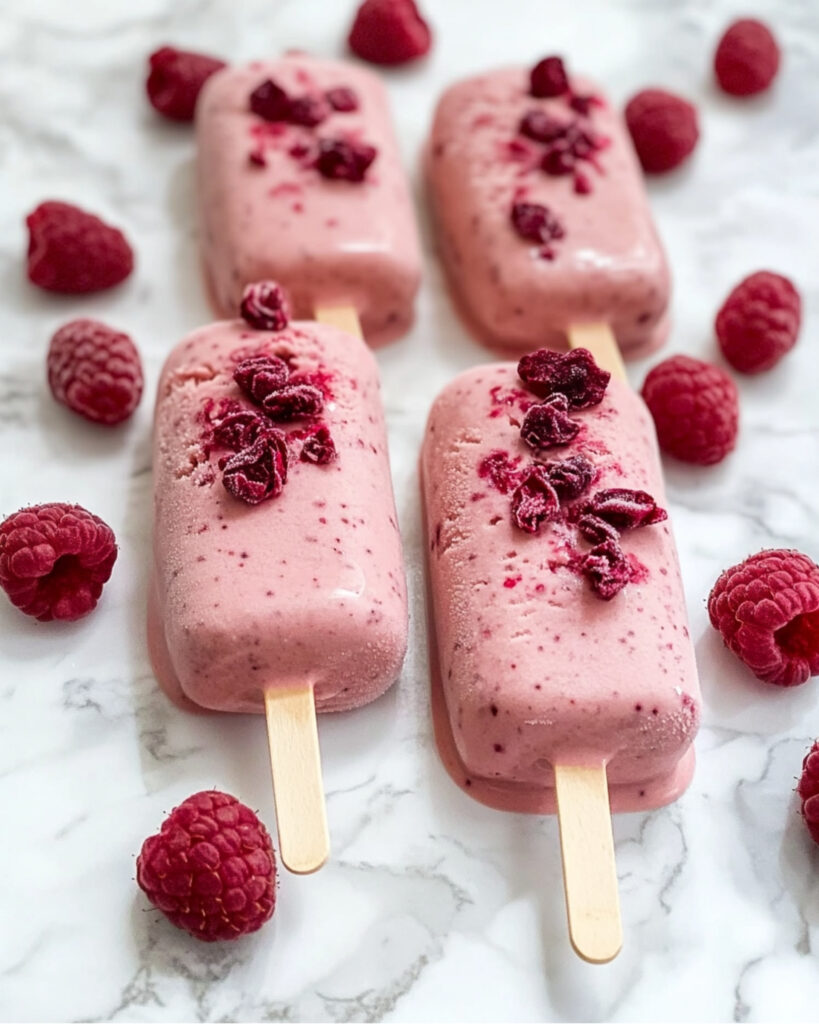
If you crave a dessert that feels both luxurious and playful, these Raspberry White Chocolate Ice Cream Pops will absolutely deliver. Think of the bold, tangy pop of real raspberries swirled through lush cream, all cloaked in a crisp shell of creamy white chocolate and sprinkled with bursts of freeze-dried berries. The best part? With just a little bit of patient chilling, you get that artisan ice cream shop texture—right from your own freezer. These pops are surprisingly easy to put together, making them a fun pick for busy weeks, family gatherings, or whenever you just need a cooling treat.
Why You’ll Love This Recipe
- Effortless Treat for Any Day: No complicated steps here—just a few simple stirs and a bit of waiting (the hardest part!).
- A Showstopper: The contrast of vibrant raspberries and snowy white chocolate makes these pops look every bit as special as they taste.
- Bright, Tangy, and Rich: Tart raspberry ribbons, vanilla bean, and sumptuous white chocolate combine for a refreshing-yet-decadent bite.
- Versatile: Great for everything from a backyard barbecue finale to a weeknight dessert when you want something fun.
- Customizable: Easy to tweak for dietary needs or flavor whims—see below for clever twists.

Ingredients You’ll Need
Gather your ingredients for a smooth, streamlined dessert experience:
- Raspberries (fresh or frozen): Delivers a summery, zingy foundation—the hero flavor here.
- Lemon Juice: Sharpens and brightens the raspberry flavor.
- Granulated Sugar: Sweetens, but also helps the berries break down and meld with the cream.
- Vanilla Bean/Extract/Paste: Adds a deep floral note; choose your favorite form for convenience.
- Heavy Whipping Cream: Brings lusciously velvety richness; don’t sub skim milk, trust me!
- Buttermilk: The secret to tangy, almost cheesecake-like undertones.
- White Chocolate (finely chopped): For that signature, snappy shell—use real white chocolate for the best melt and flavor.
- Cocoa Butter or Vegetable Shortening: Makes the chocolate coating extra smooth and easy to dip.
- Freeze-Dried Raspberries: Intensifies raspberry notes; ground for mixing, crushed for a jewel-like finish on each pop.
Tip: If you lack cocoa butter, go for the shortening—it does the job, even if purists might have opinions!
Note: You’ll find the complete list of ingredients, along with their exact measurements, in the printable recipe card at the bottom of this post.
Variations
Here’s where things get fun! Feel free to swap, add, or play:
- Berry Swap: Try blackberries or strawberries for a flavor twist, or mix multiple berries for a bramble blend.
- Chocolate Options: If you prefer, use dark or milk chocolate for the coating (just prepare for a flavor-forward contrast).
- Dairy-Free: Substitute full-fat coconut cream and coconut yogurt for the cream and buttermilk; choose vegan white chocolate for the shell.
- Add-Ins: Swirl in a bit of lemon zest, or sprinkle crushed pistachios on top of the coating.
- Extra Texture: Stir in bits of shortbread or graham crackers before freezing for a cheesecake-on-a-stick vibe.
How to Make Raspberry White Chocolate Ice Cream Pops
Step 1: Create the Raspberry Base
In a saucepan, combine raspberries, lemon juice, sugar, and vanilla. Let them simmer gently over medium heat, mashing the berries to release their juices. The mixture should thicken slightly and smell irresistible.
Step 2: Strain and Cool
Pour the raspberry mixture through a fine mesh sieve. Press with a spoon to extract as much pulp as possible, leaving seeds behind. Let the vibrant, ruby-red liquid cool to room temperature—chilling is crucial for creamy pops.
Step 3: Blend the Creamy Mixture
Whisk in heavy cream and buttermilk. Lay a piece of plastic wrap directly on the surface to prevent a skin from forming, then chill the base in the fridge for at least 3 hours (overnight works even better).
Step 4: Freeze (Two Paths)
For ultra-creamy pops: Churn the base in an ice cream maker, then spread into silicone popsicle molds.
Without churning: Pour the chilled raspberry mixture directly into popsicle molds—still delicious, just a bit icier.
Insert sticks and freeze overnight until firm. Patience is key; it’s worth it!
Step 5: Prepare the White Chocolate Coating
Melt white chocolate with cocoa butter (or shortening) gently in a double boiler or in bursts in the microwave. Stir until smooth and shiny.
Step 6: Boost with Raspberry Powder
Grind half the freeze-dried raspberries into a fine powder and stir into the melted chocolate for an extra layer of berry flavor. Crush the remaining raspberries for sprinkling.
Step 7: Dip and Decorate
Transfer the coating to a tall glass. Working quickly, dip each frozen pop to coat fully, then immediately sprinkle with crushed raspberries. The coating sets fast, so don’t dawdle!
Step 8: Final Freeze
Lay pops on a parchment-lined, frozen tray and tuck them back into the freezer for another hour or two to set the shell and ensure a firm bite.
Pro Tips for Making the Recipe
- Silicone Molds Only: For churned ice cream, silicone molds slide the pops out like a dream; standard hard molds can stick.
- Work Quickly with the Chocolate: If your kitchen is warm, keep half your pops in the freezer while you dip the others.
- Use Good Chocolate: Real white chocolate melts smoothly and tastes infinitely better than “white chips.”
- Freeze Tray First: Chilling your tray keeps pops from melting and sticking after dipping.
Extra Note: Pops keep best wrapped individually in plastic—avoid any sad hints of freezer burn.
How to Serve
- Straight from the Freezer: These are best eaten right away for supreme texture.
- Party Platter: Display them over a bed of crushed ice for an eye-catching dessert at parties.
- Pairings: Complement with fresh berries, lemon wedges, or a sparkling rosé. If you’re feeling fancy, serve with fluffy whipped cream for dipping.
For kids (or sweet-toothed adults), a drizzle of raspberry coulis on the plate doubles the fun.
Make Ahead and Storage
Storing Leftovers
Ice cream pops happily live in your freezer for up to two weeks. Store them individually wrapped in plastic wrap—this keeps the coating crisp and prevents ice crystals.
Freezing
Freeze right on a parchment-lined tray until solid, then transfer to zip-top bags or containers if wrapping individually.
Reheating
No need—these are enjoyed frozen! If too hard, let sit at room temperature for 2-3 minutes for that perfect, creamy bite.
FAQs
-
Can I make these popsicles without an ice cream maker?
Absolutely! Simply pour the cooled raspberry mixture straight into popsicle molds. The result won’t be quite as creamy but will still burst with bright, fresh berry flavor.
-
Can I use all frozen raspberries?
Yes—a winter game-changer! Just thaw and use as you would fresh berries. Frozen fruit makes these pops even more accessible year-round.
-
What if I don’t have buttermilk?
A quick fix: combine milk with a splash of lemon juice or vinegar. Let it sit for five minutes—it’ll mimic that tangy, creamy texture beautifully.
-
How do I prevent the pops from sticking to the molds?
Run the outside of the mold briefly under warm water. Silicone molds are especially forgiving and make removal nearly effortless.
Final Thoughts
Raspberry White Chocolate Ice Cream Pops combine the best of summer flavors and sweet, velvety decadence, all in a delightfully easy-to-make dessert. Their vivid color and bold flavors guarantee smiles, whether you share with friends or keep a secret stash for yourself. Don’t shy away from adding your own twist—let these pops inspire your kitchen creativity, and turn any busy week into a celebration of delicious simplicity. Dive in, enjoy, and make every bite a moment to savor!
Print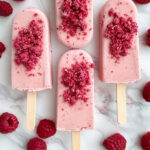
Raspberry White Chocolate Ice Cream Pops Recipe
- Prep Time: 30 minutes
- Cook Time: 10 minutes
- Total Time: 24 hours
- Yield: 5 to 6 popsicles
- Category: Desserts
- Method: Freezing
- Cuisine: American
- Diet: Vegetarian
Description
These Raspberry White Chocolate Ice Cream Pops combine tart raspberries and silky cream, dipped in a crisp, raspberry-swirled white chocolate coating. With a luscious, tangy ice cream center and a sweet, fruity exterior, these gourmet popsicles are a refreshing and decadent summer treat perfect for impressing at parties or as a luxurious homemade dessert.
Ingredients
For the Raspberry Ice Cream
- 1 1/2 cups (7 ounces) fresh or frozen raspberries
- 1/2 teaspoon lemon juice
- 3/4 cup (5 1/4 ounces) granulated sugar
- Seeds of 1 vanilla bean, or 1 teaspoon vanilla bean extract or paste
- 1/2 cup heavy whipping cream
- 1/2 cup buttermilk
For the White Chocolate Coating
- 12 ounces white chocolate, finely chopped
- 1 tablespoon cocoa butter or vegetable shortening
- 1/2 cup (about 1/2 ounce) freeze dried raspberries
Instructions
- Cook Raspberry Base: In a saucepan, combine raspberries, lemon juice, sugar, and vanilla bean. Bring to a simmer over medium heat, mashing the berries as the mixture cooks to help release their juices and break them down.
- Strain and Cool: Pour the raspberry mixture through a fine mesh sieve, pressing out as much liquid as possible to remove seeds. Discard seeds and let the strained mixture cool to room temperature.
- Add Dairy & Chill: Stir in heavy whipping cream and buttermilk. Cover the mixture, pressing plastic wrap directly onto the surface to prevent a skin from forming, and chill for 3 to 4 hours or overnight until thoroughly cooled.
- Form Pops: (Choose churning or no-churn method) If churning: Pour the chilled mixture into an ice cream maker and churn according to the manufacturer’s instructions, then spread the churned ice cream into silicone molds (standard molds may not work well). If not churning: Pour the chilled mixture directly into popsicle molds.
- Freeze: Insert sticks into the molds and freeze overnight until the pops are completely firm.
- Prepare White Chocolate Coating: Gently melt the white chocolate with cocoa butter or shortening using a double boiler or in short microwave intervals at half power. Remove from heat just before fully melted, letting residual heat finish the process.
- Prepare Freeze Dried Raspberries: Grind about half the freeze dried raspberries in a small food processor or spice grinder until very fine (about 1 1/2 tbsp powder). Stir the powder into the melted white chocolate until fully incorporated. Coarsely crush the remaining freeze dried raspberries for garnish.
- Dip and Garnish Pops: Pour the coated chocolate into a tall glass. Working quickly, remove pops from freezer, dip each one fully into the coating, return to parchment, and immediately sprinkle with crushed raspberries before the coating sets (you have about 20 seconds per pop).
- Final Freeze: Return the dipped pops to the freezer for another 1-2 hours, until thoroughly firm. Pops can be individually wrapped in plastic for storage and will keep up to 2 weeks in the freezer.
Notes
- For creamiest results, use the churned ice cream method with silicone molds.
- Pops will be a bit icier but still delicious with the no-churn method.
- Work quickly when dipping to ensure the toppings adhere before the coating sets.
- Plastic wrap can help protect pops from freezer burn during storage.
Nutrition
- Serving Size: 1 popsicle
- Calories: 320
- Sugar: 28g
- Sodium: 40mg
- Fat: 18g
- Saturated Fat: 10g
- Unsaturated Fat: 6g
- Trans Fat: 0g
- Carbohydrates: 38g
- Fiber: 2g
- Protein: 3g
- Cholesterol: 18mg

