
This timeless Aunt Betty’s Old Fashioned Skillet Cake is a delightful blast from the past that brings comfort and warmth with every bite. The magic happens when simple pantry ingredients transform into a tender, moist cake with a perfectly crisp edge that only a cast iron skillet can deliver. Ready in under an hour, this no-fuss dessert is perfect for both impromptu gatherings and cherished family meals.
Why You’ll Love This Recipe
- Incredibly Simple: With just six basic ingredients that you likely already have in your pantry, this cake comes together in minutes.
- Perfect Texture: The cast iron skillet creates that coveted crispy edge while keeping the inside tender and moist something you just can’t achieve with regular cake pans.
- Versatile Canvas: This cake is delicious on its own but also pairs beautifully with countless toppings and mix-ins to suit your mood or occasion.
- Nostalgic Flavor: There’s something about this cake that tastes like childhood and family gatherings it’s comfort in dessert form.

Ingredients You’ll Need
- Self-rising flour: The backbone of our cake that provides structure and contains the leavening agents needed for a beautiful rise. If you only have all-purpose flour, don’t worry—I’ll share how to convert it.
- Sugar: Sweetens the cake while also contributing to its tender texture by creating tiny air pockets as it bakes.
- Milk: Adds moisture and creates a tender crumb. I prefer whole milk for richness, but any type works in a pinch.
- Eggs: Provide structure, richness, and help bind everything together. Room temperature eggs incorporate much better than cold ones.
- Vanilla extract: The flavor foundation that enhances everything else. Pure vanilla extract makes a noticeable difference here, but use what you have.
- Vegetable oil: Creates moisture that stays even when the cake cools. The neutral flavor lets the vanilla shine through.
Note: You’ll find the complete list of ingredients, along with their exact measurements, in the printable recipe card at the bottom of this post.
Variations
Fruit Infusions
Transform the basic cake by folding in 1-2 cups of fresh berries or diced fruit just before baking. Blueberries, peaches, or apples work particularly well, creating pockets of sweet, jammy goodness throughout.
Flavor Twists
Add cinnamon, nutmeg, or cardamom to the batter for a warm, spiced version. For citrus lovers, add lemon or orange zest to brighten the flavor profile completely.
Topping Transformations
Before baking, sprinkle the top with a cinnamon-sugar mixture for a crackly sweet crust. Alternatively, dot the top with butter and brown sugar for a caramelized finish.
Glaze Options
Once cooled, drizzle with a simple powdered sugar glaze, chocolate ganache, or even a bourbon sauce for an adult twist on this childhood favorite.
How to Make Aunt Betty’s Old Fashioned Skillet Cake
Step 1: Prepare Your Skillet
Preheat your oven to 350°F. Thoroughly grease your 12-inch cast iron skillet and dust it lightly with flour. This crucial step ensures your cake releases perfectly after baking. If your skillet is well-seasoned, you might need less flour than you think.
Step 2: Mix Your Batter
In a large mixing bowl, combine sugar, self-rising flour, milk, eggs, vanilla extract, and vegetable oil. Mix until just combined—about 30 seconds to a minute with an electric mixer or a minute or two by hand. The batter should be smooth but don’t overmix, or your cake might become tough.
Step 3: Bake to Golden Perfection
Pour the batter into your prepared skillet, smoothing the top with a spatula. Place it in the middle rack of your preheated oven and bake for 30-35 minutes. You’ll know it’s done when the top turns golden brown and a toothpick inserted in the center comes out clean or with a few moist crumbs.
Step 4: Cool and Serve
Allow the cake to cool in the skillet for 15-20 minutes. This cooling period is essential—it allows the cake to set properly and develop that signature crispy edge. If you’re serving directly from the skillet (which makes for a lovely presentation), you’re all set. If you prefer to turn it out, run a knife around the edge before flipping it onto a serving plate.
Pro Tips for Making the Recipe
- Room Temperature Ingredients: Take your eggs and milk out of the refrigerator about 30 minutes before mixing. Room temperature ingredients blend more smoothly and create a more uniform texture.
- Don’t Have Self-Rising Flour? Make your own by adding 1½ teaspoons of baking powder and ¼ teaspoon of salt to each cup of all-purpose flour.
- Skillet Size Matters: If you use a smaller skillet, your cake will be thicker and may need a few extra minutes to bake. Larger skillets will yield thinner cakes that bake faster, so adjust accordingly.
- Test for Doneness: Start checking your cake at the 25-minute mark, especially if your oven runs hot. The worst thing you can do is overbake this simple beauty.
- Preheat Your Skillet: For an extra crispy bottom, preheat your skillet in the oven for 5 minutes before adding the batter. Just be careful when handling it!
How to Serve
This versatile cake shines in so many serving scenarios:
Sweet Companions
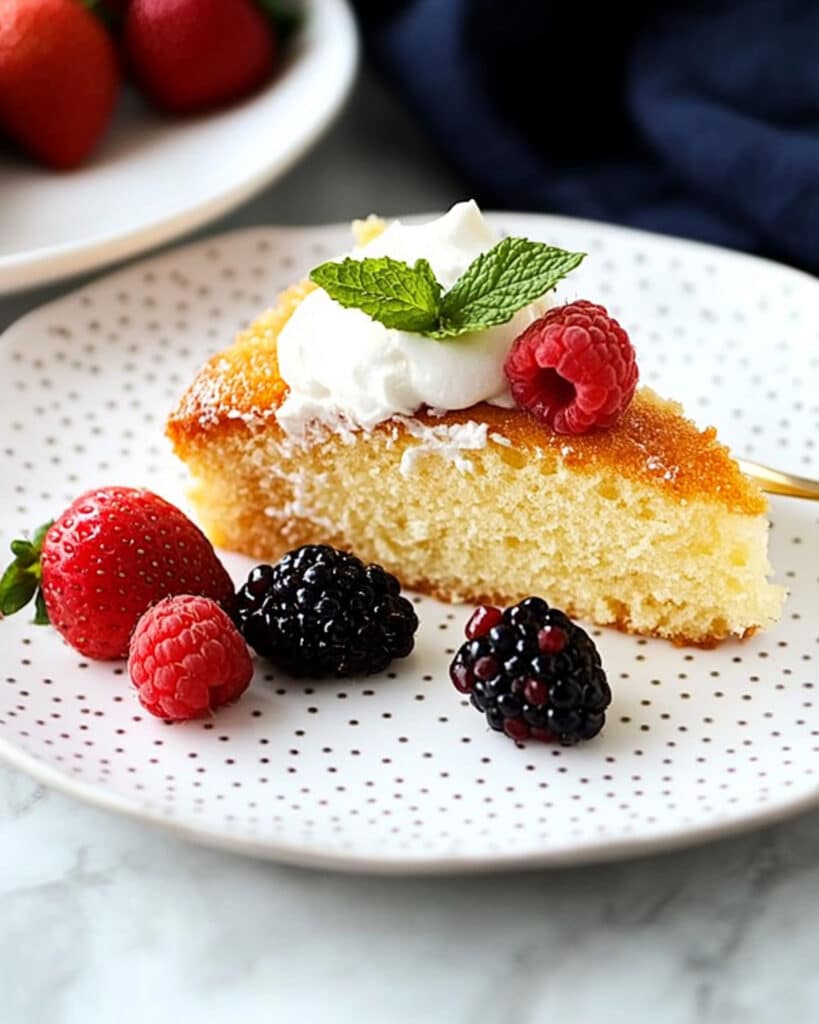
Serve warm with a scoop of vanilla ice cream that melts into the crevices, or top with freshly whipped cream and seasonal berries for an elegant dessert.
Breakfast Twist
Believe it or not, this cake makes a delightful breakfast treat when paired with yogurt and a drizzle of honey or maple syrup.
Coffee Pairing
The subtle vanilla flavor pairs beautifully with coffee or tea, making it perfect for afternoon gatherings or brunch.
Holiday Upgrade
During the holidays, serve with spiced apple compote or cranberry sauce for a festive touch that will have everyone asking for the recipe.
Make Ahead and Storage
Storing Leftovers
Store completely cooled cake in an airtight container at room temperature for up to 3 days. The beauty of this cake is that it maintains its moisture remarkably well, though the crispy edge will soften slightly over time.
Freezing
This cake freezes beautifully! Wrap individual slices or the entire cake (once cooled) in plastic wrap, then aluminum foil, and freeze for up to 3 months. This method locks in moisture and prevents freezer burn.
Reheating
To revive that fresh-baked taste, warm individual slices in the microwave for 15-20 seconds. For a more authentic touch, reheat slices in a skillet over low heat for a minute or two to recreate that crispy edge.
FAQs
-
Can I make this cake if I don’t have a cast iron skillet?
Absolutely! While a cast iron skillet gives this cake its signature crispy edge, you can use a 9×13 baking dish or a deep 9-inch round cake pan. The texture will be slightly different, but still delicious. Adjust baking time as needed check for doneness starting at 25 minutes.
-
Why did my cake sink in the middle?
This typically happens when the cake is underbaked or when the oven door was opened too early in the baking process. Ensure your oven is properly preheated and resist the urge to peek until at least 25 minutes have passed. Also, check that your self-rising flour isn’t expired, as the leavening agents can lose potency over time.
-
Can I reduce the sugar in this recipe?
You can reduce the sugar by up to ¼ cup without significantly affecting the texture. However, sugar does more than sweeten it contributes to moisture and tenderness, so I wouldn’t recommend reducing it further without expecting some changes to the cake’s structure and shelf life.
-
How can I tell if my cast iron skillet is properly seasoned for this cake?
A well-seasoned skillet has a smooth, non-sticky surface with a slight sheen. If you’re unsure, err on the side of caution and be generous with your greasing and flouring. Nothing is more disappointing than a cake that sticks to the pan!
Final Thoughts
Aunt Betty’s Old Fashioned Skillet Cake is one of those recipes that proves the best things in life truly are simple. This humble cake has graced countless family tables for generations, and with good reason. Its unfussy preparation, comforting texture, and versatile nature make it a reliable star for any occasion. Whether you’re an experienced baker or just starting out, this recipe promises success and satisfaction. I hope it becomes a cherished tradition in your kitchen too, just as it has in mine.
Print
Aunt Betty’s Old Fashioned Skillet Cake Recipe
- Prep Time: 10 minutes
- Cook Time: 35 minutes
- Total Time: 45 minutes
- Yield: 8 to 10 servings
- Category: Desserts
- Method: Baking
- Cuisine: American
- Diet: Vegetarian
Description
Aunt Betty’s Old Fashioned Skillet Cake is a quick and easy dessert baked in a cast-iron skillet, offering a moist and delicious treat with a golden-brown crust.
Ingredients
Main Ingredients
- 2 cups sugar
- 2 cups self-rising flour
- 1 1/4 cup milk
- 2 large eggs
- 1 teaspoon vanilla extract
- 1/4 cup vegetable oil
Instructions
- Preheat the skillet. Preheat the oven to 350°F. Grease and flour a 12-inch cast iron skillet to ensure your cake doesn’t stick during baking.
- Mix the batter. In a large bowl, combine the sugar, self-rising flour, milk, eggs, vanilla extract, and vegetable oil. Mix well until the batter is smooth and free of lumps.
- Pour the batter. Pour the prepared batter into the greased and floured cast iron skillet, spreading it evenly.
- Bake the cake. Place the skillet in the preheated oven and bake for 30 to 35 minutes, or until the cake is golden brown and set in the center. You can test doneness by inserting a toothpick; it should come out clean.
- Cool and serve. Allow the cake to cool in the skillet for 15 to 20 minutes before turning it out onto a serving plate. Slice and serve as desired.
Notes
- This cake pairs well with a scoop of vanilla ice cream or a dollop of whipped cream.
- If you don’t have a self-rising flour, you can substitute it by adding 1 teaspoon of baking powder and 1/2 teaspoon of salt per cup of all-purpose flour.
- This recipe works best in a cast-iron skillet, but you can also use a regular cake pan if needed.
Nutrition
- Serving Size: 1 slice


