
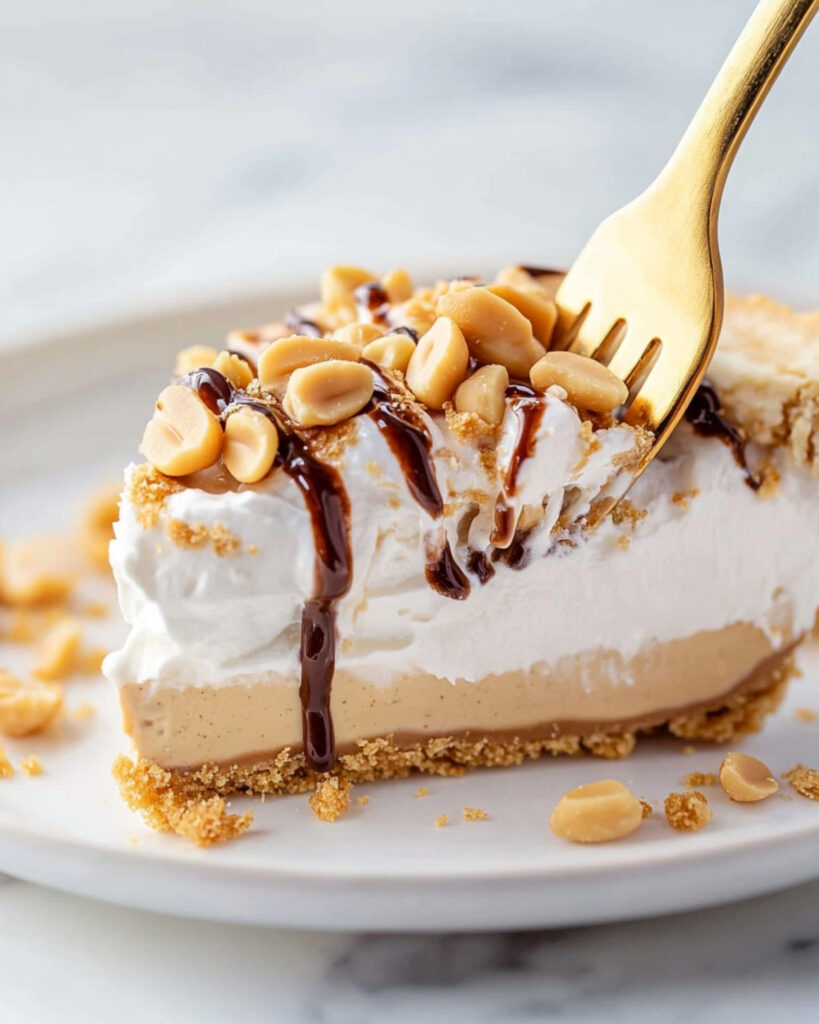
This incredibly creamy No Bake Peanut Butter Pie is the ultimate dessert for busy days when you crave something sweet but don’t want to turn on the oven. With its perfect balance of sweet and salty flavors wrapped in a silky smooth texture, this pie comes together in just 10 minutes of prep time. It’s a crowd-pleasing dessert that tastes like you spent hours in the kitchen, when really, your refrigerator does most of the work!
Why You’ll Love This Recipe
- No Oven Required: Perfect for hot summer days or when you need a quick dessert without heating up the kitchen.
- Quick Preparation: Just 10 minutes of hands-on time and you’re done! The refrigerator handles the rest of the work.
- Crowd-Pleaser: The combination of peanut butter and cream cheese creates a flavor that both kids and adults go crazy for.
- Make-Ahead Wonder: Prepare this pie days in advance for stress-free entertaining.

Ingredients You’ll Need
- Premade graham cracker pie crust: The perfect buttery, slightly sweet foundation that complements the peanut butter filling beautifully. Saves tons of time without sacrificing flavor!
- Peanut butter: The star of the show! Creates that rich, nutty flavor that makes this pie irresistible. I recommend using creamy peanut butter for the smoothest texture.
- Cream cheese: Adds tanginess and structure to the filling. Make sure it’s properly softened to avoid lumps in your filling.
- Confectioners’ sugar: Sweetens the filling without the grittiness of granulated sugar. It dissolves completely for that perfectly smooth texture.
- Whipped topping (Cool Whip): Creates the light, airy texture that makes this pie so heavenly. You’ll need one 8 oz container for the filling and additional 4 oz for topping.
- Optional toppings: Chopped salted peanuts and chocolate sauce create that perfect sweet-salty contrast and make the pie look professionally finished.
Note: You’ll find the complete list of ingredients, along with their exact measurements, in the printable recipe card at the bottom of this post.
Variations
Want to customize your peanut butter pie? Here are some delicious options:
Different Crusts
Try an Oreo cookie crust or chocolate graham cracker crust for chocolate lovers.
Flavor Twists
Add a layer of caramel or jam between the crust and filling for an extra flavor dimension.
Chocolate Lovers’ Version
Mix mini chocolate chips into the filling or drizzle melted chocolate between layers.
Crunchy Texture
Use crunchy peanut butter instead of smooth for added texture, or fold in some crushed peanut butter cups.
How to Make No Bake Peanut Butter Pie
Step 1: Make the Filling
In a large bowl, combine cream cheese, peanut butter, and confectioners’ sugar. Whip until completely smooth and no lumps remain. Take your time here—this step is crucial for that silky texture.
Step 2: Add Whipped Topping
Gently fold in 8oz of Cool Whip whipped topping. Use a folding motion rather than stirring to maintain the light, airy texture. Continue until well combined with no white streaks.
Step 3: Fill the Pie Shell
Pour the peanut butter mixture into your premade graham cracker crust. Spread evenly, creating a slight dome in the center if needed.
Step 4: Add Topping
Spread the remaining 4oz of whipped topping over the peanut butter layer. Smooth to the edges with a spatula for a professional look.
Step 5: Chill
Refrigerate the pie for at least 2 hours before serving. This resting time is essential for the flavors to meld and the pie to set properly.
Step 6: Garnish and Serve
Just before serving, top with chopped salted peanuts and a drizzle of chocolate sauce if desired (and trust me, you’ll want to!).
Pro Tips for Making the Recipe
- Room Temperature Cream Cheese: Make sure your cream cheese is properly softened to avoid a lumpy filling. Leave it out for at least 30 minutes before starting.
- Quality Peanut Butter: Use a good quality peanut butter for the best flavor. Natural peanut butter works but may create a less stable filling.
- Even Spreading: Use an offset spatula for perfectly smooth layers and professional-looking results.
- Chill Completely: Don’t rush the chilling time—a properly set pie slices much more cleanly.
- Clean Knife Technique: For picture-perfect slices, clean your knife between cuts with hot water and dry it.
How to Serve
This peanut butter pie is incredibly versatile when it comes to serving options:
Special Occasions
Dress it up with a drizzle of warm chocolate sauce, a sprinkle of sea salt, and whipped cream for dinner parties or holidays.
Casual Dessert
Serve with a cold glass of milk for the perfect after-school treat or casual family dessert.
Coffee Companion
Pair with a strong cup of coffee to balance the sweetness—the combination is particularly delightful.
Ice Cream Add-On
Add a scoop of vanilla or chocolate ice cream on the side for an extra indulgent dessert experience.
Make Ahead and Storage
Storing Leftovers
Cover any leftover pie tightly with plastic wrap and refrigerate for up to 5 days. The flavor actually improves after a day in the refrigerator as the flavors meld together.
Freezing
This pie freezes beautifully! Wrap the entire pie (or individual slices) with plastic wrap and then tightly with foil to prevent freezer burn. Freeze for up to 2 months.
Reheating
No reheating necessary! For frozen pie, thaw in the refrigerator overnight or let individual slices sit at room temperature for about 20-30 minutes before serving.
FAQs
-
Can I use natural peanut butter for this recipe?
You can use natural peanut butter, but the texture may be slightly different and less stable. Make sure it’s well-mixed before adding to the cream cheese, and you might need to adjust the sweetness since natural peanut butter doesn’t contain added sugar.
-
Is there a way to make this recipe lighter in calories?
Absolutely! Try using reduced-fat cream cheese, light whipped topping, and even consider a reduced-fat graham cracker crust. The flavor will still be delicious, though the texture might be slightly less rich.
-
Can I substitute the graham cracker crust with something else?
Definitely! An Oreo cookie crust works wonderfully with the peanut butter filling. You can also use a shortbread crust or even a pretzel crust for more sweet-salty contrast.
-
How far in advance can I make this pie?
This pie can be made up to 3 days in advance and kept refrigerated, or up to 2 months ahead if frozen. This makes it perfect for planning ahead for parties and holidays.
Final Thoughts
This No Bake Peanut Butter Pie is truly one of those magical recipes that delivers gourmet results with minimal effort. Whether you’re a seasoned baker or someone who rarely ventures into dessert-making, this foolproof pie will make you look like a culinary star. The combination of creamy peanut butter filling, light whipped topping, and crunchy graham cracker crust creates a dessert that’s impossible to resist. Give yourself the gift of this simple yet spectacular treat—I promise it’ll become a regular in your dessert rotation!
Print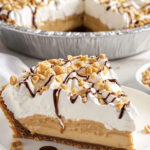
No Bake Peanut Butter Pie Recipe
- Prep Time: 10 minutes
- Cook Time: 0 minutes
- Total Time: 10 minutes
- Yield: 8 servings
- Category: Desserts
- Method: No-cook
- Cuisine: American
- Diet: Vegetarian
Description
This No Bake Peanut Butter Pie is a quick and easy dessert recipe, rich in creamy peanut butter flavor, and perfect for parties or special occasions. Only a few ingredients and minimal prep time are required for a decadent, crowd-pleasing treat.
Ingredients
For the Pie:
-
- 1 premade graham cracker pie crust
- 3/4 cup peanut butter
- 4 oz cream cheese, softened
- 1 cup confectioners’ sugar
- 8 oz whipped topping (Cool Whip)
For the Topping:
- 4 oz whipped topping
- Chopped salted peanuts (optional)
- Chocolate sauce (optional)
Instructions
- Prepare the Filling: In a bowl, combine the cream cheese, peanut butter, and confectioners’ sugar. Whip together until the mixture is smooth and well combined.
- Fold in Whipped Topping: Gently fold in 8oz of Cool Whip whipped topping and mix thoroughly. This adds lightness and fluffiness to the filling.
- Fill the Pie Shell: Pour the filling into the premade graham cracker pie crust, spreading it out evenly to the edges.
- Add the Topping: Top the pie with the additional 4oz of whipped topping. Smooth it to the edges for an even layer of creaminess.
- Chill the Pie: Refrigerate the pie for at least 2 hours to allow it to set and the flavors to meld together beautifully.
- Optional Garnish: Before serving, top with chopped salted peanuts and a drizzle of chocolate sauce for added flavor and presentation.
Notes
- Chill this pie for at least 2 hours to give the flavors time to develop and firm up.
- To make clean slices, use a large, sharp knife, and clean it between cuts for the best presentation.
- To Freeze: Cover the pie with plastic wrap and then wrap it tightly with foil to prevent freezer burn.
- To Serve: Remove the peanut butter pie from the freezer before serving and slice with a sharp knife.
- Leftovers should be covered tightly and returned promptly to the fridge or freezer to maintain freshness.
- This pie can be made several days in advance and served when desired for convenience.
Nutrition
- Serving Size: 1 slice
- Calories: 320
- Sugar: 20g
- Sodium: 220mg
- Fat: 18g
- Saturated Fat: 8g
- Unsaturated Fat: 7g
- Trans Fat: 0g
- Carbohydrates: 35g
- Fiber: 1g
- Protein: 6g
- Cholesterol: 15mg


