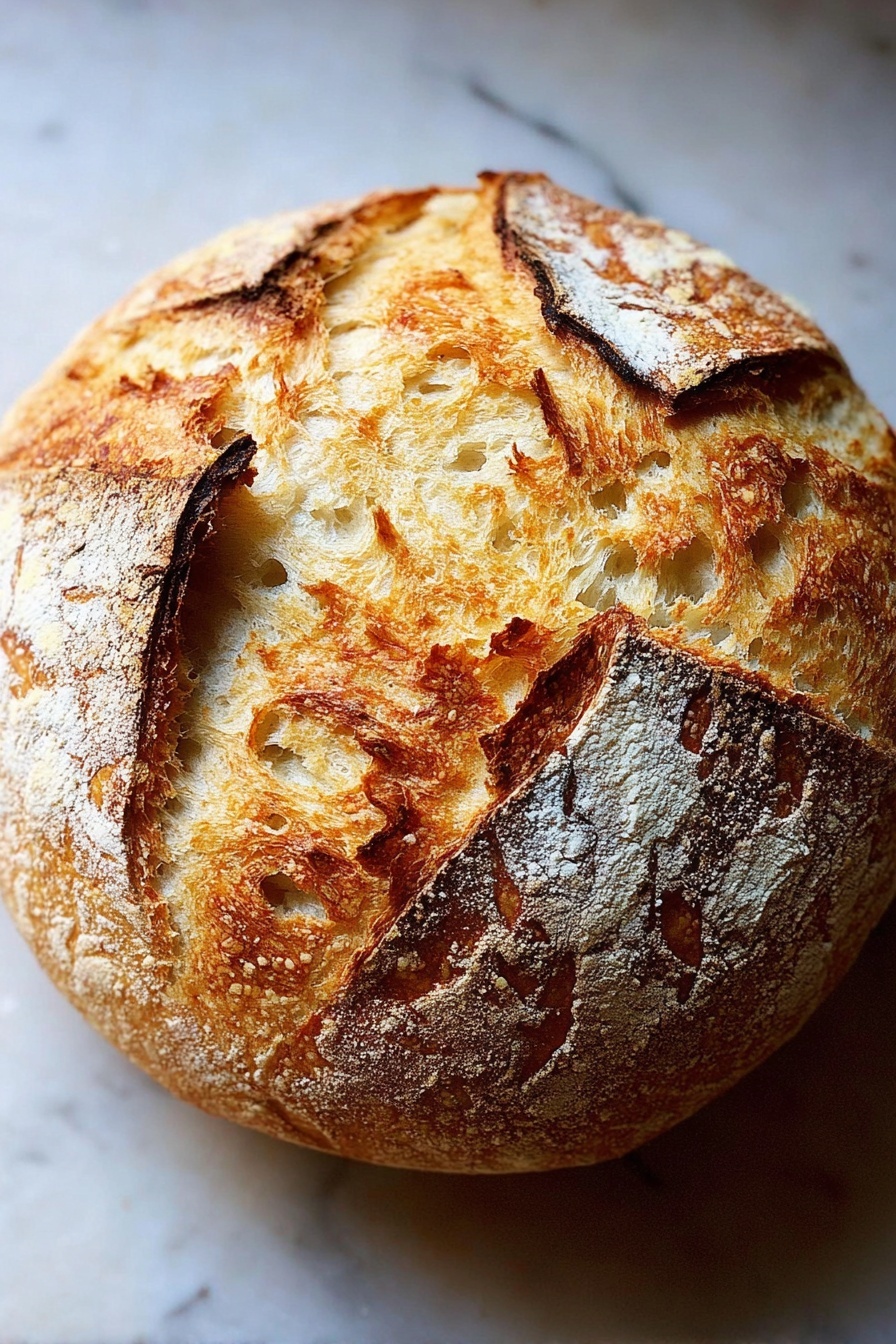
If you’ve ever dreamt of baking your own crusty, flavorful loaf at home, you’re going to absolutely love this Homemade Sourdough Bread Recipe. I still remember the first time I pulled a golden boule fresh from the oven—there’s something truly magical about the aroma and the way the crust crackles as you slice. This recipe is straightforward, packed with helpful tips, and designed to get you that perfect sourdough crumb with just about 25 minutes of hands-on time. Stick around—I promise it’ll be worth every minute!
Why You’ll Love This Recipe
- Easy to Follow: No fancy equipment needed beyond a Dutch oven and a few kitchen basics.
- Minimal Hands-On Time: Only about 25 minutes of active work spread over a day of delicious anticipation.
- Flexible Timing: Adjust bulk fermentation and proofing to fit your schedule without sacrificing flavor.
- Rewarding Results: A beautifully crusty loaf with a light, airy crumb that’ll make your family go crazy.

Ingredients You’ll Need
Each ingredient in this Homemade Sourdough Bread Recipe plays a starring role in developing flavor, texture, and that signature tang. I’ll share tips on how to pick quality ingredients and why some choices will make all the difference in your bread’s final outcome.
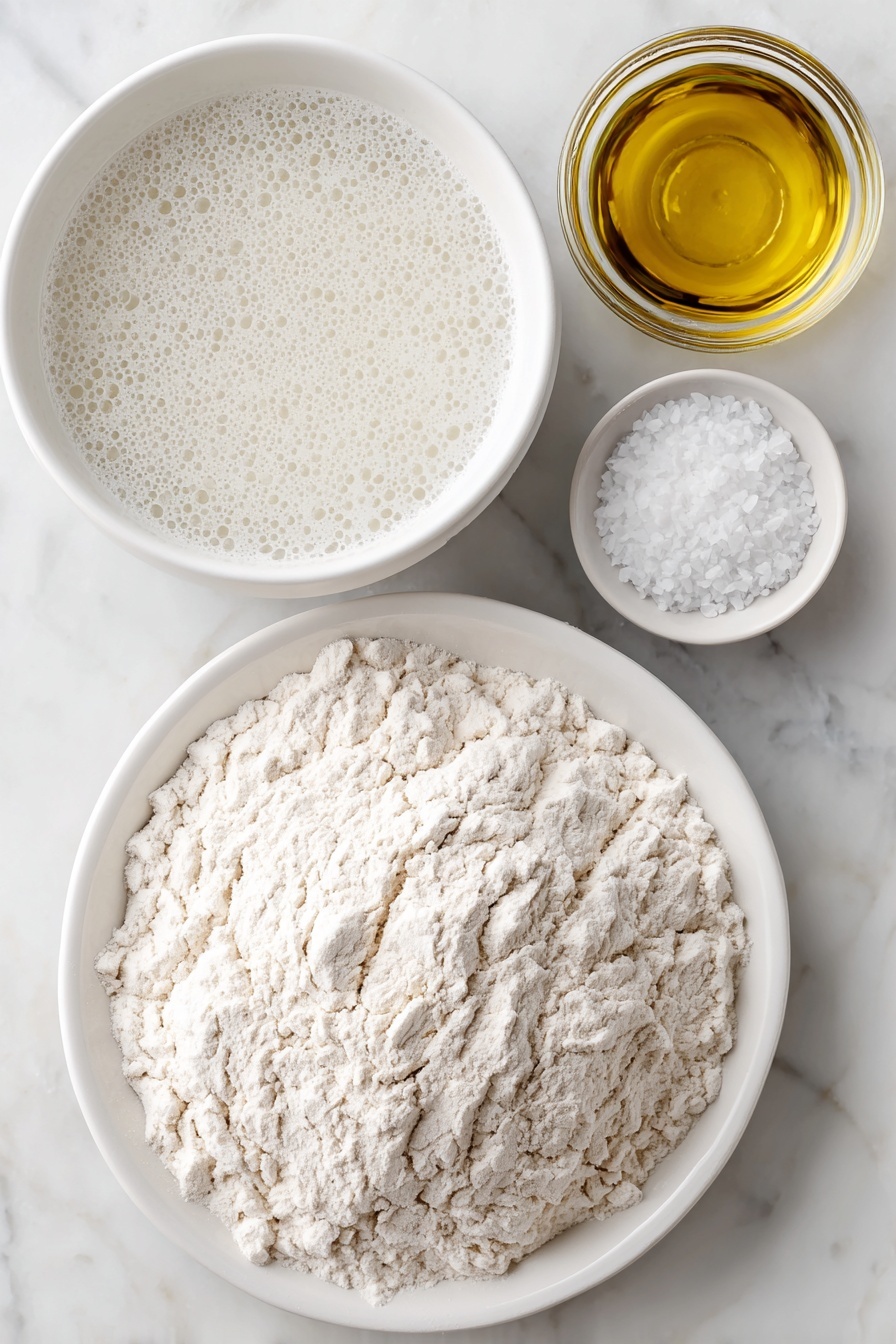
- Active sourdough starter: Make sure it’s bubbly and lively; I usually use 100 grams to speed up the rise, especially in cooler kitchens.
- Warm water: Adjust the temperature to about 75-80°F to encourage good fermentation but avoid killing the natural yeast.
- Bread flour: High-protein flour makes for great structure and chew; I love King Arthur bread flour for consistency.
- Fine sea salt: Balances flavor and controls fermentation speed; I prefer fine sea salt for even mixing.
Variations
I love that sourdough is so versatile, so feel free to make this Homemade Sourdough Bread Recipe truly your own. Over the years, I’ve tried a few fun twists that you might want to experiment with, depending on your mood or occasion.
- Add-ins: I often incorporate fresh herbs like rosemary or thyme before the last stretch and fold—it amps up the aroma and gives this bread a gourmet flair.
- Hydration level: You can push the water content a bit higher (up to 380 grams) for a more open crumb if you’re feeling adventurous.
- Shaping: For a different texture, try shaping a batard instead of a boule; it creates a looser crumb and bakes beautifully.
- Proofing time: Adjust proofing from one hour up to 48 hours in the fridge; longer proofing yields richer flavor and better digestibility.
How to Make Homemade Sourdough Bread Recipe
Step 1: Mix and Rest the Dough
I start by whisking the active starter and warm water in a large bowl. This wakes up the yeast and creates a liquid base for hydration. Then, sprinkle in the bread flour and sea salt. Mix everything until roughly combined—don’t worry about a perfect dough here, a little shaggy is good. Cover the bowl with a damp towel and let it rest for 30 minutes to hydrate the flour fully. This step makes a huge difference in dough development and reduces the kneading workload later.
Step 2: Stretch and Fold
After the rest, it’s time for one of my favorite parts: the stretch and fold. Grab a corner of your dough, gently pull it upward without tearing, and fold it towards the center. Rotate the bowl and repeat this about 4-5 times. This builds dough strength and structure. Then, cover and rest another 30 minutes, repeating this action up to 4 times over two hours. Don’t stress if you can’t do all four—each set helps, so even just one or two is beneficial.
Step 3: Bulk Fermentation
Cover the bowl and leave the dough to rise at room temperature for 8-10 hours (or less if your kitchen’s warm). You’ll know it’s ready when it has grown about 50% in volume, with bubbles appearing and a satisfying jiggle when you move the bowl. This method works better than waiting for a full double in my experience—better oven spring and flavor!
Step 4: Shape and Proof
Turn out the dough onto a lightly floured surface and gently shape it into a round. I fold the top down, turn and repeat all around, creating tension on the surface. Let it rest seam side up for 30 minutes. Meanwhile, get your proofing basket or bowl ready by lining it with a floured towel—I usually use rice flour to avoid burning. Then reshape gently and place the dough in the basket, seam side up. Cover and refrigerate for anywhere from 1 hour up to 48 hours; I personally love the flavor depth from at least 24 hours of cold proofing.
Step 5: Score and Bake
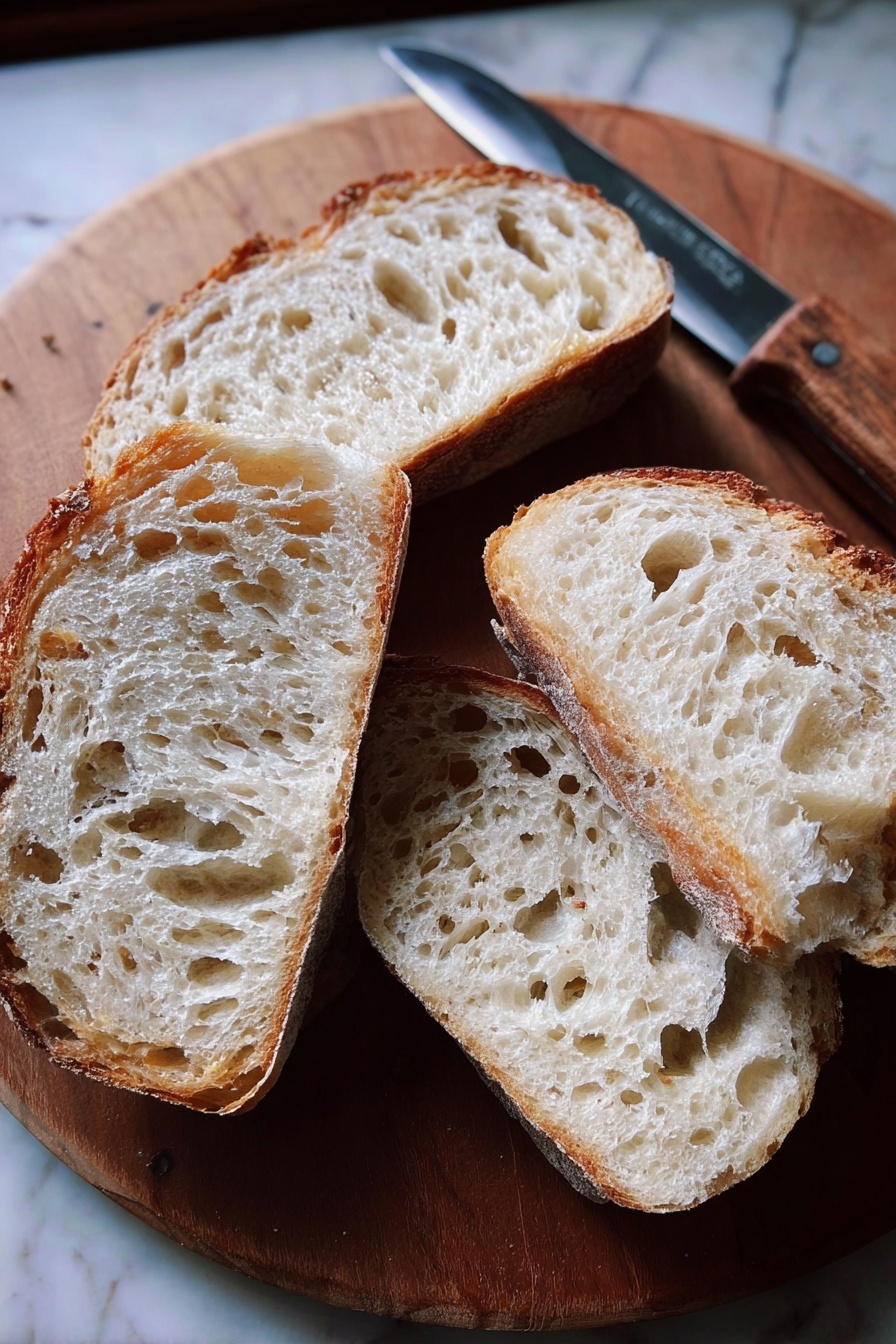
Preheat your oven with a Dutch oven inside to 550°F (290°C) for at least 30 minutes. To transfer the dough, place a parchment sheet over it and flip the proofing basket onto it. Score the dough with a sharp blade—a simple “X” always looks stunning. Use the parchment paper to carefully lift the dough into your hot Dutch oven. Lower the heat to 450°F (230°C), cover, and bake for 30 minutes. Then remove the lid and bake for another 10-15 minutes at 400°F (200°C) to crisp up the crust. If needed, take the bread out of the Dutch oven and let it bake directly on the rack for the final 5-10 minutes. Then cool it on a wire rack for at least an hour before slicing—you’ll want to resist cutting it too soon!
Pro Tips for Making Homemade Sourdough Bread Recipe
- Use a Straight-Sided Vessel: I learned this trick to better monitor the dough’s rise and catch that perfect 50% volume increase.
- Adjust Starter Amount by Temperature: In my cold kitchen, 100g starter speeds up fermentation; warmer environments may only need 50g.
- Rice Flour Dusting: Prevents sticking without burning like all-purpose flour can in the hot Dutch oven.
- Be Patient with Cooling: Sourdough continues to develop its crumb as it cools—resisting the slice is worth it!
How to Serve Homemade Sourdough Bread Recipe
Garnishes
I adore serving sourdough with a smear of extra-virgin olive oil, a sprinkle of flaky sea salt, and a few fresh herbs like thyme or rosemary. Sometimes, I toast the slices and add smashed avocado or a smear of softened butter and honey—the simple toppings let that tangy crumb and crisp crust shine.
Side Dishes
This bread pairs beautifully with soups and stews—my family goes crazy dipping crusty slices into tomato soup or butternut squash bisque. It’s also a perfect companion for cheese boards, roasted veggies, or a fresh salad. Honestly, once you get a batch going, it elevates every meal!
Creative Ways to Present
For gatherings, I like slicing the loaf into thick wedges and serving in a rustic basket lined with a linen napkin. Scoring the dough with decorative patterns before baking also makes a beautiful centerpiece. On special occasions, I’ve even turned the dough into pull-apart rolls, which disappear before the main course!
Make Ahead and Storage
Storing Leftovers
I keep leftover sourdough in an airtight container or plastic bag on the counter, and it stays fresh for up to 3 days. To keep the crust crisp, I sometimes store it in a paper bag inside the plastic for a balance of moisture and crunch. If it starts to stale, your best bet is to revive it in the oven.
Freezing
Freezing works wonders for this bread. I slice the loaf and freeze individual slices in zip-top bags so I can grab them as needed. Wrapped tightly, it keeps well for up to 3 months without losing flavor or texture, making it super convenient when you bake ahead.
Reheating
To bring frozen or day-old sourdough back to life, I preheat the oven to 350°F (175°C) and warm the slices directly on the rack for about 5-7 minutes. For whole loaves, I tent with foil (to prevent burning) for 10 minutes, then uncover for a few minutes more to re-crisp. This method restores that fresh-out-the-oven magic!
FAQs
-
Do I need a sourdough starter to make this bread?
Yes, an active sourdough starter is essential in this recipe as it provides the natural yeast and bacteria that leaven and flavor the bread. If you’re new to sourdough, consider getting a starter from trusted sources like King Arthur Flour or Breadtopia, or try making your own—it’s easier than it seems!
-
Can I use whole wheat or all-purpose flour instead of bread flour?
While bread flour is preferred for its higher protein content which leads to better gluten development, you can substitute with all-purpose flour or include whole wheat flour. Keep in mind that whole wheat will make the dough denser and may require slight adjustments in water. Try starting with a blend and see what texture you like best.
-
How do I know when the bulk fermentation is complete?
Instead of relying solely on timing, watch your dough for visual cues: it should increase about 50% in volume, have surface bubbles, and jiggle gently when moving the bowl. Using a clear, straight-sided container helps with this. This approach leads to better results than strictly following the clock.
-
What’s the secret to getting a crisp crust?
Baking in a preheated Dutch oven traps steam, which helps develop a crispy crust. Scoring the dough allows it to expand properly, and finishing uncovered in the oven helps dry out the crust. Make sure to cool the bread fully before slicing to preserve that crusty exterior.
-
Can I add extra ingredients like cheese or herbs?
Absolutely! Add-ins like herbs, cheese, or jalapeños can be incorporated just before your third stretch and fold to ensure even distribution. You might want to add an extra set of folds to fully incorporate these delicious extras.
Final Thoughts
This Homemade Sourdough Bread Recipe is truly a joy to make and share. I’ve found that with just a little patience and love, anyone can turn simple ingredients into a loaf that’s crunchy on the outside, tender inside, and bursting with flavor. Every time I bake it, my kitchen fills with that cozy, comforting aroma that makes bread baking so special. I can’t wait for you to try it yourself—you’ll savor every morsel and wonder why you waited so long to bake sourdough at home. Happy baking, friend!
Print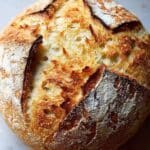
Homemade Sourdough Bread Recipe
- Prep Time: 18 hr
- Cook Time: 45 min
- Total Time: 18 hr 45 min
- Yield: 1 loaf
- Category: Bread
- Method: Baking
- Cuisine: American
- Diet: Vegetarian
Description
This homemade sourdough bread recipe offers a simple, step-by-step approach to making a flavorful loaf with a golden, crisp crust and an airy crumb. It requires minimal hands-on time, no autolyse or preferment, and uses common ingredients. Ideal for bakers looking to master sourdough bread at home with detailed guidance on fermentation, shaping, and baking using a Dutch oven.
Ingredients
Starter and Liquids
- 50 – 100 g (1/4 – 1/2 cup) bubbly, active sourdough starter (100 g recommended)
- 375 g (1 1/2 cups plus 1 tbsp) warm water
Dry Ingredients
- 500 g (4 cups plus 2 tbsp) bread flour
- 9 to 12 g (1.5 – 2.5 teaspoons) fine sea salt
Instructions
- Mix Ingredients: Whisk the active sourdough starter and warm water together in a large bowl using a fork or spatula. Add the bread flour and salt. Mix all ingredients to combine, finishing by hand if necessary, until a rough dough forms. Cover the bowl with a damp towel and let the dough rest for 30 minutes.
- Stretch and Fold #1: After resting, grab a corner of the dough and pull it up into the center. Repeat this folding action 4 to 5 times. Cover and let rest for another 30 minutes.
- Stretch and Fold Repeats: Repeat the stretching and folding process twice more over the next 2 hours if time allows, totaling 4 sets. Even one set of folds benefits the dough, so don’t worry if you cannot do all.
- Bulk Fermentation: Cover the bowl and let the dough rise at room temperature (about 70°F or 21°C) for 8 to 10 hours until it increases in volume by 50%, shows bubbles, and jiggles when moved. In warm environments, fermentation may take less time.
- Pre-shape: Turn the dough onto a lightly floured surface and gently shape into a round by folding the top down to the center, turning, and repeating until a circle is formed. Use a bench scraper if available to create surface tension.
- Rest and Final Shape: Let the shaped dough rest seam side up for 30 minutes. Meanwhile, line an 8-inch (20-cm) bowl or proofing basket with a floured towel (preferably rice flour). Shape the dough again as before, place it seam side up in the lined bowl.
- Cold Proof: Cover and refrigerate the dough for 1 to 48 hours, with 24 hours preferred for best crumb development. To prevent drying, tuck the bowl in a loosely tied plastic bag.
- Preheat Oven: Place a Dutch oven in your oven and preheat to 550°F (290°C). Cut parchment paper to fit the Dutch oven.
- Score and Transfer: Place parchment on dough and invert the bowl to release the loaf. Score the dough with a small knife or razor blade with your preferred pattern, such as a simple “X”. Using the parchment, transfer the dough into the preheated Dutch oven.
- Bake Covered: Lower oven temperature to 450°F (230°C). Cover the Dutch oven and bake the bread for 30 minutes.
- Bake Uncovered: Remove the lid, reduce temperature to 400°F (200°C), and continue baking for 10 to 15 minutes. If needed, remove the loaf from the pot and bake directly on the oven rack for an additional 5 to 10 minutes to crisp the crust.
- Cool: Remove loaf from the oven and cool on a wire rack for 1 hour before slicing.
- Store: Store at room temperature in an airtight container or plastic bag for up to 3 days or freeze for longer storage.
Notes
- Use an active sourdough starter from reliable sources such as King Arthur Flour or Breadtopia.
- Invest in a digital scale for precise measurements essential to bread baking.
- Flour sack towels are ideal for lining proofing baskets to prevent sticking.
- Rice flour is preferred for dusting over all-purpose or bread flour as it doesn’t burn during baking.
- You can adjust hydration by increasing water to 380 g for a higher hydration dough.
- Use kosher salt (Diamond Crystal) or fine sea salt (Baleine Fine); 12 grams is optimal regardless of brand.
- For a more open crumb, shape the dough as a batard instead of a round.
- Add extra ingredients like herbs, cheese, or jalapeños before the third set of stretch and folds.
- Adjust starter quantity between 50 g and 100 g depending on kitchen temperature and desired fermentation speed.
- Visual cues are more reliable than time for determining fermentation readiness—look for a 50% increase in dough volume, surface bubbles, and jiggle.
- A straight-sided vessel helps monitor volume changes effectively during fermentation.
Nutrition
- Serving Size: 1 slice (approximately 100g)
- Calories: 260
- Sugar: 0.2 g
- Sodium: 450 mg
- Fat: 1 g
- Saturated Fat: 0.2 g
- Unsaturated Fat: 0.6 g
- Trans Fat: 0 g
- Carbohydrates: 55 g
- Fiber: 2 g
- Protein: 8 g
- Cholesterol: 0 mg


