If you’re looking for a festive, fun, and absolutely delightful treat to make this holiday season, I have just the thing — a Christmas Tree Brownies Recipe that’s not only easy but also turns out adorable and tasty every single time. I love this recipe because it’s a perfect way to dress up simple brownies into something magical that’s guaranteed to impress your family and guests. Stick with me, and I’ll walk you through all the tips and tricks to get these festive treats just right!
Why You’ll Love This Recipe
- Effortless Yet Impressive: You only need a box mix and a few decorations to create an eye-catching holiday treat.
- Kid-Friendly Fun: Decorating with icing and sprinkles turns this into a fun activity for all ages.
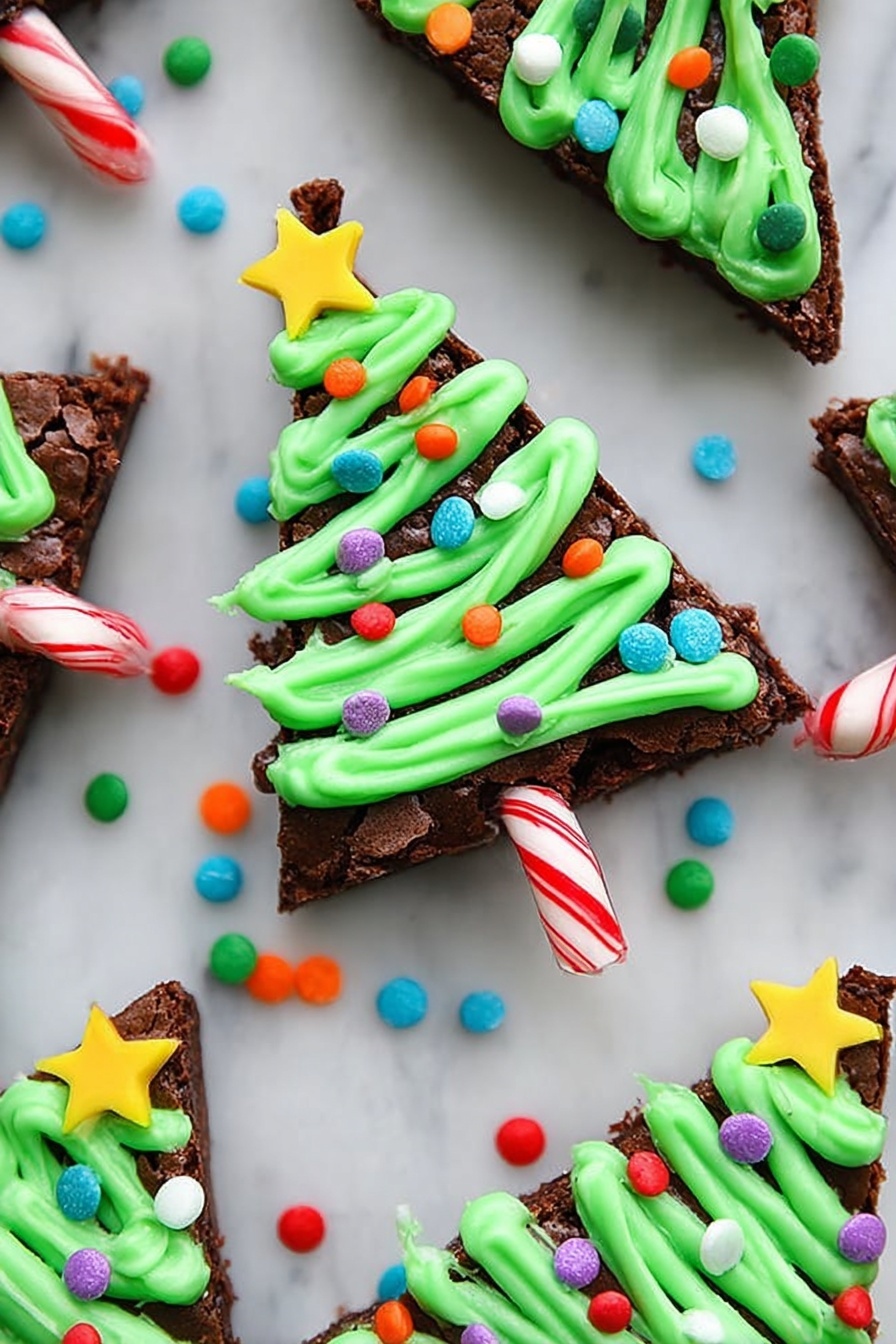
- Beautiful Presentation: The candy cane “trunk” and green icing create charming Christmas tree shapes that wow every time.
- Perfect for Parties: These brownies are easy to make in batches and always disappear fast!

Ingredients You’ll Need
These ingredients come together beautifully—the box mix gives you a classic fudgy brownie base that’s easy to handle, and the simple decorating supplies turn it into a festive masterpiece you’ll love showing off.

- Brownie Mix: I always reach for a trusty box mix as a quick and reliable base—you can’t go wrong with the kind you love best.
- White Vanilla Icing: This creates the perfect “snowy” look when colored green; canned icing is handy for quick prep.
- Green Food Colouring: Add until you get that gorgeous fresh tree green shade you want; I like gel colors for vibrant hues.
- Small Round Sprinkles: These make great “ornaments” when decorating your brownies—choose multicolor for festive fun.
- Small Star Sprinkles: These little touches mimic tree toppers, bringing your brownies to life.
- Candy Canes: Use as trunks to anchor the Christmas tree shape—plus they add a delicious peppermint touch.
Variations
One of the things I love most about this Christmas Tree Brownies Recipe is how easy it is to make your own — don’t be afraid to get creative with toppings or even switch up the base. Doing so makes it feel personal and can cater to your family’s tastes.
- Nutty Twist: I once added chopped walnuts into the brownie batter — it gave a nice crunch that my family loved.
- Minty Chocolate: Swap out regular icing for a mint-flavored version to boost the peppermint vibe from the candy canes.
- Gluten-Free: Use your favorite gluten-free brownie mix so everyone can dig in without worry.
- Vegan Option: I experimented with a vegan brownie base and dairy-free icing, and it was surprisingly delicious.
How to Make Christmas Tree Brownies Recipe
Step 1: Bake Your Brownies
Start by lining an 8″x8″ baking pan with foil and spraying it lightly—trust me, this makes it so much easier to lift the brownies out once baked. Prepare your brownie mix exactly as the package directs, and pop it in the oven. When they’re done, give the brownies a good 1.5 hours to cool completely—this step is crucial to avoid crumbly triangles when cutting later.
Step 2: Shape the Christmas Trees
Once cooled, remove the brownies from the pan using the foil “handles” and place on a cutting board. To make those perfect Christmas tree shapes, cut the brownies into three long rows and then slice diagonally in alternating directions. This zigzag pattern is what gives the trees their classic triangular, whimsical look!
Step 3: Add the Candy Cane Trunk
Unwrap a handful of candy canes and carefully cut them into about 1.5-inch pieces with a sharp knife. I learned to do this gently to avoid breaking into too many shards. Then, press the sharper end of each candy cane piece into the bottom of your brownie triangles — they’ll act like trunks that hold your trees upright and look absolutely adorable.
Step 4: Color and Pipe the Icing
Scoop half the tub of white vanilla icing into a bowl and start adding green food colouring— a little at a time—to reach the vibrant, just-right shade of green you’re happy with. Pour the green icing into a zip-top bag, seal it tight, and snip off a tiny corner for piping. Starting at the top of each brownie triangle, gently squeeze the icing out in a fun, curvy zigzag that mimics garlands on a tree.
Step 5: Decorate and Enjoy
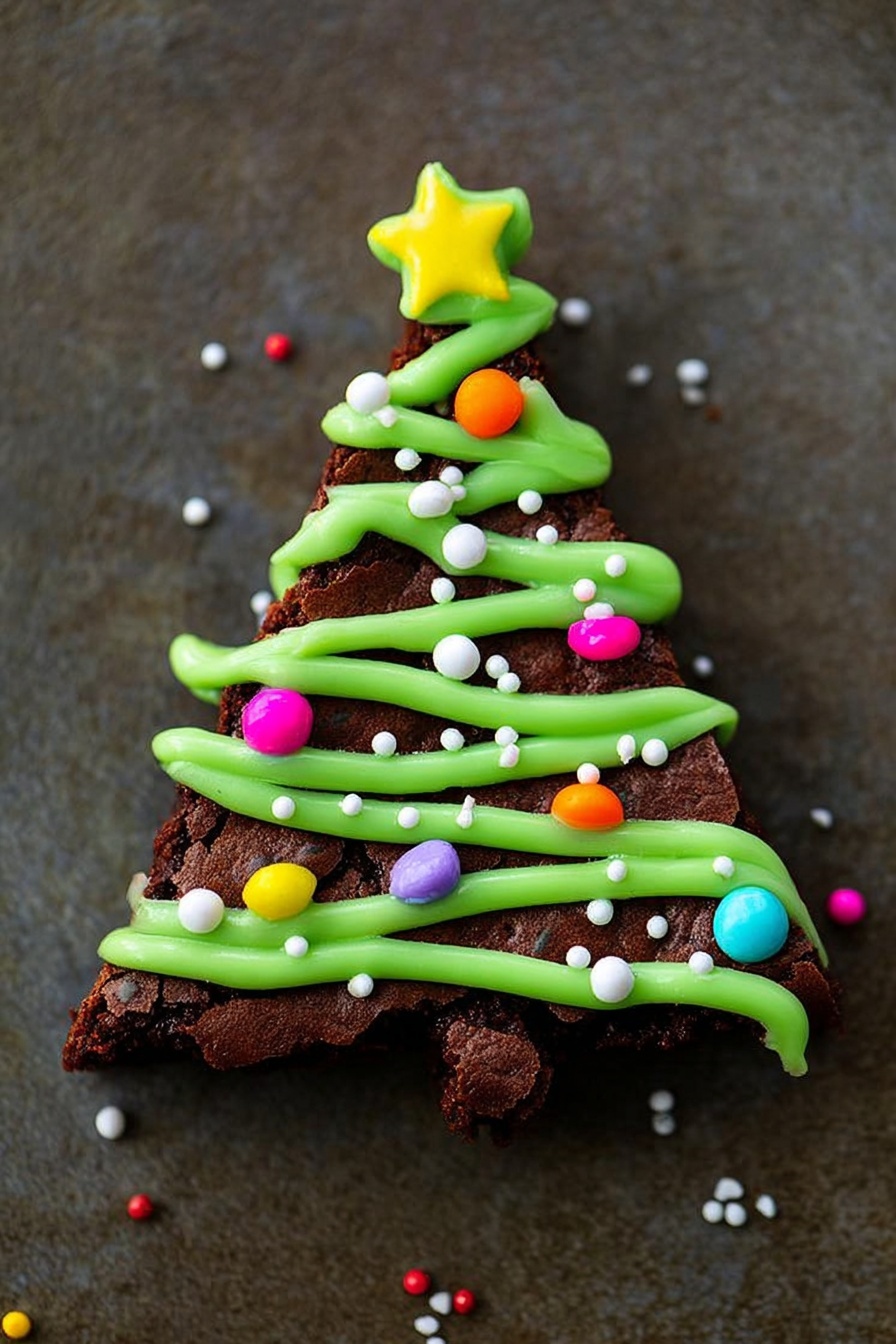
Finally, sprinkle on your chosen small round sprinkles — these become the “ornaments.” Add a tiny star sprinkle at the very top for that perfect finishing touch. Step back, admire your work, and then dig in! I guarantee these festive treats will disappear faster than you expect.
Pro Tips for Making Christmas Tree Brownies Recipe
- Cool Completely Before Cutting: I always wait full 1.5 hours to avoid crumbling; patience pays off for neat triangles.
- Use Foil Liner: Makes removing the brownies easy and avoids sticking, saving a lot of frustration.
- Snip the Icing Bag Corner Small: A tiny opening gives you better control over the icing lines for prettier decoration.
- Press Candy Cane Gently: Avoid breaking your candy cane trunks by cutting carefully and pressing lightly into the brownies.
How to Serve Christmas Tree Brownies Recipe
Garnishes
I find that a little extra sparkle makes these brownies pop, so I often dust them lightly with edible glitter or a tiny sprinkle of powdered sugar before serving. Sometimes I even add mini silver dragées to replace the sprinkles for a more elegant holiday table look.
Side Dishes
These brownies pair wonderfully with warm drinks like hot cocoa or mulled wine. You might also want to set them alongside a fresh fruit platter to balance the rich chocolaty goodness with some brightness.
Creative Ways to Present
For a festive twist, arrange the brownies on a large platter in the shape of an actual Christmas tree, then sprinkle edible confetti around the base. During family parties, I’ve served them on individual holiday-themed plates with a small sprig of holly or rosemary, which adds a beautiful aromatic touch.
Make Ahead and Storage
Storing Leftovers
I keep leftovers in an airtight container at room temperature, but I make sure to separate layers with parchment paper to protect the icing decorations. In my experience, this keeps the brownies moist and the decorations intact for up to 3 days.
Freezing
If I want to prepare these ahead of time, I freeze the undecorated brownies after cooling and cutting, wrapping each piece individually in plastic wrap, then putting them in a freezer-safe bag. Later, I thaw and decorate right before serving — the candy cane trunks and icing work best fresh.
Reheating
I recommend enjoying these brownies at room temperature, but if you want them warm, I gently heat a single piece in the microwave for 10 seconds or so. This softens them nicely without melting the decorations or candy cane trunks.
FAQs
-
Can I use homemade brownies for this Christmas Tree Brownies Recipe?
Absolutely! Homemade brownies work beautifully. Just make sure they are fully cooled and firm enough to cut cleanly into triangles without falling apart.
-
What if I don’t have green food colouring?
You can mix blue and yellow food coloring to create green, or try using matcha powder for a natural green tint with an earthy flavor.
-
Can I make this recipe gluten-free?
Yes! Just use a gluten-free brownie mix and make sure your icing and sprinkles are gluten-free. The recipe stays just as festive and delicious.
-
How long will these Christmas Tree Brownies last?
Stored properly in an airtight container at room temperature, they’ll stay fresh and tasty for about 3 days. Beyond that, they may dry out.
-
What’s the best way to avoid messing up the candy cane trunks?
Use a sharp knife to cut the candy canes gently and try not to apply too much pressure when pressing them into the brownies; plus, using thicker candy canes helps prevent breakage.
Final Thoughts
I absolutely love how this Christmas Tree Brownies Recipe turns a simple batch of brownies into a festive centerpiece that’s both fun to make and irresistible to eat. From the first time I tried it, I was hooked on how easy it is to turn humble ingredients into holiday magic that brings everyone to the kitchen. Whether you’re baking with kids or looking for a quick festive treat, I really believe you’ll find this recipe as charming and delicious as I do. So grab your brownie mix, some icing, and candy canes – and get ready to spread some holiday cheer, one cute Christmas tree brownie at a time!
Print
Christmas Tree Brownies Recipe
- Prep Time: 15 minutes
- Cook Time: 25 minutes
- Total Time: 2 hours (including cooling)
- Yield: 12 brownie trees
- Category: Dessert
- Method: Baking
- Cuisine: American
Description
This festive Easy Christmas Tree Brownies recipe transforms classic brownies into charming holiday treats. Using simple ingredients like boxed brownie mix, white vanilla icing colored green, and decorative sprinkles, these brownies are cut into tree shapes with candy cane trunks and decorated with zigzag icing and star toppers, perfect for holiday parties and family celebrations.
Ingredients
Brownie Base
- 1 box Brownie Mix
Decorations
- 1 tub white vanilla icing
- Green food colouring (to desired shade)
- Small round sprinkles
- Small star sprinkles
- Candy canes (for the tree trunks)
Instructions
- Prepare the Pan: Line an 8″x8″ baking pan with aluminum foil and spray with cooking spray to prevent sticking.
- Bake Brownies: Prepare the brownie mix according to the package directions and bake as instructed until fully cooked.
- Cool Brownies: Allow the brownies to completely cool in the pan, approximately 1.5 hours, to ensure they hold their shape when cut.
- Cut Brownies into Triangles: Remove the brownies from the pan using the foil liner. Cut into three rows, then cut in alternating diagonals to create triangular shapes resembling Christmas trees.
- Prepare Candy Cane Trunks: Unwrap candy canes and use a sharp knife to carefully cut or break them into 1.5 inch long pieces, which will serve as the tree trunks.
- Attach Candy Cane Trunks: Press the sharper end of each candy cane piece into the bottom of the brownie triangles to form the tree trunks.
- Color the Icing: Spoon about half of the tub of white vanilla icing into a bowl. Add green food colouring gradually until you get the desired Christmas tree green color.
- Pipe the Icing: Transfer the green icing into a zip lock bag, seal it, and cut off a small corner with scissors to create a piping bag.
- Decorate the Trees: Starting at the top of each brownie triangle, gently squeeze out the green icing in a curvy zigzag pattern as you move down the tree shape.
- Add Sprinkles: Decorate with small round sprinkles and place a small star sprinkle at the top to complete the Christmas tree look.
- Serve and Enjoy: Let the icing set slightly if desired; then enjoy your festive Christmas tree brownies!
Notes
- This recipe is very flexible; simply cut brownies into triangles, add candy cane trunks, pipe on green icing, and decorate with your preferred sprinkles.
- Ensure brownies are fully cooled before cutting to avoid crumbling.
- If you prefer, use homemade brownies instead of boxed mix for a personalized touch.
- Use gel food coloring for vibrant green without thinning the icing.
- Store decorated brownies in an airtight container at room temperature for up to 3 days.
Nutrition
- Serving Size: 1 brownie tree
- Calories: 250
- Sugar: 22g
- Sodium: 150mg
- Fat: 12g
- Saturated Fat: 4g
- Unsaturated Fat: 6g
- Trans Fat: 0g
- Carbohydrates: 34g
- Fiber: 1g
- Protein: 2g
- Cholesterol: 20mg
