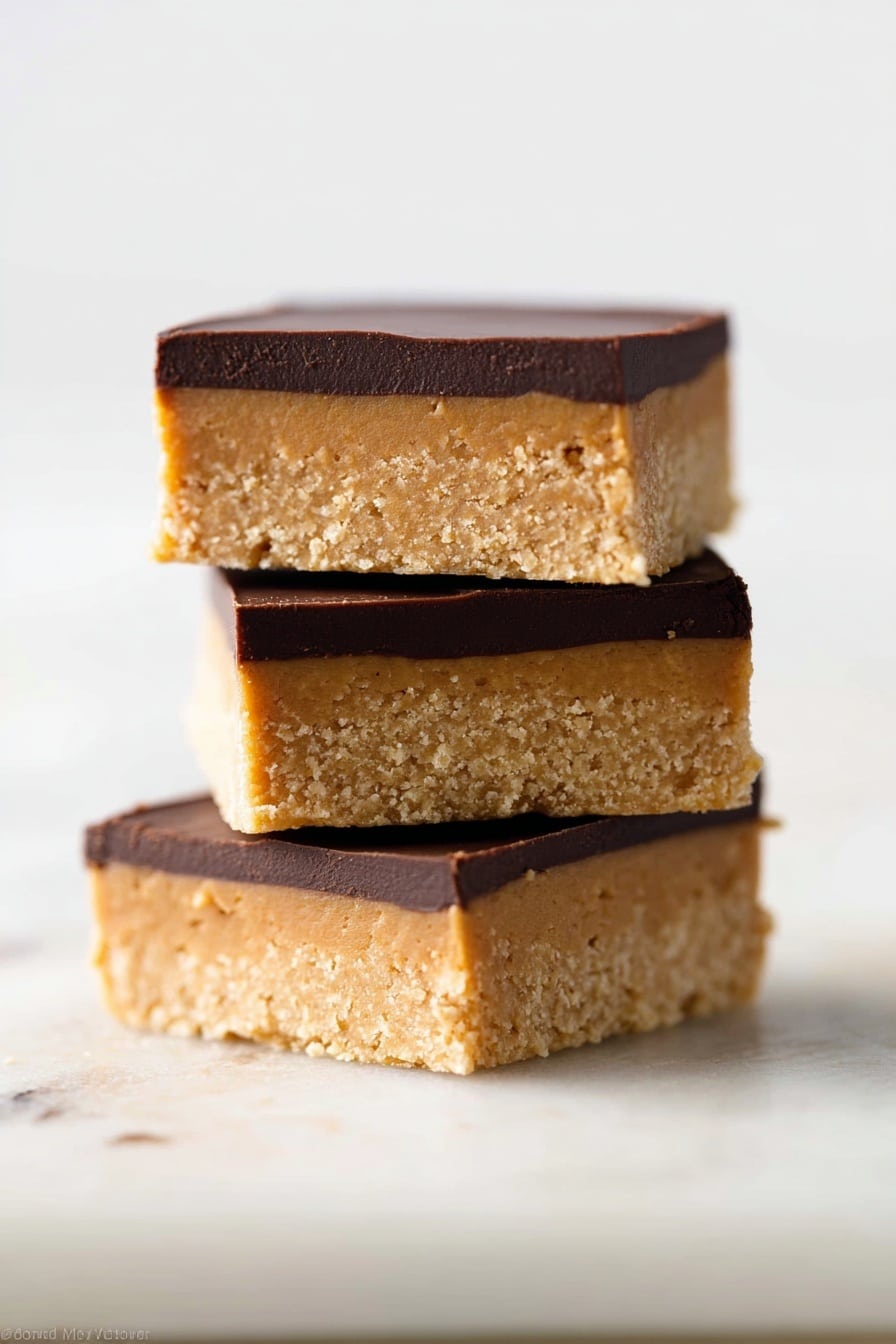
If you’re anything like me and have a serious love affair with peanut butter and chocolate, you’re going to absolutely adore this No-Bake Chocolate Peanut Butter Bars Recipe. Honestly, it’s one of those treats that feels indulgent but comes together so quickly—no oven required! I love how creamy, sweet, and rich these bars are, and trust me, your family and friends will be asking for seconds before you even get a chance to blink.
Why You’ll Love This Recipe
- Quick & Easy: You’ll have dessert ready in under 15 minutes—no baking needed.
- Only 5 Ingredients: Simple pantry staples make this recipe a lifesaver.
- Decadent Flavor: Peanut butter and chocolate come together perfectly for a rich treat.
- Kid-Friendly: Everyone, from kids to adults, can’t get enough of these bars.

Ingredients You’ll Need
The magic of this No-Bake Chocolate Peanut Butter Bars Recipe lies in its simple but perfectly balanced ingredients. Each brings a distinct texture and flavor that make these bars irresistible. When shopping, I recommend grabbing good quality peanut butter and fresh graham crackers for the best results.

- Salted Butter: Melted for easy mixing and adds a rich, slightly salty flavor that cuts through the sweetness.
- Graham Cracker Crumbs: They create the crumbly base, and crushing your own from sheets ensures freshness.
- Confectioners’ Sugar: Makes the filling smooth and sweet without graininess.
- Creamy Peanut Butter: Divided to use in both layers; creamy texture blends beautifully and keeps the bars soft.
- Semi-Sweet Chocolate Chips: Melted to make a luscious chocolate topping that contrasts perfectly with peanut butter.
Variations
I love experimenting with this recipe to keep things exciting—and you should feel free to do the same! Whether you swap ingredients or add extras, these no-bake bars are super forgiving.
- Crunchy Peanut Butter: I swapped in crunchy peanut butter once for extra texture, and my family went nuts over the added bite.
- Nut-Free Version: Using sunflower seed butter instead of peanut butter makes it safe for allergies while keeping the creamy goodness.
- Salt Topping: Sprinkling flaky sea salt on top before setting adds a fantastic salty-sweet contrast.
- Dark Chocolate: If you prefer a more intense chocolate flavor, using dark chocolate chips works beautifully.
How to Make No-Bake Chocolate Peanut Butter Bars Recipe
Step 1: Prep Your Pan Like a Pro
Start by lining an 8- or 9-inch square baking pan with aluminum foil or parchment paper. I always go with parchment because it peels away easily and doesn’t risk sticking. Don’t skip this step—it makes removing your bars a breeze, and gives them clean edges when sliced.
Step 2: Mix the Base
In a medium bowl, combine the melted butter, graham cracker crumbs, and confectioners’ sugar. Stir these together until everything is evenly mixed—this creates the perfect slightly crumbly base. Then fold in 1 cup of creamy peanut butter. The mixture will be dense but pressable. I like to use the back of a measuring cup to press this evenly into the pan; it keeps it flat and compact, so your bars hold together well.
Step 3: Make the Chocolate Peanut Butter Topping
Now melt the remaining 2 tablespoons of peanut butter with the semi-sweet chocolate chips. I usually do this gently in 20-second bursts in the microwave, stirring in between, to avoid burning. Once totally smooth, spread the chocolate mixture evenly over the peanut butter layer. The contrast between creamy chocolate and peanut butter is what makes these bars so addictive.
Step 4: Chill and Set
Pop the pan into the refrigerator for at least 2 hours to let everything firm up properly. When you’re ready to serve, let the bars sit at room temperature for about 10 minutes before slicing—that softens them just enough for clean cuts without squishing. I’ve learned that patience here really pays off for presentation and texture.
Pro Tips for Making No-Bake Chocolate Peanut Butter Bars Recipe
- Use Fresh Ingredients: Freshly crushed graham crackers and good-quality peanut butter make a noticeable difference in taste.
- Press Firmly: Press the base layer firmly into the pan to avoid crumbly edges when cutting.
- Smooth Chocolate Top: Stir the chocolate and peanut butter mixture well after melting to get that shiny, smooth finish.
- Avoid Melting Burns: Microwave in short bursts, stirring often, to prevent scorching the chocolate or peanut butter.
How to Serve No-Bake Chocolate Peanut Butter Bars Recipe

Garnishes
I often sprinkle a tiny pinch of flaky sea salt on top before chilling—the salty-sweet combo takes these bars to another level. For a fun twist, you can add chopped peanuts or a drizzle of white chocolate for contrast. Keeps things visually appealing and extra tasty!
Side Dishes
Though these bars are a decadent dessert on their own, I love serving them alongside a big glass of cold milk or a cup of black coffee. If you’re feeling extra fancy, vanilla ice cream pairs wonderfully, especially during warmer months.
Creative Ways to Present
For parties, I like to cut these into bite-sized squares and arrange them on a pretty platter with some fresh berries for color contrast. Wrapping individual pieces in parchment makes them perfect for gifting, too. They’ve been a hit at bake sales and potlucks because they’re easy to grab and so delicious.
Make Ahead and Storage
Storing Leftovers
After the initial chill, I tightly cover the pan with plastic wrap or foil and refrigerate. These bars last beautifully for up to a week in the fridge, so you can keep satisfying those sweet cravings without worry.
Freezing
I’ve frozen leftovers before by wrapping individual bars in plastic wrap and storing them in a freezer-safe container. They freeze well for up to a month. When thawing, I just let them sit in the fridge overnight before serving, and the texture remains just as yummy.
Reheating
These bars don’t really need reheating, but if you prefer them softer, popping them in the microwave for 10-15 seconds does the trick. Just be careful not to go too long, or the chocolate topping can melt and get messy!
FAQs
-
Can I use natural peanut butter in this No-Bake Chocolate Peanut Butter Bars Recipe?
Natural peanut butter tends to separate and can make the texture less stable in no-bake recipes. If you use natural peanut butter, I recommend stirring it well before measuring and possibly adding a tiny bit of powdered sugar to help with firmness.
-
Why should I chill the bars for at least 2 hours?
Chilling helps the layers set properly so the bars hold their shape when cut. Rushing this step can lead to crumbly or melty bars that are hard to serve.
-
Can I substitute graham cracker crumbs with something else?
Yes! Crushed digestive biscuits, vanilla wafers, or even crushed pretzels can work depending on your taste preference, but the classic graham cracker flavor really complements the peanut butter and chocolate beautifully.
-
How do I prevent the chocolate topping from cracking when slicing?
Let the bars sit at room temperature for about 10 minutes after chilling before slicing. Using a sharp knife warmed under hot water (then dried) also helps you make clean cuts without cracking the top layer.
Final Thoughts
Honestly, this No-Bake Chocolate Peanut Butter Bars Recipe has become my go-to for when I want something sweet, fast, and unbelievably satisfying. It’s one of those rare recipes that everyone loves, from my peanut butter-hating brother (true story!) to my kids’ friends. I can’t recommend it enough as a stress-free dessert that feels just a bit special. So, grab those ingredients, and let’s get making—you’re going to be so glad you did.
Print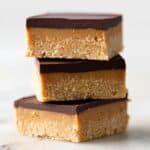
No-Bake Chocolate Peanut Butter Bars Recipe
- Prep Time: 10 minutes
- Cook Time: 0 minutes
- Total Time: 2 hours 10 minutes
- Yield: 20-24 squares
- Category: Dessert
- Method: No-Cook
- Cuisine: American
Description
These no-bake chocolate peanut butter bars are a decadent, easy-to-make treat combining a buttery graham cracker crust with creamy peanut butter and a rich chocolate topping. Perfect for quick dessert cravings without the need for an oven.
Ingredients
Base Layer
- 1/2 cup (8 Tbsp; 113g) salted butter, melted
- 1 cup (120g) graham cracker crumbs (about 8 full sheet graham crackers)
- 2 cups (240g) confectioners’ sugar
- 1 cup (250g) creamy peanut butter
Topping
- 2 Tablespoons (30g) creamy peanut butter
- 1 cup (180g) semi-sweet chocolate chips
Instructions
- Prepare the Pan: Line an 8-inch or 9-inch square baking pan with aluminum foil or parchment paper and set it aside to make removal of the bars easier later.
- Make the Base Layer: In a medium bowl, combine the melted salted butter, graham cracker crumbs, and confectioners’ sugar. Stir in 1 cup of creamy peanut butter until fully incorporated, then press this mixture evenly into the prepared baking pan to form the base layer.
- Melt Chocolate Topping: Melt the remaining 2 tablespoons of peanut butter with the semi-sweet chocolate chips using the microwave or stovetop method. Stir continuously until the mixture is smooth and glossy.
- Spread the Topping: Evenly spread the melted chocolate and peanut butter mixture over the base layer in the pan, creating a smooth top layer.
- Chill and Set: Refrigerate the bars until completely firm, which will take at least 2 hours. Before serving, allow the bars to sit at room temperature for about 10 minutes to soften slightly. They can also be set out for a few hours if desired.
- Store Leftovers: Cover any leftover bars tightly and keep refrigerated for up to 1 week to maintain freshness.
Notes
- These bars are made with only five ingredients, making them simple and quick to prepare.
- Press the base layer firmly to ensure the bars hold together well.
- Allow the bars to chill completely for the best texture and ease of cutting.
- Use smooth, creamy peanut butter for the best consistency.
- They can be kept refrigerated for up to one week, or frozen for longer storage.
Nutrition
- Serving Size: 1 square (approx. 1/24th of recipe)
- Calories: 190
- Sugar: 15g
- Sodium: 85mg
- Fat: 13g
- Saturated Fat: 5g
- Unsaturated Fat: 7g
- Trans Fat: 0g
- Carbohydrates: 17g
- Fiber: 1g
- Protein: 4g
- Cholesterol: 20mg


