
If you’re craving a festive treat that’s as light as air and packed full of refreshing holiday vibes, this Minty Peppermint Meringues Recipe is an absolute must-try. I absolutely love how these delicate little stars melt on your tongue with just the right hint of peppermint—perfect for sharing around the holidays or whenever you want a sweet, minty pick-me-up. Stick with me as I walk you through this foolproof and fun recipe that will soon become a favorite in your kitchen too.
Why You’ll Love This Recipe
- Light and Airy Texture: These meringues come out crisp on the outside and melt-in-your-mouth soft inside, a texture you don’t find in many holiday treats.
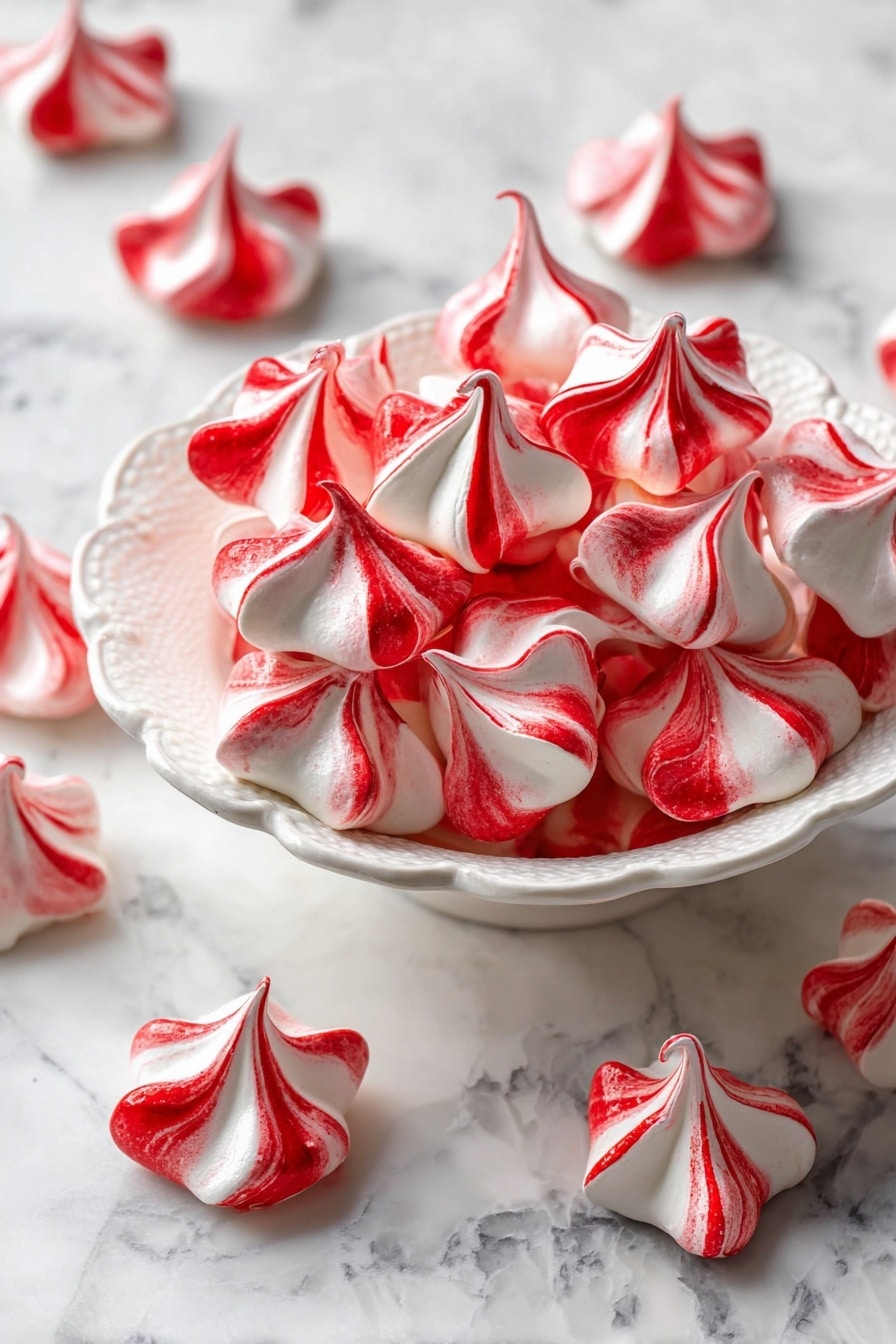
- Beautiful Festive Look: The red stripes against the white give a classic peppermint candy vibe that your guests will adore.
- Simple Ingredients: You’ll need just a few pantry staples and a drop of peppermint to create magic in your oven.
- Perfect Make-Ahead Cookie: These keep wonderfully, making them ideal for holiday baking or last-minute gift packages.

Ingredients You’ll Need
The magic of this Minty Peppermint Meringues Recipe lies in its simplicity. With just egg whites, sugar, and peppermint, you’ll see how these flavors combine so well to produce something that’s crisp, sweet, and wonderfully minty. Oh, and don’t forget that food coloring – it adds a holiday pop that makes these irresistible.
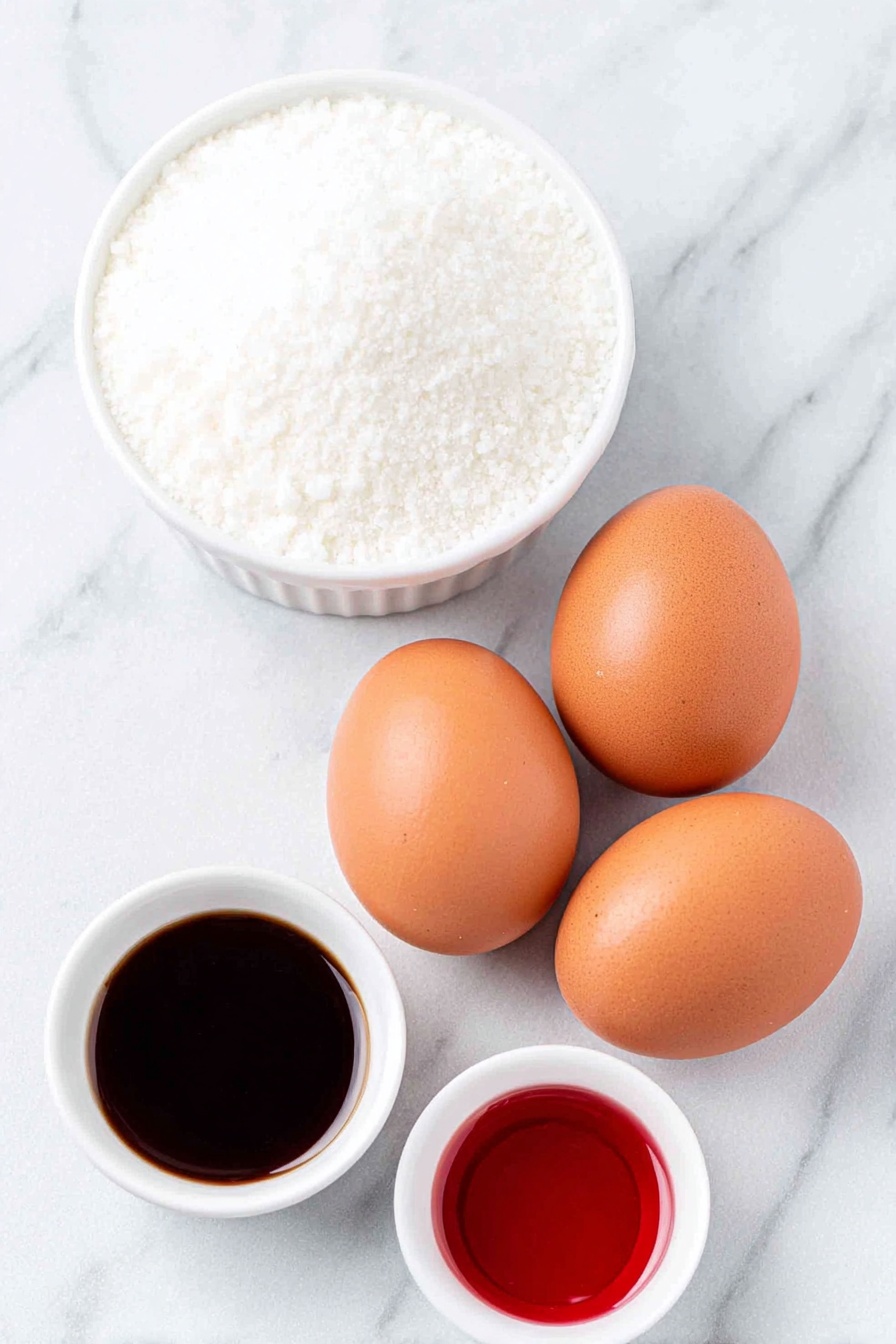
- Egg whites: Use large and fresh eggs for the best volume and stability in your meringue.
- Sugar: Fine granulated sugar dissolves easily for a smooth meringue without graininess.
- Peppermint concentrate or extract: Opt for pure peppermint extract if you can; just a small drop makes all the difference.
- Red gel-paste food coloring: A little goes a long way here, giving those iconic peppermint stripes a vibrant effect without bleeding into the meringue.
Variations
I love putting my own little spin on this Minty Peppermint Meringues Recipe depending on the season or occasion—don’t be afraid to experiment! You’ll find that these tweaks make the recipe feel new every time you make it.
- Chocolate Dipped Meringues: For a more indulgent treat, I dip the cooled meringues in melted dark chocolate; the contrast is heavenly and makes a great gift idea.
- Natural Beet Coloring: Instead of red gel-paste, try natural beet juice for a subtle pink stripe and a bit of earthiness.
- Mini Peppermint Drops: Sprinkle crushed peppermint candies on top before baking for a crunch and extra festive look.
- Advanced Flavors: Swap peppermint for spearmint or even add a hint of vanilla for a unique twist your friends will ask about.
How to Make Minty Peppermint Meringues Recipe
Step 1: Prep and Warm the Egg Whites with Sugar
First, preheat your oven to a low 175°F (about 80°C) and line two baking sheets with parchment paper. I find this low-and-slow approach key to achieving that perfectly crisp exterior. Next, place your large egg whites and sugar into a heatproof bowl. Now here’s a trick I discovered: set this bowl over a pan of simmering water and gently stir until the sugar dissolves and the mixture feels warm to the touch—about 2 to 3 minutes. This warming step helps the sugar melt completely, which means your meringue will be glossy and stable.
Step 2: Whip to Stiff Peaks and Flavor
Pop the bowl onto your mixer fitted with the whisk attachment and whisk on medium-high speed. Watch carefully as the mixture thickens and transforms into stiff, glossy peaks—that’s when you know it’s ready. I always test by lifting the whisk straight up: if the meringue holds a firm peak without drooping, you’re golden. Then, carefully fold in your peppermint concentrate or extract. Just a drop or two is enough to infuse that unmistakable cool flavor without overpowering the sweetness.
Step 3: Add Peppermint Stripes and Pipe
This step is where the magic happens visually. Take a new, clean pastry bag fitted with a small star tip—Wilton M1 is a perfect choice. Using a small paintbrush, paint 2 or 3 stripes of red gel-paste food coloring inside the bag. When you fill the bag with the meringue, those stripes will create festive candy-cane-like swirls on your cookies. Pipe small star shapes, about 3/4-inch high, onto your prepared sheets. Don’t fill the bag all at once; refill as needed, and don’t forget to add a fresh stripe of food coloring each time for consistent color.
Step 4: Bake Low and Slow
Bake the meringues for about 1 hour and 40 minutes. Keep an eye to ensure they stay crisp but don’t brown—you want a pure white finish that’s dry to the touch. When baking time is up, switch the oven off but leave the meringues inside for another 30 minutes with the door closed. This gentle cooling phase helps prevent cracking and keeps them wonderfully crisp. Once cooled completely on wire racks, transfer to a sealed container to keep them fresh.
Pro Tips for Making Minty Peppermint Meringues Recipe
- Use Room Temperature Eggs: I used to skip this and noticed it affected the volume; letting eggs warm up slightly makes whipping much easier.
- Dissolve Sugar Properly: My best tip is to keep stirring while warming the mixture over simmering water to avoid grainy meringue.
- Avoid Humidity: Meringues hate moisture; I always check the weather and try not to bake on overly humid days to keep cookies crisp.
- Use Gel Food Coloring Sparingly: A little gel goes a long way — too much can weigh down the meringue or cause color bleeding.
How to Serve Minty Peppermint Meringues Recipe
Garnishes
I love topping my Minty Peppermint Meringues with a tiny sprinkle of crushed candy canes just before baking—it adds just enough sparkle and crunch without hiding their delicate texture. You can also dust them lightly with powdered sugar for an extra snowy effect that looks so charming on a festive platter.
Side Dishes
These meringues pair beautifully with a hot cup of cocoa or peppermint tea. My family also enjoys serving them alongside a rich chocolate ganache tart or a simple vanilla panna cotta for dessert—adding a refreshing minty balance to richer flavors.
Creative Ways to Present
For a holiday party, I like arranging these meringues in little glass jars tied with festive ribbon, which makes a simple yet beautiful gift. Another fun idea is placing them atop mini cupcakes with whipped cream frosting to surprise guests with an added peppermint crunch.
Make Ahead and Storage
Storing Leftovers
Once your Minty Peppermint Meringues have cooled completely, store them in an airtight container at room temperature. I’ve found they keep crispy for up to two weeks this way. Avoid refrigeration since moisture tends to soften the crisp shells.
Freezing
I’ve frozen these meringues successfully by wrapping them individually in parchment and placing them in a freezer-safe container. When you’re ready to enjoy, just let them thaw at room temperature for 10-15 minutes—they come back lovely and fresh.
Reheating
Meringues don’t reheat well because they can soften, but if you want to refresh them, placing them briefly in a warm (not hot) oven at 150°F for 5-7 minutes can help restore some crispness.
FAQs
-
Can I use peppermint extract instead of peppermint concentrate in this Minty Peppermint Meringues Recipe?
Absolutely! Pure peppermint extract works perfectly. Just use about half a teaspoon or a small drop to avoid overpowering the meringue, as peppermint extract tends to be stronger than concentrate.
-
Why do my meringues sometimes turn out sticky?
Sticky meringues are usually a result of baking in humid conditions or not baking long enough. Make sure to bake low and slow as the recipe suggests and store them in an airtight container at room temperature to keep them crisp.
-
Can I make these meringues without a stand mixer?
You can whisk by hand, but it’ll take significantly longer and more effort to reach stiff peaks. If possible, use an electric hand mixer for best results and easier whipping.
-
How do I prevent the red food coloring from bleeding into the meringue?
Using gel-paste coloring, painting the stripes inside the pastry bag before filling, and adding fresh stripes each time you refill helps keep the colors distinct and prevents bleed. Avoid liquid food coloring, which can weigh down the meringue.
-
What’s the best way to pipe neat, uniform meringues?
Use a consistent amount of pressure on the pastry bag and practice on parchment before piping on your baking sheets. Don’t overcrowd the meringues; give them space to dry properly.
Final Thoughts
This Minty Peppermint Meringues Recipe holds a special place in my holiday baking line-up. It reminds me of cozy afternoons spent with family, and the joyful looks on everyone’s faces when they discover these crisp, minty delights on the cookie tray. I can’t recommend it enough—once you try making them yourself, you’ll enjoy both the process and the sweet, refreshing results. So grab your mixing bowl, prep those stripes of red, and let’s get ready to make magic happen in your kitchen!
Print
Minty Peppermint Meringues Recipe
- Prep Time: 20 minutes
- Cook Time: 1 hour 40 minutes
- Total Time: 2 hours
- Yield: 30 servings (approximately 30 small meringue cookies)
- Category: Dessert
- Method: Baking
- Cuisine: American
- Diet: Vegetarian
Description
Delightfully light and airy Minty Peppermint Meringues infused with a refreshing peppermint flavor and visually accented with festive red stripes. These crisp and sweet meringue cookies are perfect for holiday celebrations or any occasion that calls for a delicate treat.
Ingredients
Ingredients
- 3 large egg whites
- ¾ cup sugar
- 1 drop peppermint concentrate (or ½ tsp pure peppermint extract)
- Red gel-paste food coloring
Instructions
- Preheat and Prepare: Preheat your oven to 175 degrees Fahrenheit (80 degrees Celsius) and line two baking sheets with parchment paper. Fit a pastry bag with a small open-star tip such as Wilton M1, and set aside.
- Dissolve Sugar: Place the egg whites and sugar in a heatproof bowl that can sit over simmering water. Stir the mixture gently over the pan of simmering water for 2 to 3 minutes until the sugar has completely dissolved and the mixture is warm to the touch.
- Whisk to Stiff Peaks: Transfer the bowl to an electric mixer fitted with the whisk attachment. Whisk the mixture on medium-high speed until stiff, glossy peaks form, indicating that the meringue is ready.
- Add Peppermint Flavor: Gently fold in the peppermint concentrate or extract to infuse the meringue with a refreshing peppermint flavor.
- Prepare Pastry Bag: Using a clean small paintbrush, paint 2 to 3 stripes of red gel-paste food coloring inside the pastry bag to create festive stripes on the meringues.
- Pipe Meringues: Fill the prepared pastry bag with 1 to 2 cups of the meringue mixture. Pipe small star shapes about ¾-inch high onto the lined baking sheets. Refill the bag as needed, repainting stripes with food coloring each time for a vibrant effect.
- Bake Slowly: Bake the meringues in the preheated oven until crisp but not browned, approximately 1 hour and 40 minutes.
- Cool in Oven: Turn the oven off and leave the meringues inside for an additional 30 minutes to dry out and set further without browning.
- Final Cooling: Remove the baking sheets and let the meringues cool completely on wire racks before placing them into an airtight container for storage.
Notes
- Light and airy peppermint meringues make a festive and elegant addition to any holiday cookie tray.
- Using gel-paste food coloring ensures vibrant and clean stripes without affecting the meringue’s texture.
- Slow baking at a low temperature is key to achieving crisp, non-browned meringues.
- Ensure sugar is fully dissolved during the warming step to avoid grainy texture.
- Store meringues in an airtight container to maintain crispness and prevent moisture absorption.
Nutrition
- Serving Size: 3 cookies
- Calories: 21 kcal
- Sugar: 5 g
- Sodium: 6 mg
- Fat: 0 g
- Saturated Fat: 0 g
- Unsaturated Fat: 0 g
- Trans Fat: 0 g
- Carbohydrates: 5 g
- Fiber: 0 g
- Protein: 0.5 g
- Cholesterol: 0 mg

