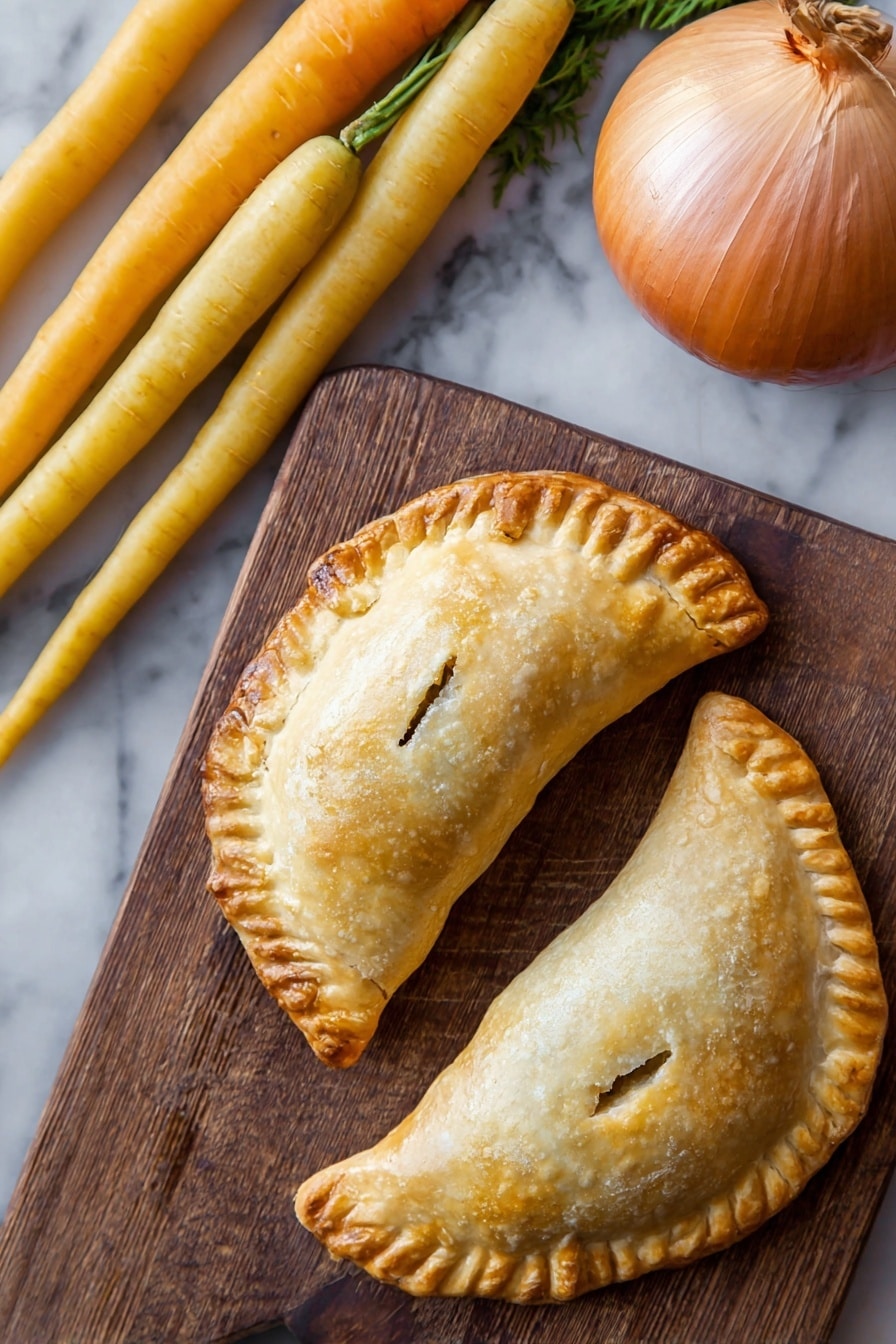
If you’ve ever wished you could carry around a slice of comfort food in your hand, this Handheld Chicken Pot Pie Recipe is going to blow your mind. It’s flaky, buttery, packed with tender chicken and veggies, and so cozy you’ll want to make these little pies your go-to anytime. Trust me, once you’ve tried these handheld wonders, you’ll be dreaming about them too!
Why You’ll Love This Recipe
- Perfect Portable Comfort Food: These handheld pies pack all the coziness of a classic chicken pot pie but in a convenient grab-and-go size.
- Buttery Flaky Crust: The crust is what dreams are made of—rich, flaky, and simply irresistible.
- Loaded with Flavorful Filling: The filling has a savory blend of tender chicken, fresh veggies, and hearty herbs that will satisfy your soul.
- Great for All Skill Levels: I’ll guide you through the steps to help you succeed, whether this is your first pot pie or your tenth.

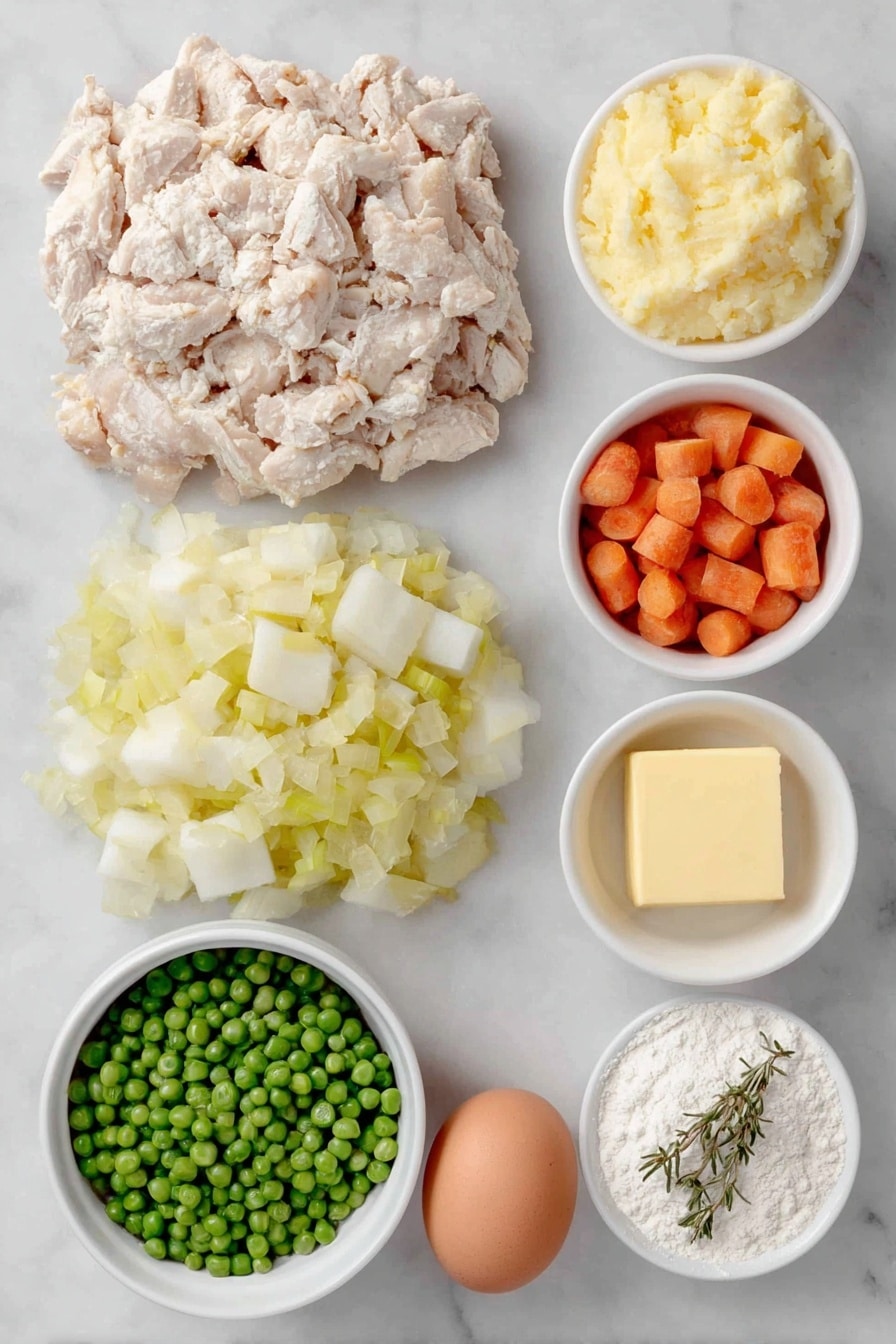
Ingredients You’ll Need
The ingredients here hit all the right notes—the veggies add sweetness and texture, the chicken brings comforting heartiness, and the herbs and butter build deep flavor. These are kitchen staples, but I’ve included tips to make sure you get the best from each one.
- Unsalted Butter: You’ll need it for both the filling and the crust to create richness and flaky layers.
- Chopped Celery: Adds a subtle crunch and fresh flavor to the filling, balancing the creaminess.
- Chopped Carrot: Sweetness and color—looks so pretty inside the pies!
- Diced Potato: Brings a lovely hearty texture without overpowering the other ingredients.
- Chopped Yellow Onion: The base flavor component that makes everything savory and aromatic.
- Dried Thyme and Rosemary: These herbs add woodsy warmth; if you can find fresh, even better.
- Salt: Enhances all the flavors and balances the dish.
- Peas (Frozen is Fine): Sweet bursts that add delightful pops of green.
- Diced Cooked Chicken: The star—use leftover roast chicken or rotisserie for an easy shortcut.
- Flour: Both for thickening the filling and creating the crust structure.
- Chicken Stock: Builds that rich, comforting sauce around the veggies and chicken.
- All-purpose Flour: The crust’s foundation—choose a good-quality brand for best results.
- Cold Ice Water: This helps bring the dough together without melting the butter, crucial for flakiness.
- Egg Wash (Egg + Water): Gives the pies that beautiful golden finish.
Variations
I love that this Handheld Chicken Pot Pie Recipe is so versatile—you can switch up the veggies or add your favorite herbs to make it truly your own. Don’t hesitate to experiment! It makes the process that much more fun.
- Vegetarian Version: I’ve swapped out chicken for mushrooms and added extra peas and carrots for a delicious veggie-packed pot pie that still feels hearty.
- Spicy Twist: Adding a pinch of cayenne or some diced jalapeños gave our family a little heat kick that everyone absolutely loved.
- Cheesy Filling: Mixing in some shredded sharp cheddar keeps the filling creamy and adds an extra flavor punch—I highly recommend trying this if you’re a cheese fan!
- Gluten-Free Crust: Using a gluten-free all-purpose blend worked surprisingly well, just make sure to chill your dough longer for easier handling.
How to Make Handheld Chicken Pot Pie Recipe
Step 1: Prep Your Veggies and Chicken Filling
First off, melt half your butter in a large skillet over medium heat. Toss in your chopped celery, carrots, potatoes, and onions. Let them cook gently until softened—this usually takes about 8-10 minutes. Sprinkle in your dried thyme, rosemary, and salt, then stir everything well so the herbs release their aroma. Next, add the peas and diced cooked chicken, stirring to combine. The colors here always brighten up my mood!
Step 2: Make the Thick, Savory Sauce
In the same skillet, melt the remaining butter. Whisk in the flour to create a roux and cook it for about 2 minutes to get rid of that raw flour taste. Slowly whisk in the chicken stock—this part is key for a silky sauce. Keep stirring until the mixture thickens and coats the back of a spoon. Then fold this sauce into the veggie and chicken mix. Set your filling aside to cool while you roll out the crust.
Step 3: Whip Up That Dreamy Butter Crust
You’ll want your butter really cold here—trust me on that. Mix your flour and cubed butter together, then add ice water little by little until the dough just comes together. Don’t overwork it; a little crumbly dough is fine because it means the crust will be flaky. Wrap it tightly and chill in the fridge for about 30 minutes. This chilling step is something I never skip—it’s crucial for avoiding tough crusts.
Step 4: Assemble Your Handheld Chicken Pot Pies
Preheat your oven to 375°F (190°C). Roll out the dough on a lightly floured surface to about 1/8-inch thickness. Cut out circles (about 5-6 inches wide) to form your pie bases. Spoon a generous amount of filling onto each circle, then top with another dough circle. Press the edges with a fork to seal completely and brush each pie with your egg wash—that shiny golden finish is a game changer.
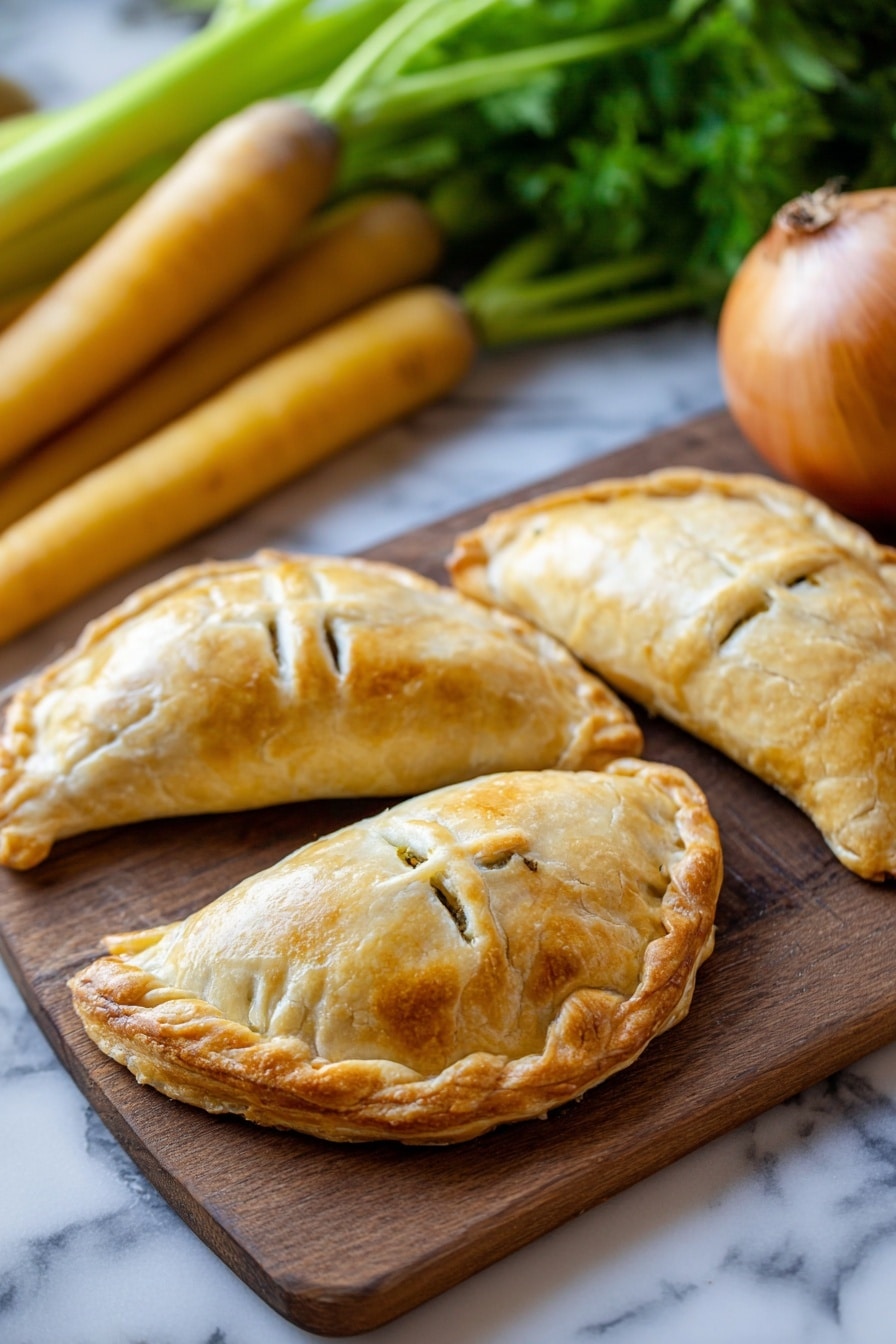
Step 5: Bake to Golden Perfection
Place your pies on a parchment-lined baking sheet and bake for about 40-50 minutes until the crust is a glorious golden brown. Keep an eye on them around the 35-minute mark if your oven runs hot. I usually let mine cool a bit before digging in because the filling inside holds heat like a furnace!
Pro Tips for Making Handheld Chicken Pot Pie Recipe
- Keep Butter Cold: I learned that using ice-cold butter in the crust makes all the difference for flaky layers.
- Don’t Overfill: Overstuffing the pies can cause leaks, so give yourself enough room to seal the edges tightly.
- Use a Light Touch Rolling Out Dough: Rolling too hard warms the butter, leading to tougher crusts—gentle pressure is key.
- Cool Filling Before Assembly: Putting hot filling inside the dough can melt the butter prematurely and make sealing tricky.
How to Serve Handheld Chicken Pot Pie Recipe
Garnishes
I usually sprinkle chopped fresh parsley or thyme over the pies just before serving to add a bit of color and an herbal brightness that cuts through the richness. A light dusting of cracked black pepper on top also gives a nice finishing touch.
Side Dishes
These hand pies are hearty enough to be a meal on their own but pair wonderfully with a crisp green salad or roasted seasonal veggies. When my family’s gathered, we often serve them alongside mashed sweet potatoes or a simple coleslaw to keep things fresh and balanced.
Creative Ways to Present
For special occasions, I like to use small ramekins as molds and shape the crust with cute crimped edges or even cut-out shapes on top for a fun surprise. Wrapping each in parchment paper tied with twine makes them perfect for gifts or potluck contributions.
Make Ahead and Storage
Storing Leftovers
I usually store leftover handheld chicken pot pies in an airtight container in the fridge for up to 3 days. When I reheat them, they taste almost as fresh as the day I baked them if warmed properly.
Freezing
Freezing these pies works great! I flash-freeze them on a baking sheet first, then transfer to freezer bags. This way, they don’t stick together and keep their shape. I’ve found they freeze beautifully for up to 2 months.
Reheating
To reheat, I pop them in a preheated oven at 350°F (175°C) for about 15-20 minutes, just long enough to warm through and crisp up the crust again without drying out the filling. Microwave reheating just isn’t the same for these flaky beauties—oven’s the way to go!
FAQs
-
Can I use store-bought pie crust for the Handheld Chicken Pot Pie Recipe?
Absolutely! If you’re short on time, a good-quality store-bought pie crust works fine. Just keep an eye on baking time since it might vary slightly, and be sure to brush with egg wash for that perfect golden finish.
-
How do I prevent the pot pies from leaking during baking?
Sealing the edges well is key—use a fork to crimp firmly and avoid overfilling your pies. Also, chilling the dough helps it hold together better in the oven, which reduces leaks.
-
Can I make the filling ahead of time?
Yes! Making the filling a day ahead can actually enhance the flavors. Just store it covered in the fridge and bring it to room temperature before assembling your pies.
-
What can I substitute for chicken stock in the filling?
If you don’t have chicken stock on hand, vegetable stock or even a well-seasoned broth will work in a pinch—just adjust seasonings to taste.
Final Thoughts
I absolutely love how this Handheld Chicken Pot Pie Recipe combines the nostalgia of traditional comfort food with the fun of a portable treat. It’s perfect for busy weeknights, lunchboxes, or entertaining friends without fuss. When I first made these, my family went crazy for how flaky and flavorful they were—and now they’re a staple in my kitchen. I promise if you give this recipe a try, you’ll feel the same warmth and satisfaction in every bite.
Print
Handheld Chicken Pot Pie Recipe
- Prep Time: 30 minutes
- Cook Time: 1 hour
- Total Time: 1 hour 30 minutes
- Yield: 8 servings
- Category: Main Course
- Method: Baking
- Cuisine: American
Description
These Handheld Chicken Pot Pies offer a convenient and delicious twist on the classic comfort food. Featuring a flaky, buttery crust encasing a rich and savory filling of chicken, vegetables, and herbs, they make perfect individual servings for family meals or gatherings. The filling combines tender cooked chicken with carrots, celery, peas, potatoes, and a creamy sauce thickened with flour and chicken stock, seasoned with thyme and rosemary. Each pot pie is carefully wrapped with a golden, flaky crust and finished with an egg wash for a beautiful, glossy finish.
Ingredients
For the Filling:
- 6 tbsp. Unsalted Butter, Divided
- 1 cup Chopped Celery
- 1 cup Chopped Carrot
- 1 cup Diced Potato
- 2 cups Chopped Yellow Onion
- 1/4 tsp. Dried Thyme
- 1/4 tsp. Dried Rosemary
- 1/2 tsp. Salt
- 1 cup Peas (Frozen Is Fine)
- 2 cups Diced Cooked Chicken
- 1/2 cup Flour
- 3 cups Chicken Stock
For the Crust:
- 3 3/4 cups All-purpose Flour
- 3 sticks Unsalted Butter, Cubed
- 1/2 cup to 2/3 cup Cold Ice Water, As Needed
- 1 Egg, Beaten With 1 Tablespoon Water (Egg Wash)
Instructions
- Prepare the Filling: In a large skillet or saucepan, melt 3 tablespoons of unsalted butter over medium heat. Add the chopped celery, carrot, diced potato, and chopped yellow onion to the pan. Sauté until the vegetables have softened, about 8-10 minutes. Stir in the dried thyme, dried rosemary, and salt, ensuring the vegetables are evenly coated with the herbs and seasoning.
- Add Flour for Thickening: Sprinkle the 1/2 cup of flour over the sautéed vegetables and stir continuously for 2-3 minutes to cook out the raw flour taste. This step will create a roux that thickens the filling.
- Incorporate Chicken Stock: Gradually pour in the 3 cups of chicken stock while stirring constantly to avoid lumps. Bring the mixture to a simmer and allow it to thicken, stirring occasionally, which should take about 5-7 minutes.
- Add Peas and Chicken: Stir in the frozen peas and diced cooked chicken. Cook for another 3-4 minutes until the peas are heated through and the chicken is well combined in the filling. Remove from heat and allow the filling to cool while you prepare the crust.
- Make the Crust: In a large mixing bowl, combine the all-purpose flour and cubed unsalted butter. Use a pastry cutter or your fingers to cut the butter into the flour until the mixture resembles coarse crumbs. Slowly add cold ice water, a few tablespoons at a time, mixing gently until the dough just comes together. Be careful not to overwork the dough to keep it flaky. Divide the dough in half, wrap in plastic wrap, and chill for at least 30 minutes.
- Assemble the Pot Pies: Preheat your oven to 375°F (190°C). On a floured surface, roll out one portion of the dough to about 1/8-inch thickness. Using a large round cutter or bowl, cut out circles large enough to hold the filling and fold over to create individual pot pies. Spoon the cooled filling into each circle, leaving enough edge for sealing.
- Seal and Brush: Fold the dough over the filling to form a half-moon shape or small parcel. Crimp the edges firmly with a fork or your fingers to seal completely to avoid leaks. Brush the tops of each pot pie with the beaten egg wash to give a shiny, golden finish.
- Bake: Place the prepared pot pies on a baking sheet lined with parchment paper. Bake in the preheated oven for about 35-40 minutes or until the crust is golden brown and crisp.
- Cool and Serve: Remove the pot pies from the oven and let them cool slightly on a wire rack for about 5-10 minutes before serving. This allows the filling to set and prevents burns when eating.
Notes
- This recipe is dedicated to the crust lovers of the world—enjoy your flaky, buttery homemade crust!
- Use cold water and cold butter when making the crust to ensure maximum flakiness.
- Leftover filling can be refrigerated for up to 2 days or frozen for longer storage.
- For extra crisp crust, you can chill assembled pot pies before baking.
- Feel free to customize the vegetables based on your preference or seasonal availability.
Nutrition
- Serving Size: 1 handheld pot pie
- Calories: 460
- Sugar: 4g
- Sodium: 600mg
- Fat: 26g
- Saturated Fat: 15g
- Unsaturated Fat: 9g
- Trans Fat: 0.3g
- Carbohydrates: 40g
- Fiber: 4g
- Protein: 24g
- Cholesterol: 85mg


