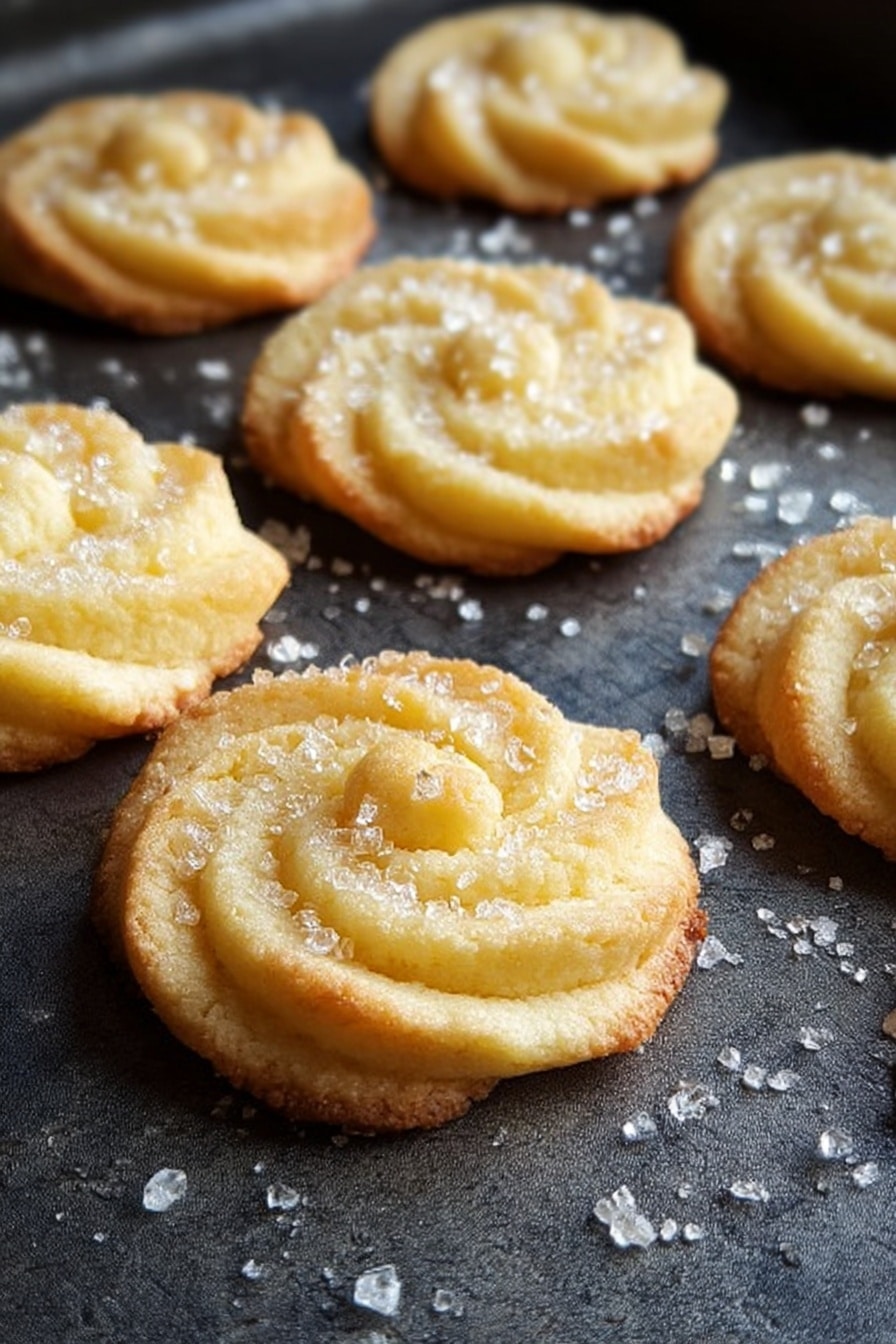
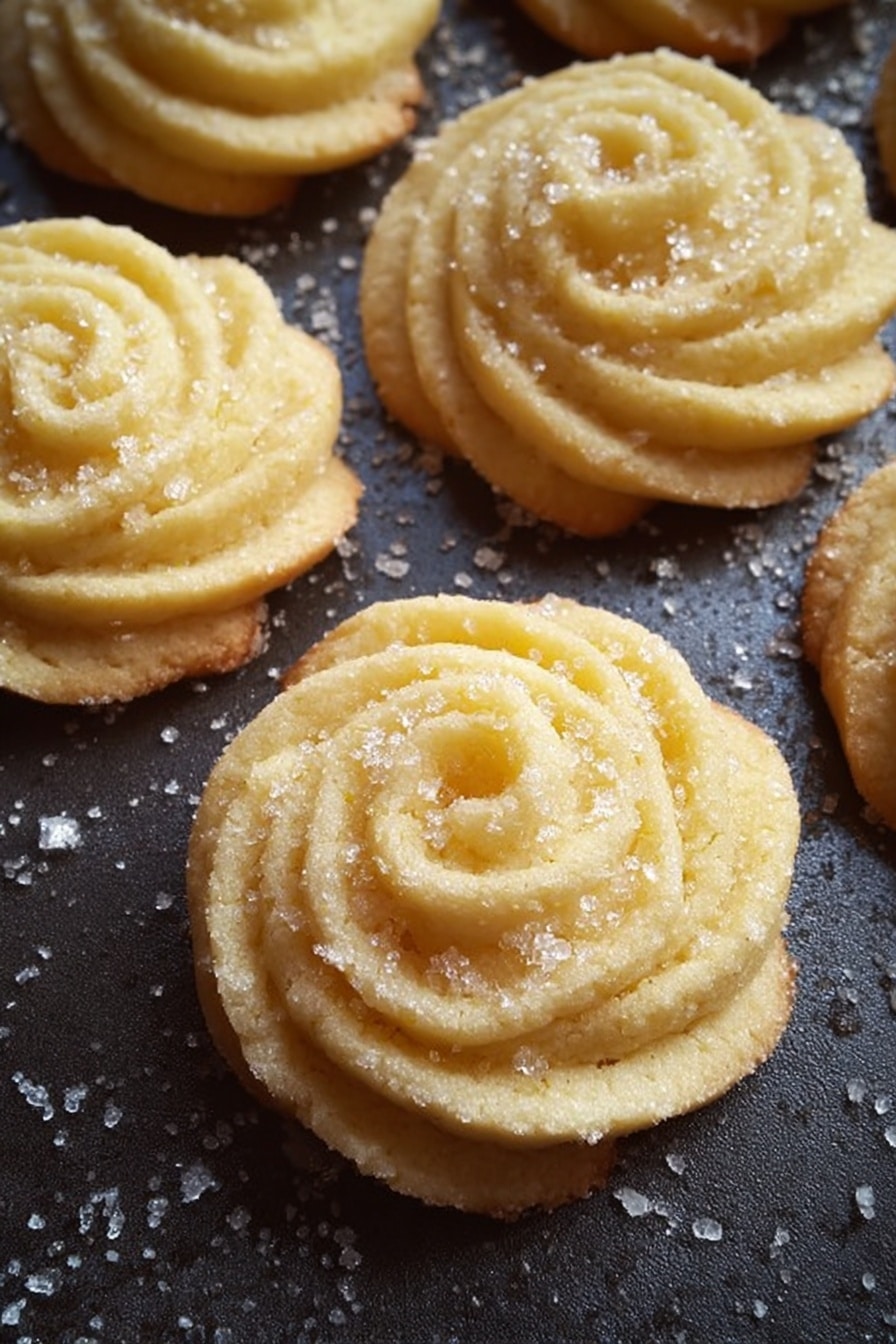
If you’ve ever wanted to master a truly timeless treat, you’re going to love this Danish Butter Cookies Recipe. These cookies have that perfect delicate crunch and melt-in-your-mouth texture that makes you want to keep reaching for just one more. I absolutely love how simple the ingredient list is—only four basics—but the result tastes like you spent hours perfecting it. Stick with me here, because I’m sharing all my best tips so you can nail this classic treat on your very first bake.
Why You’ll Love This Recipe
- Minimal Ingredients: Just butter, powdered sugar, vanilla, and flour – super easy and fuss-free.
- Perfect Texture: Light, crisp, and delicate – classic Danish cookie magic every single time.
- Great for Gifting: These cookies store well and look so charming when piped into pretty shapes.
- Beginner Friendly: You don’t need fancy equipment or baking skills – I’ll guide you step-by-step.

Ingredients You’ll Need
The magic of this Danish Butter Cookies Recipe comes from the simplicity and quality of the ingredients coming together. Using room-temperature butter really helps with getting that fluffy texture when creaming. And I like cake flour for an extra soft bite, but all-purpose works just fine if you can’t find it.

- Butter: Unsalted, and softened to room temperature for easy creaming and ultimate richness.
- Powdered sugar: Gives a smooth texture and sweeter profile compared to granulated sugar.
- Vanilla extract: Adds warm, aromatic flavor – I always go for pure vanilla for best results.
- Cake flour or all-purpose flour: Cake flour makes cookies tender, but all-purpose is a great substitute.
Variations
One of the best things about this Danish Butter Cookies Recipe is how you can make it your own. I’ve played around with different little tweaks and it’s fun to see how they change the flavor or texture while still keeping the cookie’s classic charm.
- Lemon Zest: I once added a teaspoon of fresh lemon zest into the dough – the zest brightened the cookies and gave a fresh twist that my family loved.
- Chocolate Dip: For something extra special, try dipping half the cooled cookie in melted dark chocolate – adds richness without overpowering the buttery flavor.
- Nutty Crunch: Stir in finely chopped toasted almonds or pecans before piping to add a delicate crunch that’s so delightful.
How to Make Danish Butter Cookies Recipe
Step 1: Soften the Butter
First thing’s first: get your butter out of the fridge at least an hour before starting. It should feel soft to the touch but definitely not melted. This is key because softened butter creams beautifully with the sugar, creating the light and fluffy texture that makes these cookies so tender.
Step 2: Cream Butter, Sugar & Vanilla
Using a stand mixer or handheld mixer, beat the softened butter with powdered sugar and vanilla extract for 5 to 8 minutes. This step is where the magic starts—you’ll see the color lighten as air is incorporated, making the dough fluffy. Don’t rush it; patience here really pays off with a better cookie texture.
Step 3: Fold In the Flour
Sift the flour in small batches (about 1/3 cup at a time) and gently fold it into the creamed butter mixture with a spatula. Be gentle—you want to keep as much air as possible for those light, melt-in-your-mouth bites. Keep folding until all the flour is fully incorporated and the dough looks smooth.
Step 4: Prepare Dough for Piping
Transfer your dough onto a sheet of plastic wrap and roll it into a log shape. Then poke a hole at one end and slip it into a piping bag fitted with a large star nozzle (like a 1M tip). This step makes the whole thing feel like a little baking adventure because your cookies will come out looking so pretty and classic.
Step 5: Pipe & Chill the Cookies
Pipe your dough onto a baking sheet lined with parchment or a silicone mat. If the dough feels too stiff to pipe smoothly, don’t hesitate to add a tablespoon of warm milk to soften it—that little trick saved me more than once when the dough was stubborn. Once piped, pop the tray in the fridge for 30 minutes. This chilling step is essential because it stops the cookies from spreading too much and helps maintain their beautiful shape when baking.
Step 6: Bake the Cookies to Golden Perfection
Preheat your oven to 300°F (150°C) and bake the cookies for about 15 minutes, or until you see the edges just begin to turn a beautiful golden color. Keep an eye on them—oven temperatures vary, and you want crisp edges without anything burning. Once baked, let the cookies cool on the sheet for 10 minutes before moving them to an airtight container.
Pro Tips for Making Danish Butter Cookies Recipe
- Use Room Temperature Butter: I learned the hard way that cold butter just won’t cream properly—it leads to dense cookies, so be patient and let it soften fully.
- Don’t Overmix Flour: Folding flour gently keeps cookies tender; overworking it can activate gluten and make them tougher.
- Chill After Piping: This step is a game-changer! It keeps the cookie shapes gorgeous and the edges crisp without unwanted spreading.
- Watch Baking Time Closely: I keep an eye for that golden edge color rather than relying just on time—oven temps vary, so visual cues are key.
How to Serve Danish Butter Cookies Recipe
Garnishes
I usually keep these classic, but sometimes I sprinkle a little granulated sugar on top right before baking for extra sparkle and crunch. For holiday occasions, I love dipping half the cookie in melted dark chocolate and then sprinkling crushed nuts on top—it’s an easy way to add elegance without fuss.
Side Dishes
These cookies pair beautifully with a cup of hot tea, coffee, or even a glass of cold milk. I often serve them alongside a simple fruit salad or a bowl of fresh berries to balance the richness with some brightness.
Creative Ways to Present
For gifts or special parties, I place these cookies in colorful tins or clear cellophane bags tied with ribbon. You can also stack them between parchment paper in a decorative jar to create a charming homemade gift. I’ve even used themed cookie cutters before piping to personalize for holidays — try hearts for Valentine’s Day or stars for Christmas gatherings!
Make Ahead and Storage
Storing Leftovers
I keep leftover Danish Butter Cookies in an airtight container at room temperature, usually layered between sheets of parchment paper to prevent sticking. They stay fresh and crisp for about a week, which is perfect because they rarely last longer in my house!
Freezing
If I want to prep ahead, I pipe and freeze the unbaked dough logs wrapped tightly in plastic wrap. When ready, I slice and bake them straight from frozen, adding a minute or two to baking time. The baked cookies freeze well too—just thaw at room temp and they retain their delicious texture.
Reheating
If your cookies have softened a bit, pop them in a warm oven (around 300°F or 150°C) for 3-4 minutes to restore that fresh-baked crisp. Just watch carefully so they don’t brown further. This little tip always revives the texture beautifully.
FAQs
-
Can I substitute all-purpose flour for cake flour in this Danish Butter Cookies Recipe?
Absolutely! While cake flour yields a softer, more delicate cookie, all-purpose flour works perfectly well—just expect a slightly firmer texture. To mimic cake flour, you can replace 2 tablespoons of all-purpose flour per cup with cornstarch.
-
Why do I need to chill the cookies before baking?
Chilling the piped cookies firms up the dough, preventing them from spreading too much while baking. This ensures your beautifully piped shapes hold, giving you those classic crisp edges and pretty designs.
-
My dough feels too stiff to pipe—what can I do?
If your dough is stiff, try adding a tablespoon of warm milk to soften it. This simple trick makes piping smoother and easier without affecting the cookie’s texture once baked.
- How long do Danish butter cookies stay fresh?
-
Can I make these cookies ahead of time?
Yes! You can prepare the dough, pipe the cookies, and freeze them before baking. Then just slice and bake them fresh when you want. Baked cookies also freeze well for later enjoyment.
Stored properly in an airtight container, these cookies usually stay fresh and delicious for up to a week at room temperature.
Final Thoughts
This Danish Butter Cookies Recipe has become one of my favorite go-to classics because it’s so straightforward yet absolutely delicious—perfect for sharing or gifting. Every time I bake these, I’m reminded how simple ingredients and a bit of care result in something magical. I encourage you to give it a try and watch those golden beauties disappear faster than you can say “butter cookie.” You’re going to have so much fun making these, and trust me, your family and friends will go crazy for them.
Print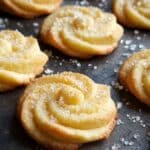
Danish Butter Cookies Recipe
- Prep Time: 15 minutes
- Cook Time: 15 minutes
- Total Time: 60 minutes
- Yield: 14 cookies
- Category: Dessert
- Method: Baking
- Cuisine: Danish
Description
Classic Danish Butter Cookies that are light, crisp, and delicate with a melt-in-your-mouth texture. Made with just 4 simple ingredients and an easy creaming method, these cookies are perfect for any occasion and deliver a buttery, sweet flavor with a beautifully piped shape.
Ingredients
Main Ingredients
- ½ cup butter (at room temperature)
- ½ cup powdered sugar
- 1 teaspoon vanilla extract
- 1 cup cake flour OR all-purpose flour (divided)
Instructions
- Prepare butter: Take the butter out of the refrigerator at least one hour before baking. It should be soft to the touch, but not melted, to ensure proper creaming.
- Cream butter and sugar: Using a handheld or stand mixer, cream the butter, powdered sugar, and vanilla extract together for 5 to 8 minutes until the mixture is light in color and fluffy in texture, indicating it is aerated well for a tender cookie.
- Add flour: Sift the flour in small portions (approximately 1/3 cup or 40g at a time) and gently fold it into the creamed butter mixture using a spatula. Continue folding gradually until all the flour is incorporated and forms a consistent dough.
- Shape dough for piping: Transfer the dough onto a sheet of plastic wrap and roll it into a log. Cut a small hole at one end of the plastic wrap and insert it into a piping bag fitted with a flower-tipped nozzle to facilitate piping the dough into decorative shapes.
- Pipe cookies: Pipe the dough onto a baking sheet lined with a silicone mat or parchment/baking paper using a 1M open star piping tip. If the dough feels too stiff or hard to pipe, add a tablespoon of warm milk to soften it for easier piping.
- Chill cookies: Place the baking sheet with piped cookies in the refrigerator for 30 minutes to firm up the dough, which helps prevent spreading during baking and maintains the delicate piped shapes.
- Optionally add sugar: Before baking, optionally sprinkle granulated sugar on the cookies to add a touch of sparkle and extra sweetness.
- Bake: Preheat the oven to 300°F (150°C, 148°C fan). Bake the cookies for about 15 minutes, or until their edges begin to turn a light golden color, indicating they are perfectly baked and crisp.
- Cool and store: Remove the baking sheet from the oven and allow the cookies to cool on it for 10 minutes. Once cooled, serve immediately or store the cookies in an airtight container to preserve freshness.
Notes
- These cookies are light, crisp, and delicate, offering a melt-in-your-mouth experience with just four basic ingredients.
- Use cake flour for a more tender texture, but all-purpose flour works well too.
- Letting the butter soften properly is crucial for achieving the right creamed texture.
- The chilling step is important to keep the piped shapes intact during baking.
- Adding a tablespoon of warm milk can make the dough easier to pipe if it feels too stiff.
Nutrition
- Serving Size: 1 cookie
- Calories: 47 kcal
- Sugar: 3 g
- Sodium: 9 mg
- Fat: 1 g
- Saturated Fat: 1 g
- Unsaturated Fat: 0 g
- Trans Fat: 0 g
- Carbohydrates: 9 g
- Fiber: 0 g
- Protein: 0.5 g
- Cholesterol: 1 mg


