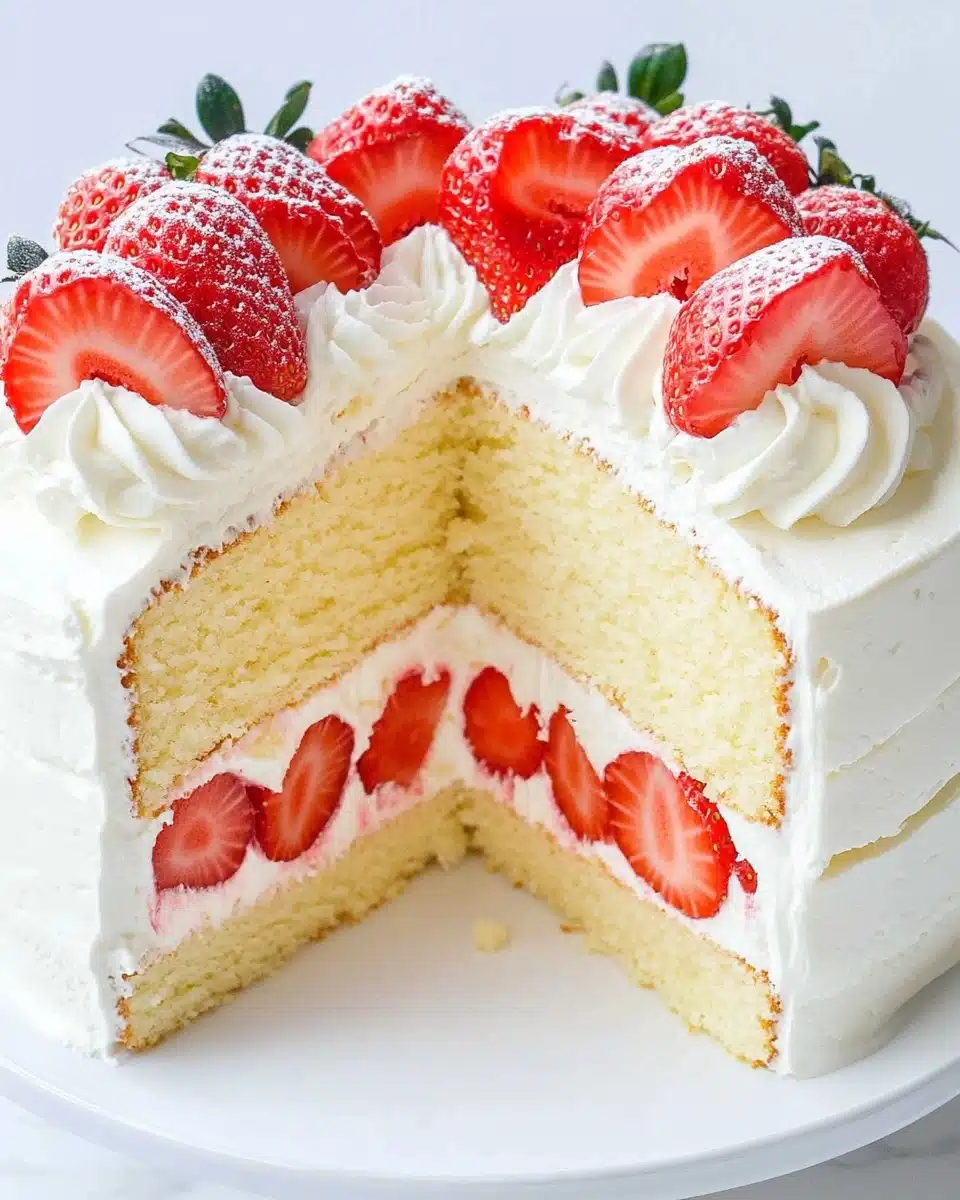
If you love strawberries and clouds of delicate whipped cream, Japanese Strawberry Shortcake is the dreamy dessert you’ll want in your spring and summer lineup. With a soft, fluffy sponge cake, lightly sweetened cream, and juicy strawberries layered throughout, each slice is a celebration—cheerful, elegant, and downright irresistible.
Why You’ll Love This Recipe
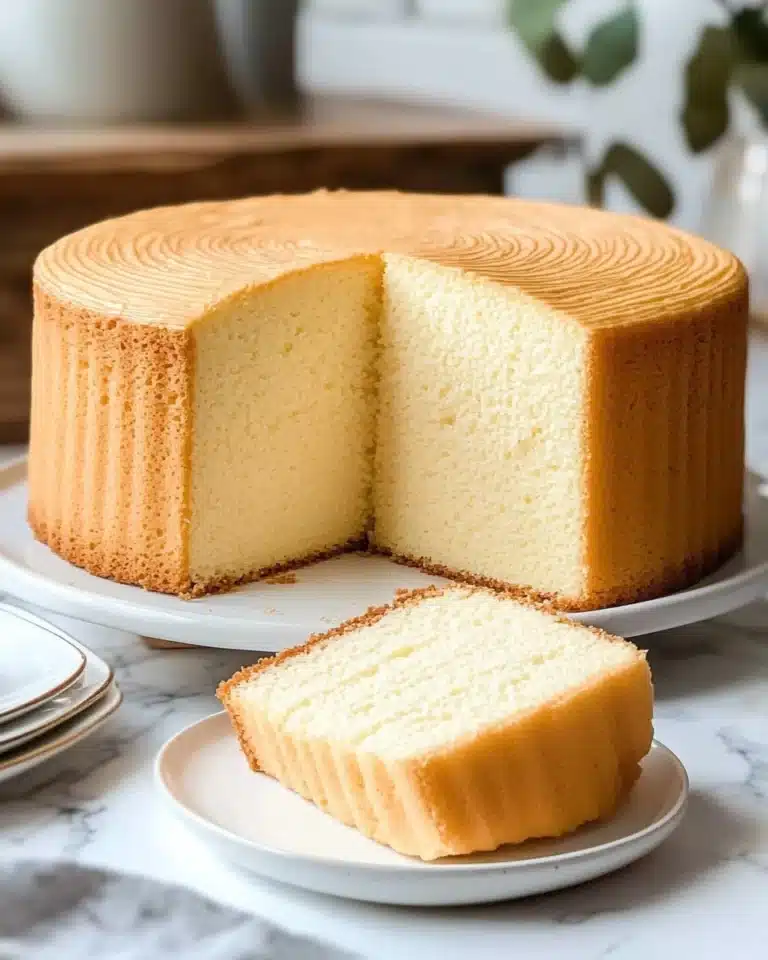
- Unmatched Fluffiness: The Japanese-style sponge cake is lighter than air, making every bite melt in your mouth.
- Fresh, Juicy Strawberries: Each slice bursts with real strawberry flavor—no artificial taste, just pure berry goodness.
- Not-Too-Sweet Cream: The whipped cream is barely sweetened, letting the strawberries and cake truly shine together.
- Stunning Yet Simple: With just a handful of pantry staples and a few steps, you get an elegant cake worthy of any celebration.
Ingredients You’ll Need
Japanese Strawberry Shortcake shines when you use fresh, high-quality ingredients—each one plays a unique role, from building the cloud-like sponge to creating that signature whipped cream frosting. Here’s what you’ll need, plus a few tips for best results!
- Strawberries (8 oz, washed and dried): Sweet, juicy strawberries are the star—seek out ripe, fragrant berries for the best flavor and color.
- Cake flour (½ cup, sifted): Cake flour gives the sponge cake its tender, delicate crumb—don’t substitute with all-purpose for this classic texture.
- Granulated sugar (¼ cup for yolks, 2½ Tbsp for whites, plus 3 Tbsp for syrup): The divided sugar is key for both the cake’s structure and its subtle sweetness.
- Baking powder (¼ teaspoon): Just a hint gives the sponge a gentle lift without making it dense.
- Salt (⅛ teaspoon): Enhances all the flavors—don’t skip it!
- Large eggs (3, whites and yolks separated): Eggs are essential for the fluffy crumb and the meringue’s structure—use at room temperature for best results.
- Avocado oil (2½ Tbsp): A neutral oil keeps the cake extra tender—feel free to swap for another neutral vegetable oil.
- Water (1 Tbsp): Helps the batter come together and keeps the crumb moist.
- Corn syrup (1 tsp): Adds just a touch of extra softness—honey can be used instead if needed.
- Vanilla bean paste or extract (¼ tsp): Adds a gentle vanilla aroma that compliments the strawberries beautifully.
- Heavy whipping cream (2 cups, cold): The base for your dreamy whipped cream; always use very cold cream for the fluffiest results.
- Powdered sugar (6 to 8 Tbsp, or to taste): Sweetens and stabilizes your frosting—add more or less to suit your taste.
- Hot water (⅓ cup, for cake syrup): Dissolves sugar and keeps the cake layers moist between whipped cream and berries.
Variations
This beloved cake is a blank canvas for creativity! If you’re looking to jazz up your Japanese Strawberry Shortcake or have specific dietary needs, try one of these delicious twists—customization is a breeze.
- Berry Medley Shortcake: Swap in raspberries, blueberries, or sliced peaches for a colorful, tangy variation.
- Dairy-Free Option: Use chilled coconut cream and your favorite non-dairy whipped topping for a plant-based take that’s still lusciously creamy.
- Matcha Twist: Add ½ teaspoon matcha powder to the sponge batter to create a subtle green hue and a gentle earthy flavor.
- Chocolate Lover’s: Mix a tablespoon of cocoa powder into the cake flour and decorate with chocolate shavings along with the strawberries for a decadent vibe.
How to Make Japanese Strawberry Shortcake
Step 1: Whip the Egg Yolks
Begin by making the yolk mixture: Add the egg yolks, ¼ cup sugar, salt, corn syrup, vanilla, and water to your mixing bowl. Using a mixer, beat on high until the mixture is thick, pale, and forms lovely ribbons when you lift the whisk. This airy base is what gives the sponge its featherlight charm—don’t skimp on this step!
Step 2: Make the Meringue
In a fresh, clean bowl, whip your egg whites on high until just foamy, then gradually add in the remaining sugar in thirds. Continue whipping until glossy, firm peaks form—the meringue should hold its shape, with just the tip curling over softly. This is the secret to that delightful Japanese Strawberry Shortcake rise!
Step 3: Combine and Fold
Gently fold half of your meringue into the yolk mixture, being careful not to deflate all that precious air. Sift in the cake flour and baking powder in three parts, folding lightly after each addition until almost incorporated. Mix two tablespoons of this batter with your oil until smooth (this keeps the oil from sinking), then fold it back in along with the remaining meringue. The batter should look ethereally light!
Step 4: Bake the Sponge
Pour the batter into a parchment-lined cake pan—one 8-inch or two 6-inch pans work perfectly. Give the pan a couple of gentle taps to pop any big air bubbles. Bake at 350°F until golden and a toothpick comes out clean—about 15 minutes for two small pans or up to 25 minutes for a single larger one. Let the cake cool completely before slicing.
Step 5: Make the Whipped Cream
Beat the cold heavy cream and powdered sugar together until you reach soft-medium peaks. The cream should hold its shape but still look silky and smooth—stop before it turns grainy, so it spreads beautifully and stays light.
Step 6: Assemble and Decorate
Slice the cooled sponge into even layers using a serrated knife (a cake slicer or toothpicks will help as a guide!). Stir together sugar and hot water to make a cake syrup, then use a pastry brush to moisten each cake layer. Spread a cushion of cream over the cake, top with sliced strawberries, and repeat as needed. Finish by frosting the entire cake with whipped cream and decorating with whole strawberries. Dust with extra powdered sugar for a fairytale finish!
Pro Tips for Making Japanese Strawberry Shortcake
- Sponge Success: Avoid nonstick pans for the sponge—uncoated pans help the cake “climb” and achieve maximum fluffiness.
- Whipped Cream Wisdom: For silky, stable cream, chill your bowl and beaters before whipping—warm tools can sabotage stiff peaks!
- Even Layer Magic: Use toothpicks or a serrated knife to guide your cake slicing—a gentle hand keeps each layer perfect for stacking.
- Sweet Strawberry Selection: Choose strawberries that are red from end to end for the most vivid and flavorful cake layers.
How to Serve Japanese Strawberry Shortcake
Garnishes
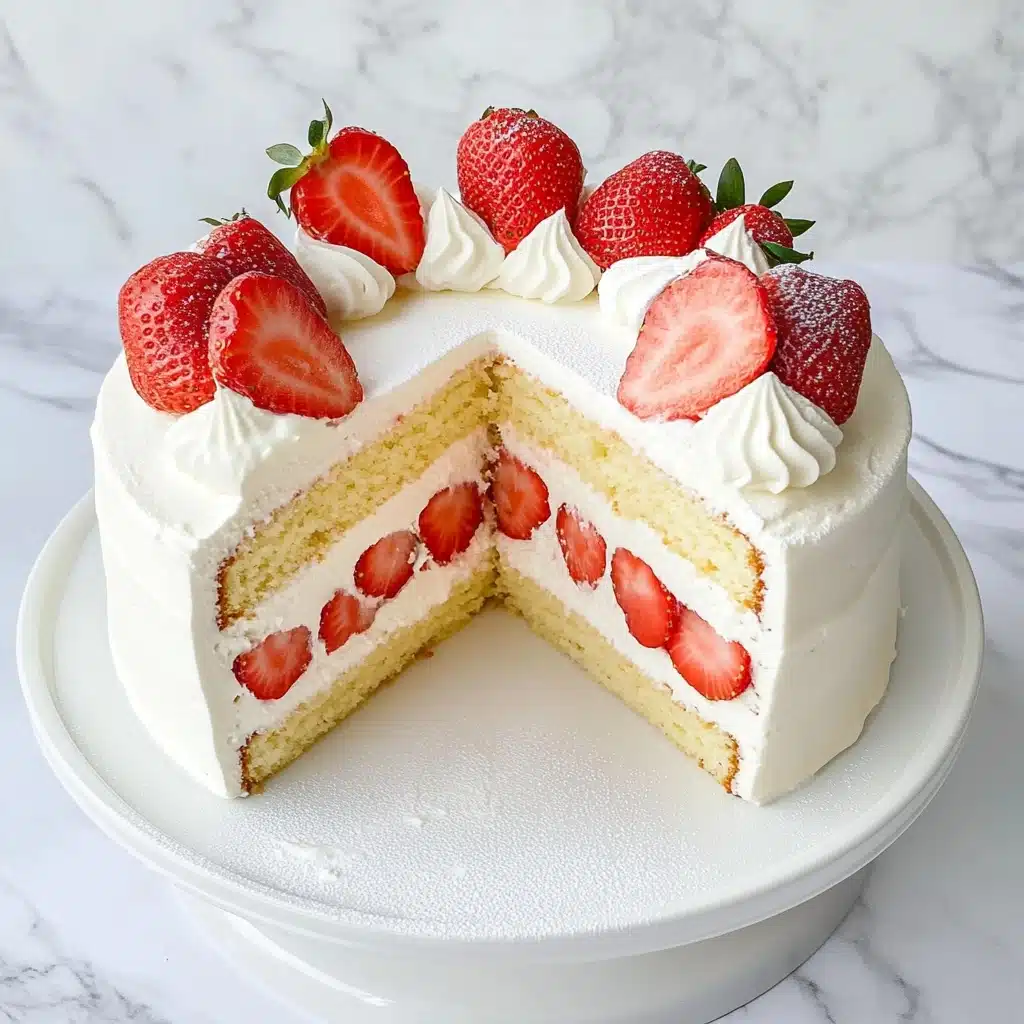
No Japanese Strawberry Shortcake is complete without a lavish crown of whole strawberries—it’s both beautiful and a promise of what’s inside! A shower of powdered sugar brings a snowy, elegant touch, while a few sprigs of fresh mint or delicate edible flowers add color and flair.
Side Dishes
This cake is the star of the show, but if you’re looking for a pairing, think light—serve with a pot of fine Japanese green tea, a refreshing fruit salad, or a flute of sparkling wine at brunch. Each brings out the strawberry’s natural sweetness and the airy cake.
Creative Ways to Present
Try building individual mini shortcakes in clear glasses for a party, or slice the cake into elegant squares and serve on a platter for a chic dessert buffet. For holidays, decorate the top with strawberry hearts or a playful pattern for a stunning centerpiece that turns heads.
Make Ahead and Storage
Storing Leftovers
Wrap leftover slices tightly in plastic wrap or store in an airtight container in the fridge. Japanese Strawberry Shortcake is best enjoyed within 1–2 days—after that, the whipped cream and berries will start to lose their fresh texture.
Freezing
It’s best to freeze just the sponge cake (before layering with cream and fruit). Once baked and cooled, wrap it well and freeze for up to one month. Defrost at room temperature, then assemble your shortcake fresh for that classic lightness.
Reheating
No need to reheat—this cake is all about enjoying it chilled for maximum freshness! If you’ve stored the sponge separately, simply bring it to room temperature before frosting and serving.
FAQs
-
Can I use regular flour instead of cake flour?
For the signature light and tender crumb of Japanese Strawberry Shortcake, cake flour is highly recommended. If you must substitute, use all-purpose flour minus 1 tablespoon per ½ cup, and sift in 1 tablespoon cornstarch, but the result won’t be quite as airy.
-
How do I keep whipped cream from turning grainy?
Always whip very cold cream and stop as soon as you hit medium peaks—the cream should look smooth and hold its shape, but not become stiff or cracked. Over-whipping is the main culprit for grainy cream!
-
Can I make Japanese Strawberry Shortcake in advance?
You can bake the sponge cake 1–2 days ahead and store it, unfrosted, tightly wrapped at room temperature. Assemble with whipped cream and strawberries the same day for the freshest, most delicate result.
-
What’s the secret to perfectly sliced layers?
A sharp, serrated knife (not a wire cutter) is key, and using toothpicks to mark the cutting line helps guide your knife for even slices. Go slow and steady—the sponge is delicate!
Final Thoughts
If you’ve been searching for a showstopper dessert that brings pure joy from the very first bite, Japanese Strawberry Shortcake is it. This treat feels like a celebration—so tender, so fresh, and bursting with real strawberry flavor. I hope you fall in love with each airy forkful and make it a delicious tradition in your own kitchen!
Print
Japanese Strawberry Shortcake Recipe
- Prep Time: 35 minutes
- Cook Time: 20 minutes
- Total Time: 55 minutes
- Yield: 6 servings
- Category: Dessert
- Method: Baking
- Cuisine: Japanese
- Diet: Vegetarian
Description
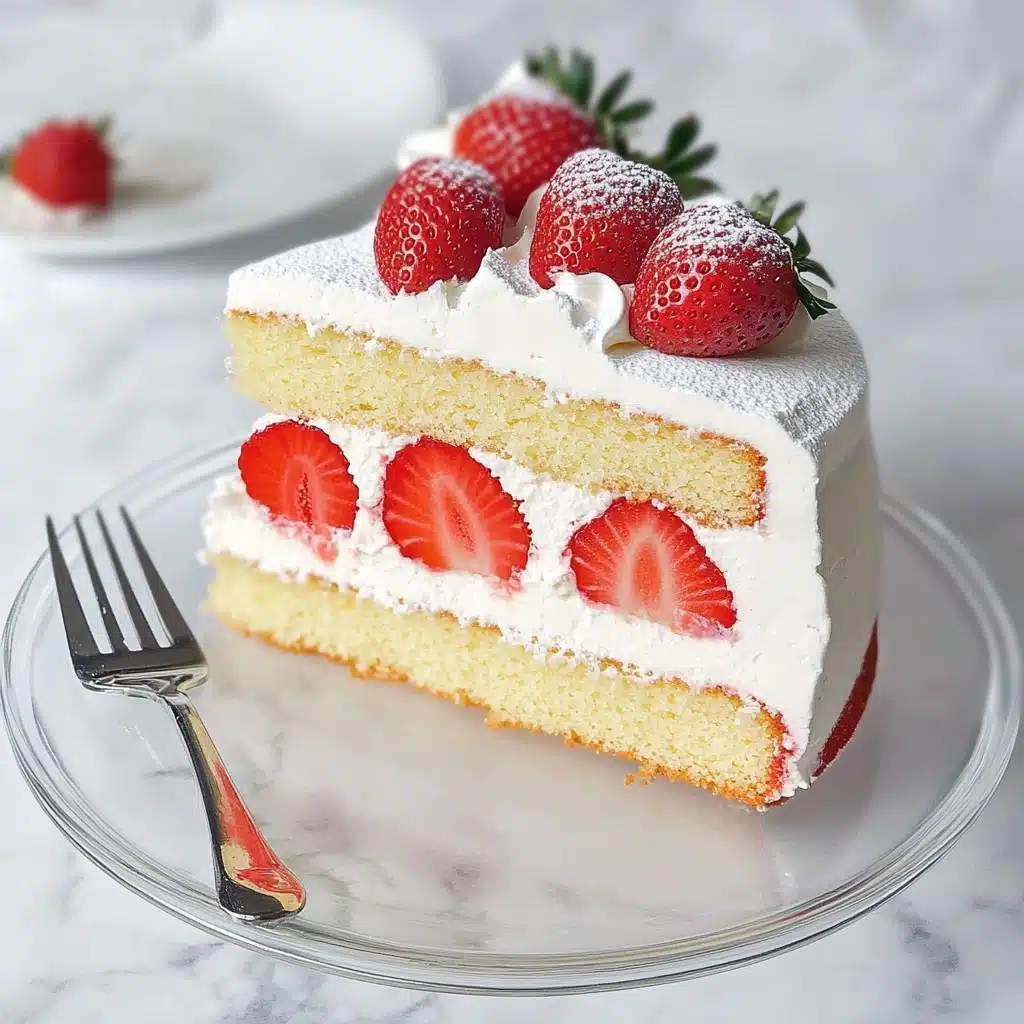
Indulge in the light, airy, and delightful flavors of Japanese Strawberry Shortcake. This classic dessert features layers of fluffy sponge cake, fresh strawberries, and luscious whipped cream, creating a perfect balance of sweetness and freshness.
Ingredients
Dry Ingredients:
- 1/2 cup cake flour (65g) sifted
- 1/4 cup white sugar (44g) for egg yolks
- 2 1/2 Tablespoons white sugar (37g) for egg whites
- 1/4 teaspoon baking powder
- 1/8 teaspoon salt (1/2 g)
Wet Ingredients:
- 3 large eggs whites and yolks separated
- 2 1/2 Tablespoons avocado oil (31g) substitute with neutral vegetable oil
- 1 Tablespoon water (12g)
- 1 teaspoon corn syrup (6g) substitute with honey
- 1/4 teaspoon vanilla bean paste or vanilla extract
Whipped cream frosting:
- 2 cups heavy whipping cream – should be cold
- 6 to 8 Tablespoons powdered sugar – add more or less depending on taste
Cake syrup:
- 3 Tablespoons sugar
- 1/3 cup hot water
Instructions
- Egg Yolk Mixture: Preheat oven to 350 degrees F. In a medium bowl, add together egg yolks, ¼ cup of sugar, salt, corn syrup, vanilla, and water. Beat on high with a stand mixer or hand mixer until fluffy and pale yellow with ribbons form when lifting the whisk. Set aside.
- Egg White Meringue: In a large bowl, add the egg whites and beat on high until it starts to get foamy. Start adding the 2½ tablespoons of sugar in three equal parts, beating each time to incorporate. Beat the egg whites on high until firm peaks form. When lifting the whisk from the bowl, the meringue should hold its shape while the tip drops slightly.
- Batter: Add ½ of the egg white meringue to the egg yolk mixture and gently fold it in until it’s mostly mixed in. This should be light and airy. Next, sift the flour and baking powder into the yolk and meringue mixture in three equal parts, gently folding after each time. Take out 2 Tablespoons of the combined batter from the previous step and mix this with the oil until it’s not longer separated. Gently fold the oil mixture into the batter. Next, add the remaining half of the egg white meringue by gently folding it in.
- Bake: Pour the batter into a round cake pan lined with parchment paper. You can use one 8 inch pan or two 6 inch pans. Bang the pan twice on a flat surface to remove large air bubbles. Bake at 350 degrees F until golden brown and a toothpick inserted in the center comes out clean. About 15 minutes for two 6 inch pans or 23 to 25 minutes for one 8 inch pan. Remove the cake from the pan and remove the parchment paper. Let it cool on a cooling rack.
- Slice and Decorate: Add the cold heavy cream and powdered sugar into a large mixing bowl and beat it on medium speed until you get medium peaks. Watch it carefully and stop the mixer before it becomes grainy. See Note 2. Slice the cake into even layers. See Note 3 for how to slice even layers. Make the sugar syrup by dissolving the sugar in the hot water. Then, brush on even amounts of the sugar syrup onto all the layers, including the top layer. Cut half of the strawberries into thick slices for the inner layer. Leave the other half whole to decorate the top of the cake. Apply a layer of cream to the cake sheet and then top it with sliced strawberries. Add another layer of cream on top of the strawberries and followed by another layer of cake. Repeat as necessary. Next, frost the top and sides of the cake with whipped cream and decorate as desired. Place whole strawberries on top of the cake, sprinkled with powdered sugar. Serve immediately.
Notes
- You can use one 8 inch cake pan or two 6 inch cake pans. Avoid using nonstick pans as the coating prevents the sponge cake from fully rising.
- Medium peaks – the whipped cream should be soft but hold its shape when the whisk is lifted from the bowl. The top of the peak should fall over but the body will retain its shape. The texture should be smooth with no graininess. Whipping too much will result in a grainy, lumpy texture and you may start to see cracks in the cream which indicate separation.
- Slice even layers: First, you want to use a sharp, serrated knife. Next, I prefer to use this cake slicer attachment that works well. Otherwise, you can use toothpicks to mark where you want to cut the layers. Pierce the toothpicks all around the cake and use that as a guide for your knife. Avoid using wire cutter cake levelers as the sponge cake too soft for that tool.
Nutrition
- Serving Size: 1 slice
- Calories: 290
- Sugar: 20g
- Sodium: 70mg
- Fat: 18g
- Saturated Fat: 10g
- Unsaturated Fat: 6g
- Trans Fat: 0g
- Carbohydrates: 28g
- Fiber: 1g
- Protein: 4g
- Cholesterol: 95mg


